Sunday, November 4, 2012

Wood Laser Frames

This is the third laser frame project and ideal for Designer Crafts Connection, First Monday post.  Our theme for November is "Thank You Gifts", and this is a gift for a friend. 

 
You will need:
Laser Frame (from Michaels - seasonal section)
DecoArt® Americana® Acrylic paint:
   Santa Red and Dazzling Metallics® Emperor’s Gold
Recollections® Tinsel Glitter – Cherry
Artist’s Loft™ 5” x 7” Canvas Panel
Elmer’s® Tacky Glue
8 ½” x 11 Piece of Parchment paper
Chipboard Letters – M & C
¼” Flat Paint brush
Small Sea Sponge
Sponge Brush

1. Use the sea sponge to dab red paint over the front of the frame.
2. Working in sections, cover the front of the frame with an even coat of glue.  While the glue is still wet, sprinkle liberally with glitter.  Gently press glitter into the glue with wax paper.  Shake off excess.
3. Using a writing program with your computer, print “erry hristmas” onto parchment type paper as shown.
4. Trim paper to 5 ½” x 7 ½”.  Glue to canvas art board for extra stability, then glue behind the opening in the frame. 
5.  Paint the chipboard letters gold then adhere to the front as shown.  Enjoy!

I have a new project coming up on Saturday and a giveaway.  Designer Crafts Connection members will be participating in a Smoothfoam™  blog hop.  Each member will feature a project using this great product, and.... they'll be just in time for the holidays!  You won't want to miss this one, so y'all come back now....

Yours truly,
Julie :)


Friday, November 2, 2012

Wood Laser Frames for Winter

Without further ado, here are the instructions for the Pine Cone laser frame:


You will need:

5"x7" Wood Laser Frame - available at Michaels Arts & Crafts stores
DecoArt® Americana® Acrylic paint:
    Bittersweet (Brown) and Snow (Titanium) White
DecoArt® Americana® Weathered Wood™ Crackling Medium
Decorative Twigs
Potpourri Mix (for Small Pine Cones, etc)
Glue Gun
Small Sea Sponge
Sponge Brush

1.  Paint the front of the frame brown.  Let dry then re-paint with an even coat of crackling medium.  Let dry thoroughly. 
2.  Using the sea sponge, dab white paint on top of the crackling medium.  Use a hair dryer or heat embossing tool to expedite the drying process.  As the white paint dries the crackle medium will crack to reveal the brown paint underneath.
3.  Use a glue gun to adhere twigs, pine cones and other embellishments to the center of the frame at the top.
4.  Place the frame on the wall around a small grapevine wreath, photo, etc. for a unique holiday decoration. 

This is the third frame in the Christmas series. 

      
I'll post the instructions for this next week, so  y'all come back now........

Yours truly,
Julie :)

Thursday, October 25, 2012

Christmas Laser Frames

Still 7 weeks + to Christmas, but it's never too early to start working on Christmas decorations and projects.  As you know, I'm in love with the wood laser frames at Michaels and now they have 3, yes 3 new ones especially for the holidays.  So here's one of the new projects I just posted on Pinterest.  I'll post the others in a few days.  Let me know if you have any questions.


You will need:
Laser Frame
DecoArt® Americana® Acrylic paint:
    Bittersweet and Hauser Med. Green
Creatology™ Adhesive Foam Sheet - 5 ½” x 7 ½”
Black Cardstock
Paper Raffia (or strips of brown plastic from a grocery bag)
Elmer's Tacky glue
Small Sea Sponge, or round sponge pouncer used for stencilling
Sponge Brush
12” Twig
Brown Paper Lunch bag

1. Thin the brown paint with a little water then use to “stain” the front of the frame.
2. Tear the bottom off the lunch bag then tear down the seam to create a flat piece of paper. Tightly crumple the paper to create lots of creases then pull apart and flatten slightly.
3. Dampen the sea sponge slightly then dip into green paint.  Lightly whisk the sponge across the top of the creased paper, so the ridges pick up the paint color.  Let dry.
4. With the painted side up, lightly press the painted paper onto the adhesive side of the foam sheet.  Trim the edges of the paper even with the foam then glue behind the opening in the frame.
5. Use a die cutting machine to cut a seasonal image or trace an the outline onto black cardstock then cut out.  Glue to the center of the frame.  You can also use a wooden shape painted black. 
6. Hang the frame from the twig with raffia as shown.

Enjoy!  Y'all come back for instructions for this frame:

Yours truly,
Julie :)

Monday, October 22, 2012

Halloween Crafts

The weather is very "fallish" this week and windy, so the grandkids and I thought it would be fun to have some ghosts flying from the trees for Halloween.


Not a reason to make a long trek to the store though, so we gathered up some supplies from around the house:  Coat hanger, 4" Smoothfoam™ Ball, Tall Kitchen Bag, black permanent marker (I use Painter™ markers), string to hang, plus scissors and pliers. (I used my hubby's, but you can borrow from anyone if you need to.)


 Step 1 :  Straighten out the coat hanger hook.

 Step 2 :  Lay the trash bag flat.  Then cut slits about 2" wide from the bottom upwards.  Stop 15" from the top!  Place the coat hanger inside the top opening.


 Step 3 :  Gather the trash bag ties around the neck of the coat hanger.  You can leave them like this, or carefully stuff the ends to the inside.


 Step 4 :  Cut ONE LAYER of each strip about 4"-6" from the top.  Alternate cutting from the front and the back of the loop.  Think about this before cutting!  You don't want to cut them off, but by cutting one layer you'll make them longer.


 Step 5 :  Push the straightened out hook from the coat hanger into the base of the ball.  You'll know where this is because there's a little hole to guide you.


 Step 6 :  Push the ball all the way down then use the pliers to fold over the end of the wire.  Squeeze tightly together so when you loop string thru the hook, it won't come off.


 Step 7  :  Now you have to add some eyes and a mouth with the black marker, or paint.  Nice thing about Smoothfoam™ is, that it is - SMOOTH - so you don't have to prep the surface, or anything.  The kids liked doing this the best.  We have some pretty scary looking ghosts!

Now wasn't that easy!  In no time at all you'll have ghosts dancing in the wind all around the house.  Woo Hoo!


Happy Haunting!  Hope y'all make it back now!

Yours truly,
Julie :)

Wednesday, October 3, 2012

Wood Laser Frames

Love, love, love these laser frames!  Saw them at Michaels earlier this year in the seasonal wood section.  Not just for my home, I thought they'd look great on the set of Scrapbook Soup!  Of course when I went back to get more, they were gone!  So I donated mine to the studio for the set.  What can I say, they look fabulous.  I also used one of them for a project I designed for Elmer's to feature on the show.  Take a peak!  The new series of Scrapbook Soup is now airing online, so you'll be able to find all the instructions on our website.


Here I am with my co-host Julie Fei Fan Balzer and guest, Melissa Frances.   You can see the frames on the wall behind us.  I used the frames to feature photos of guests from the previous series.  I strung jute from side to side then clipped photos to the jute with small, wood clothespins.


As I said, when I went back to the store a few days later, the frames had sold out, so you can imagine how excited I was when last week I saw they were back in the store!  They are now in the wood department on a year round basis.

There are so many things you can do with the frames.  Just add paint!  You can use a spray paint, or the round, sponge pouncers available with the stencils work great!  I framed a silhouette and a pre-painted wood letter (also from Michaels) for my daughter's entryway and a wood Gecko for my grandson's room.  There are just so many possibilities, it's positively mind boggling!


 You only have to "google"  Wood Laser Frames for a ton of ideas!  Enjoy!  Y'all come back now.......

Yours truly,
Julie :)


Sunday, September 30, 2012

Celebrate Fall and Halloween!

If it weren't for the last minute, nothing would ever get done!  This project took exactly 5 mins - quick'n EZ just like I like them.  Let's face it, time to be creative is at a premium these days.  Not only can you make these mini lanterns in the blink of an eye,  you probably have all the supplies on hand:  decorative napkins, empty plastic water bottles, a piece of tape and a pair of scissors.


1.  Cut the top from a small plastic bottle about 6" from the bottom.

2.  Separate the printed layer from the paper napkin.  Trim to the height of the bottle.  Wrap around the bottle, overlapping ends about 1/2".  Trim away excess, then seal with a piece of tape.  NOTE:  You can use ModPodge to glue the paper to the bottle, but if you tape the paper in place you can re-use the bottles with other decorative napkins throughout the year.

3.  Place an LED flickering candle inside the bottle. 

That's it!  I have a ton of empty bottles, so I can place these on windowsills, the fireplace mantle and along the sidewalk.  You can also punch a hole on opposite sides at the top, then add a cord or wire hanger and hang from a tree.  It's a great way to re-cycle!  

Check out more fun ideas by hopping forward via the Designer Crafts Connection logo in my sidebar on the left.  Enjoy!  Y'all come back now!

Yours truly,
Julie :)


Family Matters!

I've only posted twice this month - my bad, but I've been away.  They say a picture is worth a thousand words, so here's the reason - I'm now Nana to 3 :)


My new grandson, just 5 days old.  This photo was taken by Meredith Hunt.  Please like her FB page; you can find it here:  https://www.facebook.com/MeredithHuntPhotography?ref=ts&fref=ts

Designer Crafts Connection will be posting Fall/Halloween projects tomorrow, First Monday in October, so don't forget to check back.  There's also a Makins Clay challenge and giveaway on the 13th!  October is shaping up to be pretty spooktacular!  Y'all come back now.....

Yours truly,
Julie :)

Saturday, September 8, 2012

Scrapbook Memories Now Online!

Show 1610 is now airing at www.scrapbooksouptv.com.  I love this particular show because it was all about flowers.  Flowers and shells are my two favorite things.  I used to collect wild flowers, press them between the pages of the telephone book then feature them in a wildflower journal.  Wish I still had it - it was quite a collection.  Now I take photographs instead - that way I don't end up in jail...LOL - since it's illegal to pick wild flowers in many parts of the world.

Like the shells I collect, I kept the pressed daisies and buttercups picked from lawn in the front of the house and put them to good use.  In the late 90's I used them on a scrapbook page I created while hosting "More than Memories".  I think I was considered somewhat of a rebel, after all they weren't exactly "acid free".  I really didn't care - I liked my page and the flowers were the perfect accent!  Soon after that a company started selling pressed flower stickers......   acid free, of course, since that was a really big deal in the 90's and up to 5 or 6 years ago.


Beth and I opened the show by showing lots of flowers:  shapes, punches, etc then Julianna Hudgins showed us how to create flower accents for her project using a digital die cutting machine and software.


Love those machines!  I've had a Wishblade for 6 or 7 years now.  I loved that it worked with my Mac and I could cut out anything that I drew.  Delicious!  As usual, I digress.   

Our next segment was shot on location in Orlando, Florida at the summer CHA Trade Show.   I was in the Flower Soft booth with Noreen McKie from "jolly ol England" as you can no doubt tell by her accent.  She's actually from my neck of the woods, but quite a bit further North.


Flower Soft "sprinkles" is such a great product, I hope you'll give it a try.  If you can't find it in your local craft store, try Paper Wishes.  A subsidiary, or partner company with Hot off the Press, you can find a lot of really cool supplies here for paper crafting.

Last, but definitely not least, Julie Fei Fan Balzer showed how to add a hint of glitter to paper with a Sakura glue pen.


Lots and lots of ideas over the years and all the instructions are on our website (most of them anyway).  I like to look at the projects from earlier shows.  It's interesting how much has changed over the years and how much hasn't.


Blogs and Pinterest have become a great resource for inspiration over the past couple of years.  I founded the Designer Crafts Connection a little over a year ago.  It's a group of bloggers who are either CHA designer members, or work for CHA manufacturer members.  We're linked together as a webring and the first Monday of each month we post a project based loosely on a theme.  We all create with different supplies, so it's interesting to see what everyone comes up with.  This month's theme is "Vintage Showcase".  Basically crafting with old stuff...  You can see my post below.  We're also hosting a blog hop this month and there's a giveaway.   Just look at all this great product you can win.

 
Look for the blue Designer Crafts Connection logo in my sidebar on the left, then click on "hop forward".  It will take you to Carol Heppner's blog where you'll be able to see what she made and how to enter to win these products.  There are 12 of our designers participating in this hop, so hop around via the logo and when you get back here, you'll know you've seen it all.

Please "like" us on FB (there's a button in my sidebar for that too) and you can see everyone's projects on our Pinterest board (the  P  button).   Good Luck with giveaway!  Y'all come back now.........

Yours truly,
Julie :)

Sunday, September 2, 2012

Vintage Crafts - Designer Crafts Connection - First Monday

You may remember that I love collecting shells.  I have boxes of them that I've dragged around with me for almost 50 years.  I'm not sure where this fascination came from, I just know that it is what it is.  I've talked about collecting shells quite a few times over the past year or so and each time I think I've mentioned Sailors' Valentines.  Here's a photo of one I created for my Aunt about 15 years ago.


This is a photo of my Uncle Derek taken in the late 1940's.  He has since passed away.  My Aunt is now in her 90's and this "Sailors' Valentine" stands on the shelf over her fireplace.  It's a very basic rendition, of course, but special because all the shells I used were found on the beach where my Aunt and Uncle used to go on holiday every year.  I used the base of an empty heart shaped box of candy then glued the shells in place around the photo.  Much the same as making a mosaic.  If you're wondering how this ties in with our "Vintage" theme, I've had the shells for a long, long time and crafting with shells is inherently vintage.

Samples of antique Sailors' Valentines can be found in maritime museums in coastal areas in the US and other parts of the world.  Easy to find, crafting with shells was a popular pastime for early 19th century sailors - can you believe they were "eco crafting" and upcycling 200 years ago!   To learn more, you only have to "google" Sailors Valentines.  Click on images for some great samples!  You can also read a little history here: http://www.sailorsvalentinestudio.com/history.asp   Enjoy!  Y'all come back now..... there's a special blog hop for our group, 8-18 Sep with a GIVEAWAY.  You can read more about it on Carol Heppner's blog when you hop forward....

Yours truly,
Julie :)

Friday, August 24, 2012

Living a Life of Ifs and Buts

Over 30 years ago I heard a Don Meredith quote, "if "ifs" and "buts" were candy and nuts, oh what a Christmas it would be".  Not sure why, but it has always stuck with me.  How many times, I wonder do we use those words "if" and "but"?  If we had a penny for each time we used one of them would we be millionaires?  I suppose it all depends on the number of excuses we can come up with for not doing something instead of jumping in to at least give it a try. 

Not sure where this post is coming from, other than the fact that I know there's something I should be doing, but I keep making excuses not to tackle it......  it's better to try something and fail, than to do nothing and succeed - at least that's what I keep telling myself.  It's not working.   I've had SO much going on these past couple of weeks, I've been meeting myself coming back and now I think my brain has frozen - I think I need to re-boot;  if only I could find the switch.......

Y'all come back now.......

Yours truly,
Julie :)

Thursday, August 9, 2012

Scrapbook Memories - Show 1605 Now Online!

It's hard to believe that we taped this series only 2 years ago in 2010.  Things have changed so much since then - aaah the memories of Scrapbook Memories.  Here's another look back.


We shared a lot of card projects on this show.  Cards are great way to use your leftover scraps of paper and embellishments and many of our viewers were enjoying card making as much as they were enjoying scrapbooking!


Beth and I had lots of different samples to share.  We had cards from Flower Soft, a British company and some really intricate rubber stamps from other European companies.  For those of you who have heard of Mabel Lucie Attwell, or are familiar with her sweet designs, check out the Flower Soft website for their new product line.


Julianna Hudgins joined us again for our first segment to show a variety of dry embossing techniques.  Don't forget, we may have used these techniques to make cards, but you can also use them to make embellishments for your scrapbook pages.


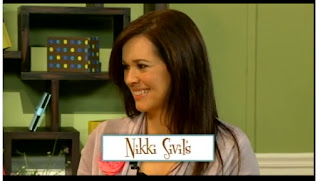
Nikki Sivils joined us next to show how she combines a selection of patterned papers on one scrapbook page.  Check out the flowers on the project shown below, then watch the show to see how she made them - www.scrapbookmemoriestv.com  


I visit Nikki's booth at the trade show each year and she always has the most amazing line of new papers and embellishments for all kinds of paper crafting ventures.

Julie Fei Fan Balzer was our final guest.  This week she showed water coloring techniques on a card then joined Beth and me at the end of the show to demonstrate how to make envelopes using the Crafters' Companion.  This was probably the most important product of all - you HAVE to have envelopes so you can mail all the cool cards you've been inspired to make! 


Thanks for joining us.  Enjoy the show and y'all come back now.................

Yours truly,
Julie

Sunday, August 5, 2012

Back to School Crafts!

"And mom and dad can hardly wait for school to start again".   Do you remember this line from an old, old song........ ?  After a 3 month vacation, the start of a new school year was always something both moms and kids looked forward to.  (Yes, I know it's from a Christmas song.....)

Even as a grandmother with the oldest going into 1st grade and his sister entering pre-K, I still look forward to the "Back to School" excitement.  I mean, OMG have you seen all those fabulous school supplies on sale!!!!  Composition books for less than a dollar - they make great journals - all you have to do is decorate the covers with leftover scraps.  Then there's pens and papers and all kinds of boxes and storage stuff.  The mind positively boggles with so many creative opportunities!

I re-cycle all kinds of empty containers and hate to admit it, but I have a "thing" for the bottoms of Velveeta cheese packages.  They're made of thick corrugated cardboard and are nice and sturdy for lots of stuff.  They fit in drawers for dividers for all kinds of sewing notions, pens and pencils and are sturdy enough to sit on a shelf to hold cards, or photos like this one.


It's on the shelf right above my computer and I use it for photos and cards "that I'm going to do something with one day".  I also have another box I use for project sheets and booklets that I pick up each time I visit the craft store.  I had thought of covering them both with scrapbook paper, duck tape, or something (in my copious free time), but.....  you know how that goes.  Well, last week I found these colorful crayons for .25 cents for a box of 24 with all the fabulous school supplies.  Not one to resist a bargain I picked up a few boxes and thought they'd look pretty cool glued onto the Velveeta boxes, empty cans, or shortened soda bottles. (Great little plant holder for a teacher gift BTW).  Anyway here's one I just finished.  You know how I LOVE Quick'n EZ - it took me all of 5 mins!


You could glue them on with a glue gun,  tacky glue,  double sided tape,  or whatever you might have on hand.  Either way, I think it looks kinda cool.

Crafting with School Supplies is the theme for Designer Craft Connection bloggers this month, so don't forget to hop forward and see what everyone else came up with.  Enjoy!  Y'all come back now....

Yours truly,
Julie :)