Showing posts with label CHA Designer Julie McGuffee; Scrapbook Soup; Scrapbook Memories. Show all posts

Sunday, August 31, 2014

DCC First Monday - Preserving Memories

Growing up in England I have some wonderful memories of holidays at the seaside.  Our favourite holiday destination was Bridlington, a small seaside town on the east coast of Yorkshire.  I remember days at the beach collecting shells, paddling in the waves, building sand castles, playing cricket on the sands. donkey rides and the one hour trips on either the Yorkshire Belle, Bridlington Queen or the Thornwick,  pleasure boats that made the trip from the harbour jetty in the centre of town to Flamborough Head and back.  Like many Brits, I loved the sea and still do......

Here's a quick look back at Julie at the seaside in the 50's and the 60's.


A few years ago, I had an opportunity to go back to Bridlington to visit a friend.  Like most places it had changed a lot, but the boats are still there making their trips to Flamborough Head and back and the sands are exactly the same as I remembered, including the donkeys!  I spent a lovely morning walking along the same old beach and couldn't resist picking up a couple of the white rocks, rounded by the waves that had washed up on the sands.  You can see Flamborough Head in the distance, so I'd like to believe they came from there.


My original idea was to paint our house number on one of the rocks and place it by the front door. Being an ever practical Yorkshire lass however, I started to wonder what I'd do if we moved......  Then it hit me - not the rock, but a really good idea...  I've been using Craft Attitude to feature a lot of my photos on all kinds of surfaces, so why not print one of the photos onto Craft Attitude film and glue it on the rock!  It now sits on a patio table outside my home in land locked Texas, a constant reminder of my childhood holidays at the seaside.  I even have a few shells so we can listen to the waves rushing to the shore....


There are lots of ways to preserve memories.  Hop thru DCC member posts by clicking the blue logo in my sidebar to see more ideas to inspire you.  Enjoy!  Y'all come back now........

Yours truly,
Julie :)

KEEP CALM AND CARRY ON CRAFTING!

Friday, October 18, 2013

Fall & Halloween Wreath

It's a little late to be posting Halloween projects, or maybe not...  Halloween is still two weeks away, but the cool thing about this wreath is that you can switch it to a Fall wreath in 5 minutes or less.  I love anything that I only have to make once then use it for something else with just a quick change.   This all came about because my daughter-in-law sent me a photo of a wreath she saw on somebody's door and asked if I could "make one like that".   It was already a bit late to find exactly the same supplies, but I grabbed the last roll of orange deco mesh at my local craft store and a Halloween garland, now on sale and here's what I came up with, plus the idea to change it to a Fall wreath on November 1st!  This is the wreath for the next 2 weeks


and this is the Fall wreath transformation!


This is what you do.  You'll need a wreath, a roll of 5" wide Deco Mesh and some floral pins to make the basic wreath. I used a straw wreath for this because it was cheaper.  KEEP THE PLASTIC ON!  For the Halloween wreath decorations, I used Smoothfoam™ letters "B, O, O", a 1" Smoothfoam ball,  a small piece of cheesecloth, 2 black sequins, 2 sequin pins (they are shorter than regular straight pins), 4 bamboo skewers, black paint and 2 plastic zip ties. 

1.  Pinch the end of the mesh together then secure to the wreath with a floral pin.

2.  Pinch the mesh about 6" from the end then secure to the wreath with a floral pin about 2"-3" from the first pin to create a loop.  Make loops all around the wreath.


3.  Secure the end of the black tinsel garland to the top of the wreath then wind it backwards and forwards around the mesh loops.


4.  Make the decorations.
 
    Ghost:  Stick the blunt end of a skewer into the base of the ball.  (There's a small indentation you can use as a guide.)  Attach the zip ties to the dowel as shown for arms then cover the head with the cheese cloth draping it over the arms as shown.  Push the "arms" upwards to the base of the head.


Tie the cheesecloth tightly around the skewer at the base of the head.  I used a piece of a black chenille stem I happened to have, but you can use anything.  Attach the sequins to the head with sequin pins for eyes.  You can also make black dots of paint (or marker) directly on the ball for eyes, before covering with the cheesecloth.


    Letters:  You can leave these white, or add small black dots using the rounded end of a paintbrush handle - perfect for dotting.  Black adhesive acrylic jewels would look great too!

    Bow:  This is a simple bow.  Cut about 24"of Deco Mesh.  Cross the ends over then pinch together at the center.  Attach to the wreath with a floral pin.  You can also use a zip tie to wrap around the center to secure.


5.  Cut 3 skewers to 5"-6" in length then push one into the bottom of each letter.  Attach the letters and ghost to the wreath.

When November 1st comes around, simply remove the bow, ghost and letters then replace the tinsel garland with a Fall garland.  You can use the same bow again, or add a burlap bow and a floral pick.  How cool is that!!!!!

Enjoy!  Y'all come back now...........

Yours truly,
 Julie :) 

KEEP CALM AND CARRY ON CRAFTING!

Monday, October 14, 2013

Scrapbook Soup - New Series 300!

OMG!  Have you seen it?  Scrapbook Soup, series 300 is now airing on local PBS stations across the US!  You are going to absolutely love the new format, projects and the exciting line up of guests who visited our studio.  Ali Edwards came to tape and share - need I say more........ 

Julie Fei Fan Balzer is also showing how to use the new digital die cutting machine with a built in scanner - Brother's Scan'n Cut.  This is definitely going to be everyone's new dream machine.  You'll have to see it to believe it!  Can you imagine being able to scan your Kindergartner's handwriting then cutting it out!! What a fun way to preserve a special part of childhood.  OMG, my head is spinning with ideas.

You'll also see interviews with business owners like Stacey Caron from Spellbinders.  What a success story she is.  In 10 years her vision has taken Spellbinders from an idea born in a tiny, dark and dusty warehouse to a multi million dollar company.  I've always loved their dies for cutting, embossing and, I use them for stencilling too.  The detail is absolutely amazing. 

If the show isn't airing in your area, you can watch online at www.scrapbooksouptv.com, but you'd better hurry!  The second show of the season is airing now!!!  Each show airs 24/7 for one week, from Friday noon, EST to the following Friday.  You can also see select segments on YouTube and you can purchase a set of show DVDs - the perfect addition to your Christmas wish list!! 

Enjoy, and y'all come back now!

Yours truly,
Julie :)

KEEP CALM AND CARRY ON CRAFTING!

Sunday, October 6, 2013

Halloween Crafts

It's Halloween and it's party time, so I thought I'd share a little rhyme
About ghoulies and ghosties, witches and bats,
Jack'O Lanterns, monsters and scary black cats.

Now on Halloween we go trick or treat, we think it's fun and we think it's neat,
To get lots of cookies and candy too,
That sticks to our teeth like Elmer's glue.

A jack O'Lantern is a scary sight, but he's just an old pumpkin with his insides alight
Sitting on the doorstep, grinning, all aglow
A home for a soul with nowhere to go.

So when you're out on the thirty first, with a bag full of goodies that is fixing to burst.
Look over your shoulder and all about
'Cos take it from me you'd better watch out!

My daughter had to perform a Halloween rap for her class in 1987, so I wrote this for her.  It was quite a bit longer back then, but don't want to bore you to death...... even if it is Halloween.... lol

I have to admit that I struggle with Halloween.  Growing up in England it wasn't something that was celebrated by anyone except satanists and witches covens. In many European countries, it was, and still is all about November 1st, All Saints Day.  I do however, realize the commercial value of celebrating this "holiday".  After all, Halloween craft supply sales are second only to Christmas. 

As I've said before, if it weren't for the last minute, nothing would get done, so here I am at the last minute designing something to share and of course it's EZPZ Quick'n EZ.


I basically painted an 8.5" x 11" sheet of Smoothfoam with yellow acrylic craft paint (no prep needed) then printed the artwork onto a piece of Craft Attitude printable film.  It's very easy, but make sure you read the directions included in the package.  The most important thing to remember is that you place the film printed side down, so you have to print a "mirror image" of any clip art you use - very important if you include words.  You can also print on self adhesive ink jet transparency, which doesn't have to be reversed, so, if you use my clip art, you'll have to print it on a "mirror image" setting.  Once the image is in place, I dinged up the upper edges of the foam with the handle of a sponge brush, then painted the edges with DecoArt® black Patio paint.  Patio paint leaves a really cool shiny finish.   I added a black glitter bow and ribbon tails, as shown and it now hangs in the hallway...... at my daughter's.   You can find detailed instructions and a list of supplies on the Smoothfoam® blog.  You can also download a FREE pdf of my design there if you don't have one of your own to use. 


Had to share these votives again.  Découpaging the printed layer of a napkin onto glass is a favorite technique of mine for all reasons and seasons.  You can find the instructions for these here:  http://juliemcguffee.blogspot.com/2011/10/halloween-votives.html

Happy Halloween everyone!  Y'all come back now..........

Yours truly,
Julie :)

KEEP CALM AND CARRY ON CRAFTING!

Friday, June 14, 2013

Glass Etching

How do you add a little class to your glass?  Etch it of course!  I decided to turn this vase (as in "bars") into a vase (as in "base") using etchall® etching creme from B&B Products.  Look how classy this looks and it was SO easy.


What a great gift for a friend, or to brighten up your own home.  This is how easy it is:

    1.  Wash the piece of glass then dry thoroughly.
    2.  Cover any area you do not want to etch.  I created diagonal stripes on this vase using regular scotch brand tape. 


    3.  Make sure the edges of the tape are pressed down firmly onto the glass surface.
    4.  Cover one side of the glass with the etching creme.  Use the black spatula/squeegee to spread the etching creme thickly over one side of the glass (and yes, it will drip over the edge onto the next side).  Remember that this is etching creme and it will ETCH any shiny surface, so protect any surface you are working on.


    5.  After 15-20 mins, use the spatula to spread the creme over onto the next side.  Repeat for each side.   (This is a square vase so I did one side at a time.)  When you are finished, scrape the creme back into the bottle!!

ETCHALL® ETCHING CREME 
(AND DIP) IS RE-USABLE!!!!

Please note:  I used etching creme for this project, but it would have been much easier (and faster) to use etchall® Dip'n etch.

    6.  After all the creme has been scraped back into the bottle, rinse away the residue under running water then remove the tape.  Dry thoroughly then admire your glass with class.

There is so much to tell you about etchall® it would take me all night, so hop thru each of the DCC member blogs by clicking on the blue logo found in each blog sidebar to see how other designers used the product.  You can also find a wealth of information at www.etchall.com including "how to" videos and lots of inspiration.

As a decorative painter, I first used etchall® to etch glass plates! I loved painting on glass (it required no prep) and an etched piece of glass had "tooth" so the paint would stick.  Here are a couple of pieces that were featured in my book, Garden of Glassware published by Leisure Arts.


You can also personalize glass by etching.  On these two projects for example, I cut my own custom stencils using etchall Etchmask for the name "jennifer" and the title "Snow" using a digital die cutting machine and used them to etch this small glass bezel and a plain glass frame.  These samples are, of course, just scratching the surface (or should I say etching)..... imagine the possibilities!  Are YOU itching to etch yet? 


The "Snow" frame was featured on Scrapbook Memories, series 1300, so you can find the instructions @ http://www.scrapbooksouptv.com/projects/1300/1310/1310-5.htm

I know you're dying to start hopping, so hop to it and enjoy!  Y'all come back now.....

Yours truly,
Julie :)


KEEP CALM AND CARRY ON CRAFTING!
 

Sunday, June 2, 2013

Happiness is.......

Happiness is....  now that's a leading question..... but it's also the theme for this month's Designer Crafts Connection First Monday post.  Basically it's to make us think about what we do, creatively, that makes us happy.

Well I love pretty much everything.  Decorative painting is probably #1 on my list, but I also like to sew, knit, crochet and papercraft.......  I've always loved making things and I had hobbies that I loved too.  I used to collect wild flowers and bird watch, but photography was, and still is my favourite.  There's something magical about being able to take a photo of a specific moment in time, then being able to go back years later and relive that moment.  I love looking back thru all the photographs I've taken over the years.   Believe me, there's a ton of them.

I received my first camera when I was 11 years old.  It was a Brownie reflex 620.  As a teen I bought myself a 35mm, Olympus Pen EE half frame camera; half frame because that meant I could get twice as many photos/slides from one roll of film.  The Yorkshire in me loved that.  I also used a Polaroid camera occasionally, but quickly found the color didn't last too long.  It was fun to have instant photos to share though.  I still have my old cameras - they must be antiques by this time.

In the late 70's I graduated to a 35mm Konika, then in the mid 90's a Canon Rebel.  Still love that camera.  The first digital camera I owned was an Epson, followed by a Fuji Fine Pix,  a pocket Canon and now I have a Canon Rebel T1i, or something like that...... 

If you follow the Scrapbook Memories/Scrapbook Soup TV series, you'll know that I love my digital camera.  The advantages are that I can take an unlimited number of photos, but the disadvantages are that I can take an unlimited number of photos.  Since I can edit just about anything in Photoshop,  I have a real problem hitting the "delete" button. 

Way too many of my photos are now on my computer, but I do love to be creative with some of them.  I took this photo of a Cardinal a couple of years ago and loved the color and contrast.


I thought it would look great printed on canvas and decided to use it in project I designed for Elmer's on a recent episode of Scrapbook Soup.  This is how it turned out.  You can see the TV segment here: http://youtu.be/vOKv38W36e8
  

Photos printed onto ink jet printable canvas are perfect for all kinds of wall art.  This was a photo of the ocean which I cropped to size then added words in different layers.  I also changed the color of the type and made some layers more transparent.  


Printing on ink jet transparency is another favourite of mine.  I've used photos to make transparent overlays and cropped a wide range of flower photos to make greeting cards.   There are so many surfaces to print on now, which makes being creative with your photos so much fun, especially if you're familiar with photo editing software.  Imagine being able to change your photos to black & white, or sepia then print them out onto wood paper, or fabric so you can put photos on a T-Shirt, or quilt.  A few years ago I made my daughter a maternity T-Shirt.  The slogan on the shirt read "Body by Baby" and it circled around a photo of her sonogram.  It was featured on Scrapbook Memories about 5 years ago, so you can find the instructions here: http://www.scrapbookmemoriestv.com/projects/1300/1307/1307-5.htm

I derive a lot of happiness from the photos I've taken over the last 50+ years, especially now that I can be so creative with them.  Try some of these tips for yourself and enjoy!  Y'all come back now.....

Yours truly,
Julie :)

KEEP CALM AND CARRY ON CRAFTING!

Sunday, May 5, 2013

Designer Crafts Connection - Dreams and Wishes

The DCC theme for May is Dreams and Wishes.  There's a little rhyme that keeps popping in my head:  "I wish I may, I wish I might, wish upon a star tonight".  Did I get that right..  It's always fun to make a wish, even if you know it might never come true.

It's my birthday today, so we had a traditional birthday cake (Bavarian Forest) with its traditional candle - the number "8" because it looks like the sign for infinity (but mainly because hubby forgot to get some new ones).  Each year when I blow out the candle I always wish to be around for my next birthday.  I've been pretty lucky so far, but I know that one of these years my luck will run out - hopefully not any time soon.

A couple of years ago my granddaughter "wished" to go to Disney World to see her favourite princesses and Tinkerbell.  Who could resist that, so off we went.  I took tons of photos of course and created this plaque for her room.  Some time later, I had an opportunity to create some projects for Michaels.com and this is one that is currently being featured.  Everything I used was purchased at my local store and you can find the instructions here: http://www.michaels.com/Wish-Upon-A-Star/29074,default,pd.html?cgid=projects-generalcrafts-woodcrafting&start=20
 

It was really quite simple.  I covered the inside of the plaque with scrapbook paper, painted the edge and a small wood star yellow and the letters white then added glitter before gluing them in place.  

The plaque now hangs in her room, witness to the fact the wishes do sometimes come true.  May all your wishes come true too.  Use the "hop forward" on the DCC logo in my sidebar to see what other designers came up with.  Enjoy! Y'all come back now.........

Yours truly,
Julie :)

KEEP CALM AND CARRY ON CRAFTING!

Monday, April 15, 2013

Hello Kitty!

Hello Kitty - again!  I remember my daughter loved Hello Kitty, when she was little.  There was even a store at the mall totally devoted to this little kitten, then she disappeared......  (the cartoon kitty, not my daughter.... lol)

Well, guess what - she's back in all her former glory and also a little more grown up.  I found some new styles to use for scrapbooking and paper crafting at Michaels a couple of weeks ago and here's the double page layout I made from the Travel Collection:


With a great selection of coordinating patterned papers and embellishments, you can create pages, cards, gift bags and tags, picks, memo clips, magnets and a whole lot more!  You can find everything you need at your local Michaels store and instructions at Michaels.com  http://www.michaels.com/Hello-Kitty-Scrapbook-Layout/33267,default,pd.html?cgid=projects-scrapbooking-pagelayouts-girls&start=1

Enjoy!  Y'all come back now.............

Yours truly,
Julie :)

KEEP CALM AND CARRY ON CRAFTING!

Sunday, April 7, 2013

Slider Bracelets

One of the fun things about being a CHA (Craft & Hobby Assoc.) designer is that you receive new product to review.  An innocuous looking parcel will suddenly appear in your mail box, or on your doorstep and opening it up is like opening a surprise gift.

This month DCC (Designer Craft Connection) bloggers and many other designer bloggers are having an opportunity to play with the new "slider" bracelets and more from Cousin's.  Just look at the goodies that were in my box!  Don't they make you want to play!


Since I've hosted a scrapbook TV show for 14 years, viewers don't think of me as a "jewelry" designer, but I'm here to tell you that I love all kinds of crafts including jewelry making and a whole bunch more!  And honestly, you don't have to be a "jewelry designer" to create with these.  In no time at all I had made 2 leather slider bracelets and a silver one!  All I had to do was slide the charms onto the bands, then attach the closure pieces to each end.  EZPZ Quick'n EZ.  How cool is that!


You can find supplies to make your custom bracelets at your local JoAnn's stores throughout the US and there's an instructional video on YouTube  @http://www.cousin.com/slide-bracelet.   You can also find a lot more information and project links on Facebook @ https://www.facebook.com/CousinCorp/app_137541772984354  

Before you hop over there, don't forget to hop thru the DCC blogs using the blue logo in each designer's sidebar to see the projects we've created.  You can also find them on our Pinterest board.

Enjoy!  Y'all come back now.................

Yours truly,
Julie

KEEP CALM AND CARRY ON CRAFTING! 

Sunday, March 31, 2013

Smoothfoam Crafts

This month's theme for Designer Crafts Connection is "Handmade Flowers",  plus a challenge to create with things from around the house.  My first thought went to a craft I used to enjoy in the '70s - no that's not a typo, I've been crafting a long time.......  supplies are white bread, white glue and glycerin.  Nice right - you don't even have to go to the craft store!  Okay, here's the rub - it's Easter weekend and I have family visiting from out of town.  I know exactly where my flower samples are, but I need another day or two to find them... oops.  So, I will post photos of samples and my recipe from 1978 in another couple of days.......   In the meantime, I want to share some Smoothfoam projects with you.  Smoothfoam is an amazingly versatile product as witnessed the variety of projects shown below. 


Can you believe all the things you can create with it!  A new project was featured each day on the  Smoothfoam blog during March, which was National Craft month.  There's also a fabulous giveaway worth over $100 if you want to hop on over there. 

Y'all come back and I'll share some flowers I made with bread and glue!  Enjoy!

Yours truly,
Julie :)

KEEP CALM AND CARRY ON CRAFTING!

Friday, March 8, 2013

Buttons Galore!

Button, button who's got the button?  AnswerButtons Galore and More!  Buttons go waaaaay back in history and have been traditionally used to hold parts of clothing together, but, creativity knows no bounds so with all the amazing button designs at our disposal, buttons have become a staple craft product.  With so many colors and shapes to choose from, there's something for everyone, in fact I'll go as far as to say, a button is one of the most versatile embellishments for all your projects, whatever they may be.


As I said in my previous post, March is a very busy month, but the best part is that the first day of Spring always falls in March - the time to think about planting Spring flowers which make everything cheery and bright after a dreary Winter.

This is a very simple idea for an outdoor decoration. It could be used for a rehearsal dinner, a wedding, shower, or a simple table decoration for your patio.   After having decorated for 2 weddings, it's all about simple, believe me.  This table decoration can be made in 5-10 minutes.  All you need are the following supplies, plus scissors and a craft knife:


A small plastic bottle (from the recycling bin), burlap, glue (I used these 3D Glue dots, but a glue gun would work well too), and buttons.  I used a "Bee" button and an orange stitched button.  (The lime green stitched button would have looked really good too.)

Let's get started:

1.  Lay the empty bottle down on a flat surface and carefully cut off the top part with a craft knife, so that the bottle is the same height as the width of the burlap.
2.  Cut a piece of burlap long enough to wrap around the bottle overlapping the ends about 1/2". Glue in place.
3.  Cut a 4" piece of burlap, pinch together at the center then secure with a twist tie for a "bow".  Fray the ends by removing 3-4 strands from each end.
4.  Fray the top of the burlap around the bottle by pulling strands from the edge.  Thread one of these strands up thru a hole from the bottom of a large button, thru the shank of the bee button then down thru a second hole in the large button.  Tie the ends together at the back to secure.
5.  Glue the burlap "bow" to the front of the bottle, then glue the buttons to the center of the bow.  You're done! EZPZ Quick'nEZ.
  
TIP: Take the top part of the bottle (which you cut off), turn it upside down and insert it inside the top of your "vase".  This will act like a "frog" and help hold the flowers in place.  You might also want to fill the bottom with small pebbles to weight it down in case it's a bit windy - after all, it is March!

Here's a quick bonus project:


Everyone seems to be handing out rubber bangles.  They come in all different colors and you can buy them at the party stores and lots of other places too, I'm sure.  My granddaughter loved this one because it was pink.  To jazz it up a bit I stacked some silk flower shapes together with a button on top to make it more secure then sewed them onto the bangle.  It took all of one and half minutes - her smile was priceless!   I even added a self adhesive pearl to the center of the button.  You can also place the decorated band around the metal ring on a mason jar for a quick decoration, then remove it afterwards so the jar is re-usable.....  gotta think ahead!


Using the blue, DCC logo in the sidebar you can hop forward thru Designer Crafts Connection blogs for more ideas.  You can also visit the Buttons Galore blog for more designer ideas and details of the PRIZES to be won!  Enjoy!  Y'all come back now........

Yours truly,
Julie :)

KEEP CALM AND CARRY ON CRAFTING!

Sunday, March 3, 2013

Fabscraps

It's been 4 weeks since my last post - what can I say..... February was SO busy, I barely had time to go grocery shopping!  March is turning out to be almost as busy......  It's National Craft Month, St. Patrick's day is on the 17th, March 21st is the first day of Spring and it's Easter Sunday on the 31st!  It's also that horrible month when we turn the clocks forward and lose an hour!  On the "Good News" front, DCC has a fabulous giveaway (details below) and a challenge hop showcasing product from Buttons Galore which starts on March 9th...

Many of our DCC bloggers are also members of the Smoothfoam Creativity team and their projects are being featured every day during the month of March on the Smoothfoam blog!  There's a giveaway there too - $100 worth of Smoothfoam product - so be sure to check it out.

Now, here are the details on the DCC giveaway:  You may remember that at the end of the last show on Scrapbook Soup series 100, I showed a fabulous "purse" album from Fabscraps.  You can view the video here: http://youtu.be/-OZjx6Yhmg0   


Our viewers just loved it, so we've put together a very special giveaway - ALL the product you will need to make this adorable album, including the flowers.


One lucky winner will receive everything pictured above:  album, papers, paper roses pad, tags and even adhesive.  To enter to win, hop through the DCC blogs and leave a comment on the blogs featuring your favorite technique, or a technique you can't wait to try, then let me know which ones they are by commenting here on my blog.  I'll be picking a winner at the end of March, so don't forget to check back.  Good Luck! 

Yours truly,
Julie :)

KEEP CALM AND CARRY ON CRAFTING!


Monday, February 4, 2013

For the Love of Crafts

It's First Monday for Designer Crafts Connection bloggers and our theme this month is "Love is Handmade".  Instead of a project, I thought I'd share a little about me and my love of crafts.

Decorative painting, sewing, card making, knitting, cake decorating, gardening, scrapbooking and jewelry making. These are just a few of the many creative things people do; not to be creative necessarily, but simply for the pure enjoyment of the process and the great feeling of accomplishment when, whatever you have made, is finished.

I have always loved making things. My father taught me to draw and paint and my mum taught me how to sew, tat (with a shuttle), smock, bake and decorate cakes. I learned to knit and crochet from my grandmothers and the importance of fallen leaves and manure for the roses my grandfather lovingly tended in his garden.  One of my earliest crafting memories is sitting at a card table with my mum in front of a roaring fire making Christmas cards with old brown stencils and only 3 colors of paint. I also remember helping my parents make the most beautiful crêpe paper flowers, but most of all I remember the FUN we used to have together.

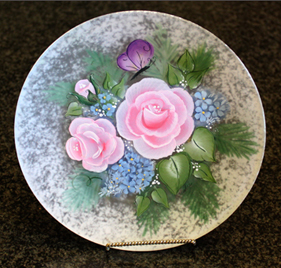
The best thing about crafting is that there are no rules. There are tools to master and techniques to learn, to be sure, but creativity is a very personal thing and there is always something very special about anything that someone has made themselves – it’s all about the main ingredient – the LOVE that went into it.  If you’re already a mother, or grandmother, you’ll know how special it is when you’re presented with something your children have lovingly created, just for you, no matter what it may be.  My daughter made this dish from clay when she was about 8 yrs old.  For the past 30 years it has had a special place on either my kitchen desk or the windowsill, where I can see it every day.  The most special thing about the dish, other than the fact that she made it, is the way she created the roses.  We had watched a TV program a few weeks earlier about the artists who made exquisite china flowers for Royal Dalton.  Later we made some bread dough and tried the techniques ourselves.  Jennie had obviously remembered these techniques when she fashioned the clay roses that decorate the top of the dish.

Mum passed away a few years ago so my sister and I went home to England to take care of the house, etc.  Mum treasured everything, but we were still surprised to find a virtual treasure trove of the gifts we had made for her over the years.  I keep everything my children and grand children have made me too......   the love and thoughtfulness that comes with each and every piece is PRICELESS.  Take time to be creative with family and friends; you'll be glad you did. Y'all come back now!

Yours truly,
Julie  :)

KEEP CALM AND CARRY ON CRAFTING!

Sunday, January 27, 2013

Dallas Market 2013

Seriously, can life get any busier - rhetorical question, of course......    Last Monday I made my bi-annual trip to the Dallas Gift market.  It's good to see what will be coming to the gift stores in a few months and to check to see if there's anything new.  Soft vintage, naturals, retro and collegiate were pretty much everywhere and traditional Christmas colors of red, green, white and silver & gold still prevail.  I may be wrong, but it seems like there's a yearning for the "good old days" when life wasn't quite so complicated and definitely less stressful.

Here are photos of displays in some of the larger, popular showrooms, so grab a cuppa tea, put your feet up, sit back and enjoy!


Not sure what's going on with blogger, but the rest of my photos are vertical and they keep loading sideways...  I'll try loading again, so y'all come back now!

Yours truly,
Julie :)

KEEP CALM AND CARRY ON CRAFTING!