Tuesday, December 7, 2021

Gnome Bead Garland

        Any time is a good time to decorate, but the Christmas season seems to bring out creativity in everyone! 

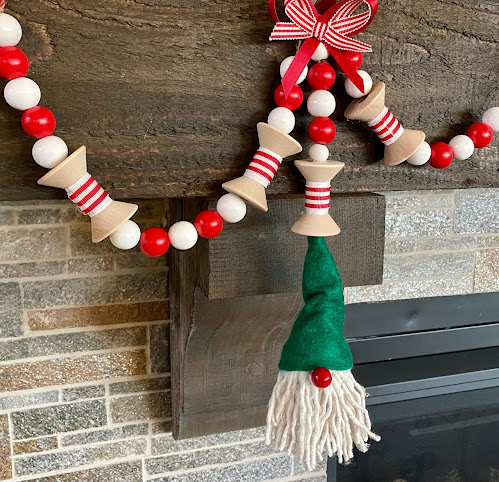
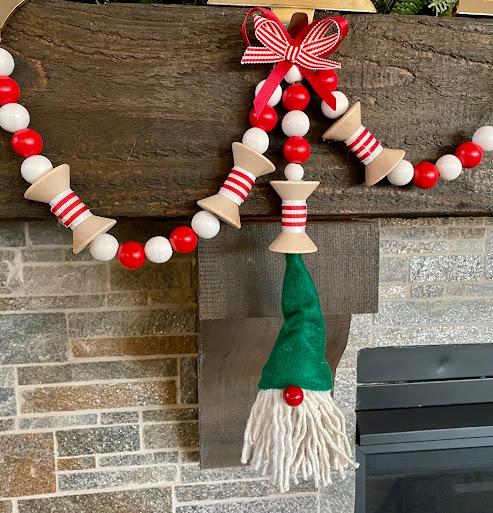
        Wood bead garlands,  popular in home décor over the past couple of years, are easy to make and the perfect accent for any area of the home especially with the addition of a Holiday Gnome.......  
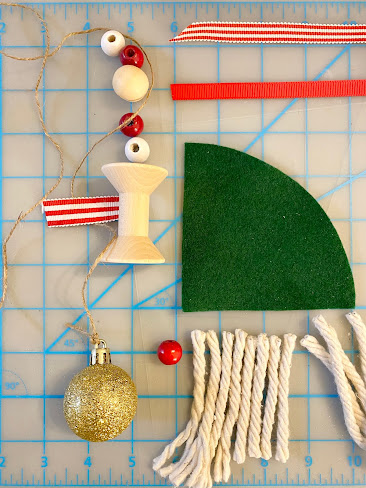

You will need:
  • Painted Wood Beads: 2 Small & 1 Med. White; 1 Small & 2 Med. Red
  • 3" Spool
  • 5/8" Red/White stripe grosgrain ribbon* (about 2" to go around center of spool)
  • 7/8" White grosgrain ribbon*  (about 2" to go around center of spool)
  • 3/8" Red grosgrain ribbon* for bow
  • 3/8" Red/White strip grosgrain ribbon* for bow
  • 8" x 8" Green Felt 
  • 1 1/2" Ornament (head)
  • Thick, soft rope for beard (I used strands from a mop head from Dollar Tree)
  • Twine
  • Lo-Temp glue
  • Embroidery needle
  • Scissors 
*Ribbon was provided by Gwen Studios and is available at Walmart stores and online at Walmart.com


Instructions:
1. Cut 3" strips of rope for the beard. Glue ends around the center of the ornament. Unravel each piece and fluff to create the beard.
2. Create the gnome's hat by folding one quarter of an 8" circle into a cone. Check to make sure it fits over the ornament and top of the beard. Overlap the sides then glue.
3. Glue a small piece of white ribbon around the center of the spool then a piece of the  5/8" red/white striped ribbon on top.
4. Create two bows; one each, red and red/white striped.

Assemble:
1. Tie end of twine to the top of the ornament. 
2. Thread about 15" of twine onto needle then pull the twine up thru the center of the cone hat, spool and beads as shown. 
3. Glue: small red bead to the head below the edge of the hat for the nose, the red bow to the twine above the end bead, then the striped bow on top of the red.
4. Create a loop of twine for a hanger at the top to finish.  


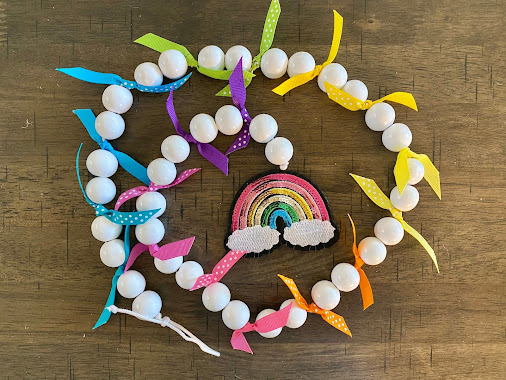
Look for more wood bead projects, including the spool garland created for 
"Holiday Décor and More",  
available to download from Bella Crafts Publishing.

Enjoy!

Yours truly,
Julie 💝

KEEP CALM AND CARRY ON CRAFTING!

Monday, December 6, 2021

Rainbow Ribbon Bead Garland

I'm loving all the bead garlands that are currently trending, so when I received an assortment of appliqués and a Favor Pack of ribbons from Gwen Studios, I had to create a fun garland for my grand daughter....  This is my Boho version...

You'll need:

  • Gwen Studios Favor Pack - Rainbow assortment of 3/8' grosgrain ribbon
  • Gwen Studios Rainbow Appliqué x2
  • 5/8' White Beads - you will need 2 for each color of ribbon used plus 2 
  • White Cord 
  • Adhesive

Instructions:

1. Thread the number of beads needed onto the cord. TIP: Wrap the end of the cord with tape to make it easier to thread.

2. Cut a 4"- 5" piece of ribbon and tie onto the cord between the 2nd and 3rd bead. Continue tying pieces of ribbon between the beads as shown ending with two beads.  I used the colors of ribbon in the order they were packaged.

3.  Sandwich the end of the cord between the backs of the two appliqués.  They can be glued together with an adhesive, or, following instructions on the back of the package, seal with a hot iron and pressing cloth.  


4.  Make a loop at the opposite end of the cord then cut.


Use ribbon you already have on hand, or look for different, color coordinated Gwen Studios Favor Packs at your local Walmart store, or online at Walmart.com.

Enjoy!

Yours Truly,
Julie 💝

KEEP CALM AND CARRY ON CRAFTING!


Friday, December 3, 2021

International Felt Garland

 * Feliz Navidad * Frohliche Weihnachten * Joyeux Noel * Buon Natale *

Say "Merry Christmas" in any language with Joy!


A garland is always on trend whatever your holiday decorating style.  This one is easy to make and can be customized to match any décor.

You will need:
  • Joy® Iron-on 3-D Embroidered Letter Sheet
  • Two, 9" x 12" Kunin® Classic Felt - Red
  • 9" x 12" Kunin® Glitterfelt™ - White (or 3" snowflakes)
  • Canvas fabric (a drop cloth used for this project)
  • 12" Pom Pom Trim - White
  • Red/White Bakers Twine
  • Large eye tapestry needle
  • Fabric glue
  • Scissors


SNOWFLAKES:  I cut my own 3" snowflakes from glitter felt on the Cricut® Maker, an electronic shape cutting machine. If this option is not available, you may be able to purchase packages of 3" snowflakes at your local craft store.  You will need one snowflake per letter. 


1.  Cut a 3" x 4" canvas rectangle for each letter. Adjust this size if your snowflakes are larger/smaller than 3".  Cut so the top of the rectangle is at the folded and stitched edge at the top of the drop cloth.  If this is not possible, cut the rectangle 1/2" longer. Fold over at the top then secure with glue to create a casement for the twine.

2.  Center the snowflake on one piece of canvas then use as a guide to cut the bottom of the rectangle as shown. Use this piece as your pattern to cut the remaining pieces.


 3.  Fray the side edges of each piece.  Trim if needed.  


4.  Arrange, then glue the pieces onto the red felt with the top edge of each piece aligned with the edges of the felt.
   

5.  Cut around each piece about 1/8" from the edges of the canvas.

6.  Glue one snowflake to each piece then iron each letter in place following directions on the back of the package.
   

TIP:  Pull the fabric away from the backing of the letter sheet,  roll inward and the letters will easily release from the fabric.


7.  Glue one pom pom to the point at the bottom of each banner between the canvas and the felt.


TIP:  Place a spot of glue at the point where the threads meet so the threads won't separate when the trim is cut.


8.   Glue a piece of bakers twine across the top of each piece.


9. To create the garland, thread the end of the bakers' twine onto the needle then pull the twine through the casing at the top of each finished piece.  Leave about 12" of twine at each end of the garland.


10.  Make a small bow from the bakers twine then glue to the center at the top of each piece to finish.


May your home be filled with love, laughter and joy this season and always…..  

Yours truly,
Julie 💝

KEEP CALM AND CARRY ON CRAFTING!