Showing posts with label Home Décor. Show all posts

Tuesday, December 7, 2021

Gnome Bead Garland

        Any time is a good time to decorate, but the Christmas season seems to bring out creativity in everyone! 

        Wood bead garlands,  popular in home décor over the past couple of years, are easy to make and the perfect accent for any area of the home especially with the addition of a Holiday Gnome.......  
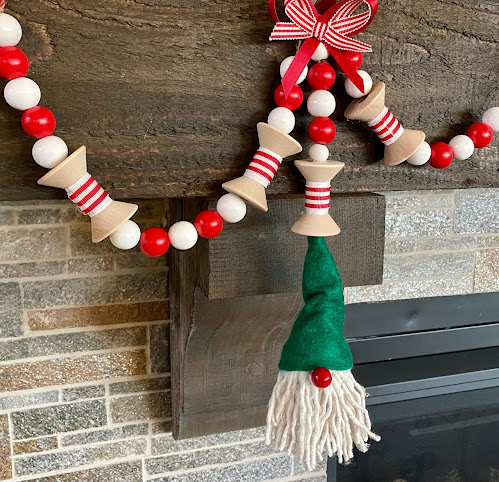

You will need:
  • Painted Wood Beads: 2 Small & 1 Med. White; 1 Small & 2 Med. Red
  • 3" Spool
  • 5/8" Red/White stripe grosgrain ribbon* (about 2" to go around center of spool)
  • 7/8" White grosgrain ribbon*  (about 2" to go around center of spool)
  • 3/8" Red grosgrain ribbon* for bow
  • 3/8" Red/White strip grosgrain ribbon* for bow
  • 8" x 8" Green Felt 
  • 1 1/2" Ornament (head)
  • Thick, soft rope for beard (I used strands from a mop head from Dollar Tree)
  • Twine
  • Lo-Temp glue
  • Embroidery needle
  • Scissors 
*Ribbon was provided by Gwen Studios and is available at Walmart stores and online at Walmart.com
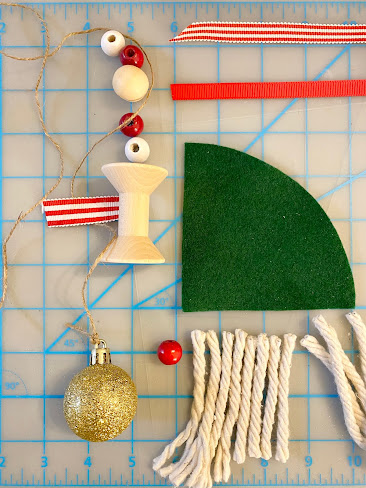

Instructions:
1. Cut 3" strips of rope for the beard. Glue ends around the center of the ornament. Unravel each piece and fluff to create the beard.
2. Create the gnome's hat by folding one quarter of an 8" circle into a cone. Check to make sure it fits over the ornament and top of the beard. Overlap the sides then glue.
3. Glue a small piece of white ribbon around the center of the spool then a piece of the  5/8" red/white striped ribbon on top.
4. Create two bows; one each, red and red/white striped.

Assemble:
1. Tie end of twine to the top of the ornament. 
2. Thread about 15" of twine onto needle then pull the twine up thru the center of the cone hat, spool and beads as shown. 
3. Glue: small red bead to the head below the edge of the hat for the nose, the red bow to the twine above the end bead, then the striped bow on top of the red.
4. Create a loop of twine for a hanger at the top to finish.  
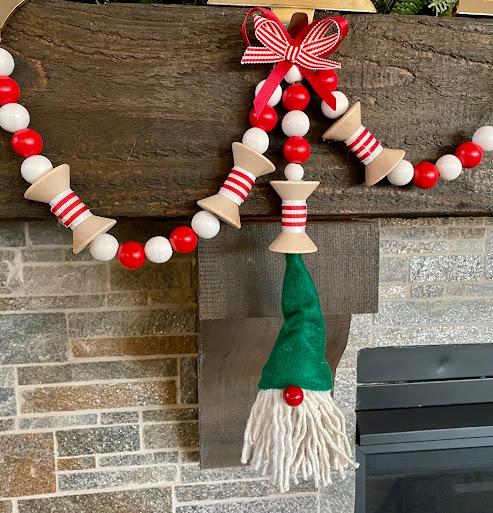

Look for more wood bead projects, including the spool garland created for 
"Holiday Décor and More",  
available to download from Bella Crafts Publishing.

Enjoy!

Yours truly,
Julie 💝

KEEP CALM AND CARRY ON CRAFTING!

Tuesday, July 2, 2019

Get Crafty with Leftovers

        I have a LOT of craft supplies! And, probably half of them are left over from projects I've worked on over the past 30+ years...  Hate to admit that I hardly ever throw anything away, resulting in an infinite resource of crafty leftovers.  (I cook the same way. I always make too much, then have meals for the next few days......)   So, if you check my previous post, you'll understand why I had enough cut pieces of felt to make more of those fun felt flowers......  for another project!


You will need
  • Kunin® Classic Felt, 9” x 12” – Baby Pink, Lemon Frost and White
  • Kunin® Premium Felt, 9” x 12” – Kelly Green 
  • Cricut® Maker™ with Rotary blade
  • Zots® clear adhesive dots - singles
  • 8" x 10" Mixed media canvas
  • 12" x 12" Green striped burlap paper
  • 10" Strip of decorative border (cut from a piece of scrapbook paper)
  • Lo Temp glue gun
  • Extra strength glue stick, or other glue
  • Jute


Instructions:

1. Please refer to my previous post for step by step instructions on how to make the rolled roses and the free pattern for the leaf.  You will need 3 roses and 3 leaves.

2. Cut the burlap paper to fit into the opening at the back of the mixed media canvas. Cut the paper about an inch wider then tuck the ends between the wood frame and the canvas and it will stay in place.


2.  Cut a 9" piece of border pattern from a sheet of scrapbook, or other paper. Place on top of the burlap paper then tuck the ends behind the wood frame to secure. You may need to glue the strip to the burlap to prevent it slipping.


3.  Position, then glue the roses to the center of the strip with lo-temp glue.  Glue the leaves between the roses. 


4.  Cover the staples with strips of burlap paper. You can glue the strips with either the green side up, or the back.  Overlap, then trim ends to fit.  I chose to have the plain side facing up.


5.  Wrap the length of jute 3x around the top edge of the frame, tie the ends in a bow et voilà, it's finished and it took hardly any time at all. Note: It took longer to decide which papers I wanted to use than it did to make the project!


I really love how easy these roses are to make and can think of lots of different ways to use them; decorate baskets, headbands, summer hats, bags, wreaths and a whole lot more.  Wonder what you'll come up with - enjoy!

Yours truly,
Julie :)

KEEP CALM AND CARRY ON CRAFTING!

 Don't forget to follow Kunin Felt Products on Facebook for a chance to win a selection of felt!


Friday, August 31, 2018

Glass Etching Quick'n EZ

From boring to brilliant in literally minutes!

I love this set of glass bottles I recently found at my local craft store, but thought they needed a little extra oomph....  


so, I filled each one with dip'n etch.... wrapped a little jute around the neck


and now they look like this......


Perfect for my bright and cheery sunflowers....


and it took less than an hour!  Here's how....

You'll need:
etchall® dip'n etch
Plastic container, large enough to hold the bottle
Pebbles, marbles, or coins 
Jute
Scissors

1. Clean the outside of the glass bottles thoroughly then wipe with vinegar to make sure it's squeaky clean. Dry thoroughly.

2. To determine how much dip'n etch you'll need, fill the bottles with the pebbles (so they don't float) then place one bottle in the plastic container. Fill the container with water up to the place where you want the etching to stop. 


3. Remove the bottle and the water level will sink.  Mark the water level then empty the container.  Dry the container and the bottle thoroughly.


4. Pour dip'n etch into the container, up to the water level mark, then place the bottle in the container. Leave for 15 minutes.


5. After 15 minutes remove the bottle. Rinse the outside thoroughly and dry. Set aside and place the second bottle in the same container of dip'n etch. Repeat the process until all 3 bottles have been etched. DO NOT rinse over a porcelain sink. Etching product may accidentally etch the glaze.


6. Wrap the neck of each bottle with jute, while the other bottles are being etched. After the last bottle has been etched, pour the dip'n etch back into the container.  (I cut the top off a plastic soda bottle to use for a funnel.) 
NOTE: etchall® crème and dip are re-usable. 


Leave as is, or add your favorite flowers and enjoy!


You can find lots of glass containers in craft, thrift and dollar stores and easily turn them into home dec treasures in minutes.  Enjoy!  Y'all come back now...

Yours truly,
Julie

KEEP CALM AND CARRY ON CRAFTING!  


Tuesday, July 31, 2018

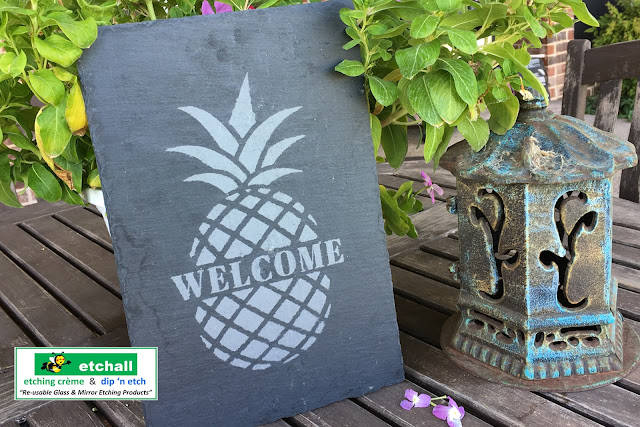
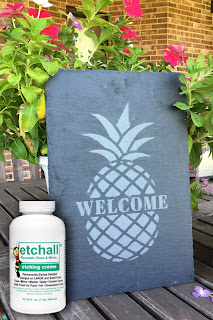
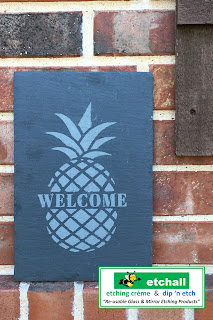
Pineapple Welcome Slate

You're slated for success when you create a 
"Welcome" sign with a slate and etchall® etching crème!


You will need:
etchall® etching crème
etchall® etchmask and transfer paper
8" x 12" slate*
etchall® Pik tool and squeegee
Stencil pattern (vinyl)
*Not all slate will etch. Check a small area on the back before starting your design.

Instructions:
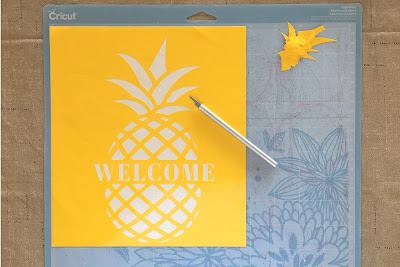
1. Cut the stencil with a digital die cutting machine.  


NOTE: You can cut the stencil across the center, separate the two halves then add a stencil for the word "WELCOME" in the space between. If you have access to Cricut Design Space, you can find the complete stencil design here


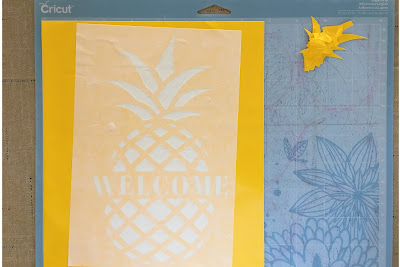
2. Cover the stencil with transfer paper. Press firmly in place then lift the stencil from the mat and remove the backing paper.


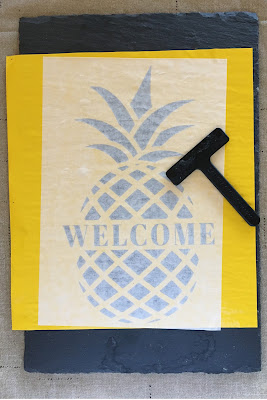
3. Position on the slate then use the squeegee to press firmly in place.  Remove the transfer paper.


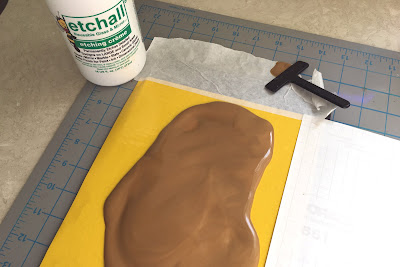
4. Cover the open areas of the stencil with etching crème.  Use pieces of the transfer paper to cover the slate not covered by the stencil to prevent accidental etching. Don't skimp - etchall crème is re-usable.


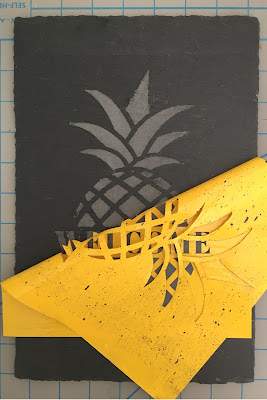
5.  Leave the crème on the stencil for 15 minutes then scrape as much as possible back into the container.  Rinse away any residue with a soft sponge in a bucket.  Do not do this over a porcelain sink to avoid accidental etching.  


6. Peel away the stencil then rinse the slate once more. Let dry.  Do not dry with a towel, or paper towel to avoid leaving bits of residue on the slate's rough surface.


Enjoy!  Y'all come back now.........

Yours truly,
Julie

KEEP CALM AND CARRY ON CRAFTING!


Thursday, May 17, 2018

Trim it Up with Expo International

I've got tassels and buttons and trims, oh my!
"Houston we have a problem" - what to make first!

T-shirts and aprons pillows and hats,
Baskets and bags, purses and mats.
Just add some trim, it's easy to do
And soon your old stuff will be looking like new!


This is just a small selection from Expo International and already I'm in creative overload. T-shirts, aprons, hats, pillows - pretty much anything can go from boring to beautiful with the addition of one or two, well-chosen trims.  Here are a few ideas to start with....


You will also need:
Needle and thread
Lo-temp glue gun
Fabric glue
Double sided photo mounting tape
Glue spots
Scissors

Up-cyled Headband:


An old headband had seen better days, but it fit nicely (on my head too), so instead of throwing it away I decided to cover it with lace and trim.  I chose stretch lace, simply because the headband was about 1" wide at the top, but tapered to 1/2" at each end.

1.  Cut the lace to size.


2.  Attach one end of the lace to the end of the headband with a glue spot, then pull over the top and attach to the opposite side. Secure the end.  Because the lace stretches the edges will curl inward.


3.  Adhere the photo mounting tape to the underside of the headband. Remove the cover from the tape then glue the edges of the lace to the tape.


4.  Trim the lace at each end as needed.


5.  Adhere rhinestone trim on top of the lace for some evening sparkle!  


Pillow Pizzaz
Pillows don't have to be plain and boring! 


 Glue, or sew woven braid along the pattern lines for an updated look.  
Note: Dip ends of trim in glue to prevent fraying.


Add a second trim for even more pillow pizzaz and a tassel at each corner!


Summer Bag

Nobody likes a boring bag.  Jazz it up with the same trims used on the pillow, plus 3/8" pom pom trim.

1.  Cut 4 pieces of woven braid trim and 2 pieces of pom pom trim the width of the bag,  Dip ends of trim in fabric glue to prevent fraying.  Sew or glue trim in place as shown.  


2.  Glue the flower, or other complimentary trim on top of the woven braid.


Swag Bag

Glue woven braid trim around the edge of the iron-on vinyl flag for a more finished look.
Note: Dip ends of trim in fabric glue to prevent fraying.


These are just a few ideas to get you started. Check out the other blogs listed below then head back to the Designer Crafts Connection blog to enter to win your own treasure chest of trims!

Beth Watson
Julie McGuffee - You are here!
Designer Crafts Connection


Enjoy!  Y'all come back now.......

Yours truly,
Julie

KEEP CALM AND CARRY ON CRAFTING!