Showing posts with label etched slate. Show all posts

Tuesday, October 18, 2022

Etched Jack O'Lantern Slate Coasters

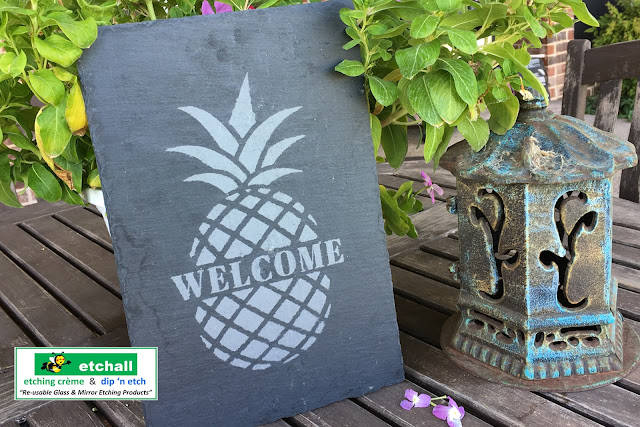
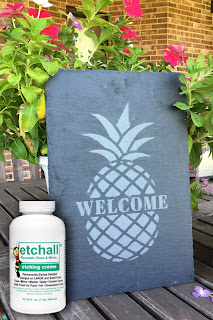
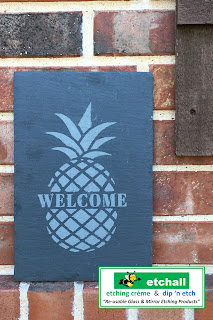
         I love being able to customize holiday, or special event accents for the home. Everyone loved the smoked Jack O'Lantern glasses, so thought I'd use the same designs for a couple of slate coasters...  YES! You can etch slate with etchall® etching crème.  They're pretty cool looking, right.........

Here's what you'll need
  • etchall® reusable etching crème
  • Stencil cut pick knife, or pick tool
  • Squeegee 
  • Etchmask, stencil or vinyl for creating stencils
  • Slate coasters  (I got mine from Plaid, but you can also order from Amazon)
  • Jack O'Lantern patterns 
  • scissors 


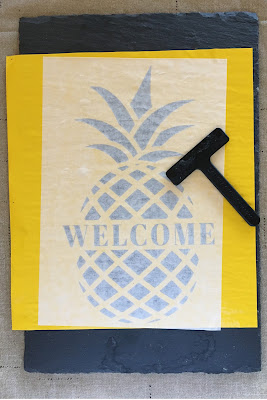
1. Drag the above patterns from here onto your desktop then upload into your cutting software*, or print onto printable vinyl and cut with a craft knife.  Each face is about 1.5-2" wide, but you can adjust the size to fit the size of your coaster.    *I used my Cricut Joy® machine to cut the stencils.
    
2. Using the pick tool, carefully weed (remove) the areas to be etched from the vinyl then press firmly in place at the center of the slate. Since this is a small and simple design, I didn't find it necessary to use transfer tape.  


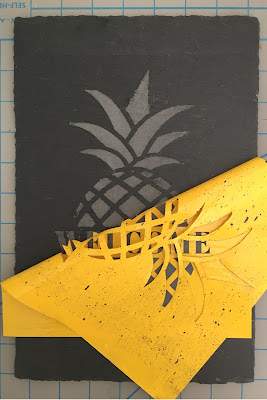
3.  To prevent accidentally etching the uncovered areas of the slate, cover with scraps of vinyl.


4. Cover the open areas with etching crème and leave for 15-20 minutes. Refer to directions on the container. *NOTE: Etching crème is off white when you first open the container, but it will eventually darken over time. The color does not effect the effectiveness of the product.


5. After 15-20 minutes, use the squeegee to scrape the etchall back into the container! Don't forget, etchall etching crème is reusable.


6. Rinse away any remaining crème with water. DO NOT RINSE OVER A PORCELAIN SINK TO AVOID ACCIDENTALLY ETCHING YOUR SINK!! Use a plastic bowl if necessary. Discard the vinyl and dry the surface of your slate.


7. These will make a perfect gift together with a couple of matching, etched wine glasses and a bottle of wine!


You've been boo'ed! Enjoy! 
Yours truly,
Julie 🎃

KEEP CALM ANC CARRY ON CRAFTING!


Tuesday, June 28, 2022

Etched Slate - Aloha Summer!

Wherever you live, celebrate the joys of Hawaii at home with this etched slate plaque!


You will need:

etchall® crème

etchall® etchmask and transfer paper

Slate, 5” x 7”

Squeegee

Pik tool

Swivel blade craft knife, or a digital cutting machine

Pattern


1. Download the pattern onto your computer, then either print, or upload to your cutting software.


2. Cut the pattern from etchmask using your digital cutting machine, or cut around the traced design with a swivel blade craft knife. It is only necessary to cut the vinyl, not the backing paper.


3. Use the pik tool (or the point of a craft knife) to remove the areas of the design that will be etched. Insert the tip of the knife into the vinyl away from the cut edge, then lift gently.


4.   Once all areas to be etched have been exposed, cover the top of the etchmask with transfer paper.  Press firmly onto the etchmask, then carefully peel the backing sheet away from the etchmask.


5.  With the transfer paper facing up, position then press the etchmask firmly onto the slate then remove the transfer paper.  Make sure that all areas of the slate not to be etched are completely covered. Use pieces of transfer paper on the edges or corners as needed.


6. Cover the open areas liberally with etching crème. NOTE: etchall etching crème is reusable, so you cannot use too much. Use the squeegee to spread the crème across the open areas on the slate.  After 10 minutes, use the squeegee to move the crème around a little being careful not to touch the slate surface. 


7. After an additional 5 minutes, scrape the crème back into the container then rinse the slate and remove the etchmask to reveal your etched design.


NOTE:  etchall etching crème creates a permanent etch on slate, glass, ceramic, mirror, porcelain and other glazed surfaces. Please read directions thoroughly. Do not rinse over a porcelain sink, or work on a glazed countertop (granite, etc). Even a small amount of etching product will permanently etch any of these surfaces. 


        Use etchall etching crème and dip to customize glass, mirror, china, or slate pieces for your home, or to give as a gift. You can also use stencils to create the designs of your choice!  Search "glass etching" in the search bar on my blog for more project ideas.  Enjoy!


Yours truly,

Julie 💝


KEEP CALM AND CARRY ON ETCHING!


etchall® products were provided by B&B etchall.  Check their website for the full product range.


Use code  BELLA622  for 20% off your order

The slate was purchased from my local Michaels store. Some surfaces are also available online.

  I receive a small endorsement fee for featuring my etched projects on my blog.

Tuesday, July 31, 2018

Pineapple Welcome Slate

You're slated for success when you create a 
"Welcome" sign with a slate and etchall® etching crème!


You will need:
etchall® etching crème
etchall® etchmask and transfer paper
8" x 12" slate*
etchall® Pik tool and squeegee
Stencil pattern (vinyl)
*Not all slate will etch. Check a small area on the back before starting your design.

Instructions:
1. Cut the stencil with a digital die cutting machine.  


NOTE: You can cut the stencil across the center, separate the two halves then add a stencil for the word "WELCOME" in the space between. If you have access to Cricut Design Space, you can find the complete stencil design here


2. Cover the stencil with transfer paper. Press firmly in place then lift the stencil from the mat and remove the backing paper.


3. Position on the slate then use the squeegee to press firmly in place.  Remove the transfer paper.


4. Cover the open areas of the stencil with etching crème.  Use pieces of the transfer paper to cover the slate not covered by the stencil to prevent accidental etching. Don't skimp - etchall crème is re-usable.


5.  Leave the crème on the stencil for 15 minutes then scrape as much as possible back into the container.  Rinse away any residue with a soft sponge in a bucket.  Do not do this over a porcelain sink to avoid accidental etching.  


6. Peel away the stencil then rinse the slate once more. Let dry.  Do not dry with a towel, or paper towel to avoid leaving bits of residue on the slate's rough surface.


Enjoy!  Y'all come back now.........

Yours truly,
Julie

KEEP CALM AND CARRY ON CRAFTING!