Showing posts with label Wood bead garlands. Show all posts

Tuesday, March 8, 2022

Green Beads and Gnomes!

Coloring beads to match seasonal décor is Quick'n EZ 

        I enjoy decorating with bead garlands and almost always finish off the ends with a tassel, tag, or  seasonal gnome. Making the gnome was the easy part, but I really wanted some green beads for the month of March without the hassle of painting. I created a lot of projects in the 80's & 90's with small wood parts and whenever I had a lot to color I would use dye!  

STEP 1

I dissolved about 1/2 a packet of Tulip® Fabric Dye in hot water in a small STAINLESS STEEL saucepan placed in my STAINLESS STEEL sink then carefully added the string of beads with the tassel and some additional loose beads. I stirred the beads and tassel around for a minute, or so with a STAINLESS STEEL spoon making sure the jute tassel was saturated with the dye.  Note: Since this is DYE, I also wore disposable gloves.  I know being "green" is trendy right now and St. Patrick's day is right around the corner, but I really didn't want to risk green hands......  


STEP 2:

I left the beads and tassel in the dye for a couple of hours then used a STAINLESS STEEL ladel to transfer the beads to a STAINLESS STEEL colander to drain.  Still working in the sink, I placed a paper towel in the colander to soak up any excess dye, placed the colander in a plastic bag (so it didn't drip on the way to the door) and took it outside so the beads could dry in the sunshine. I hung the strand of beads and tassel from a tree branch and placed the colander at the base.


STEP 3:

Once the beads and tassel were dry, I tied the tassel to the end of a piece of string/jute, glued a gnome hat around the top (ball) of the tassel (see my post below with steps on making the hat* with Gwen Studios ribbon and Kunin® Presto felt) then added beads to the string alternating green and natural. I also glued a small bead to the tassel, below the rim of the hat for the nose and a small shamrock I cut from felt at the top.  *Do not add the yarn beard; the tassel is the beard. You may also need to adjust the size of the quarter circle to fit the tassel. You can also make the Leprechaun gnome as shown to add to the end of a garland.

        Now you know how easy it is to color natural beads, you can create any color you like to coordinate with any season or celebration throughout the year.  Note: Not all beads are made from the same wood, so sample a few first. You can also change the depth of color by the amount of dye you add to the water and/or how long you allow the beads to soak in the dye. The color may not always be even, but this only adds to the charm of the farmhouse style....  


Yours truly,
Julie 💚

KEEP CALM AND CARRY ON CRAFTING!

Tuesday, December 7, 2021

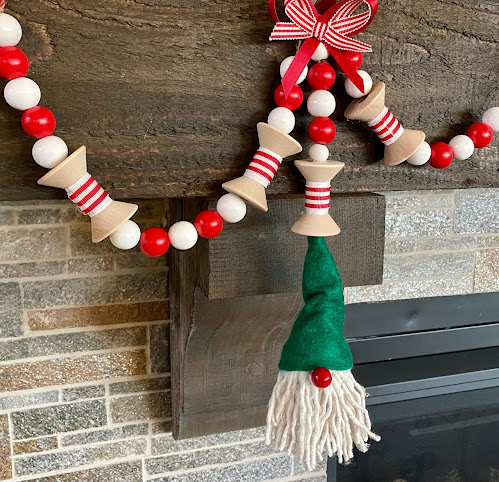
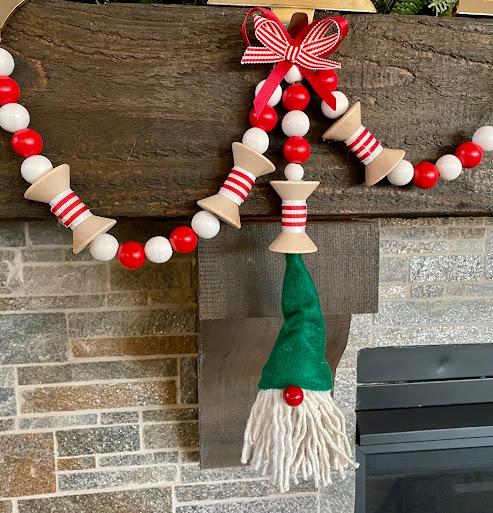
Gnome Bead Garland

        Any time is a good time to decorate, but the Christmas season seems to bring out creativity in everyone! 

        Wood bead garlands,  popular in home décor over the past couple of years, are easy to make and the perfect accent for any area of the home especially with the addition of a Holiday Gnome.......  


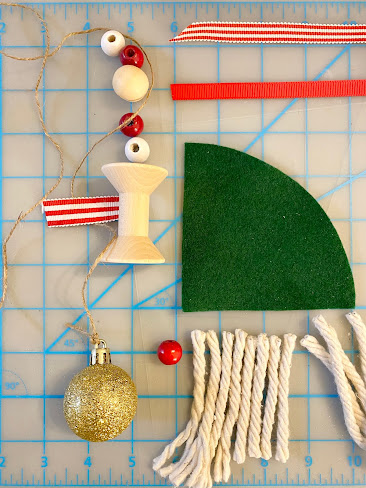
You will need:
  • Painted Wood Beads: 2 Small & 1 Med. White; 1 Small & 2 Med. Red
  • 3" Spool
  • 5/8" Red/White stripe grosgrain ribbon* (about 2" to go around center of spool)
  • 7/8" White grosgrain ribbon*  (about 2" to go around center of spool)
  • 3/8" Red grosgrain ribbon* for bow
  • 3/8" Red/White strip grosgrain ribbon* for bow
  • 8" x 8" Green Felt 
  • 1 1/2" Ornament (head)
  • Thick, soft rope for beard (I used strands from a mop head from Dollar Tree)
  • Twine
  • Lo-Temp glue
  • Embroidery needle
  • Scissors 
*Ribbon was provided by Gwen Studios and is available at Walmart stores and online at Walmart.com


Instructions:
1. Cut 3" strips of rope for the beard. Glue ends around the center of the ornament. Unravel each piece and fluff to create the beard.
2. Create the gnome's hat by folding one quarter of an 8" circle into a cone. Check to make sure it fits over the ornament and top of the beard. Overlap the sides then glue.
3. Glue a small piece of white ribbon around the center of the spool then a piece of the  5/8" red/white striped ribbon on top.
4. Create two bows; one each, red and red/white striped.

Assemble:
1. Tie end of twine to the top of the ornament. 
2. Thread about 15" of twine onto needle then pull the twine up thru the center of the cone hat, spool and beads as shown. 
3. Glue: small red bead to the head below the edge of the hat for the nose, the red bow to the twine above the end bead, then the striped bow on top of the red.
4. Create a loop of twine for a hanger at the top to finish.  


Look for more wood bead projects, including the spool garland created for 
"Holiday Décor and More",  
available to download from Bella Crafts Publishing.

Enjoy!

Yours truly,
Julie 💝

KEEP CALM AND CARRY ON CRAFTING!

Monday, December 6, 2021

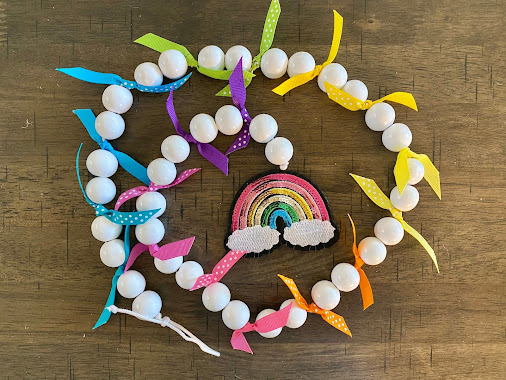
Rainbow Ribbon Bead Garland

I'm loving all the bead garlands that are currently trending, so when I received an assortment of appliqués and a Favor Pack of ribbons from Gwen Studios, I had to create a fun garland for my grand daughter....  This is my Boho version...

You'll need:

  • Gwen Studios Favor Pack - Rainbow assortment of 3/8' grosgrain ribbon
  • Gwen Studios Rainbow Appliqué x2
  • 5/8' White Beads - you will need 2 for each color of ribbon used plus 2 
  • White Cord 
  • Adhesive

Instructions:

1. Thread the number of beads needed onto the cord. TIP: Wrap the end of the cord with tape to make it easier to thread.

2. Cut a 4"- 5" piece of ribbon and tie onto the cord between the 2nd and 3rd bead. Continue tying pieces of ribbon between the beads as shown ending with two beads.  I used the colors of ribbon in the order they were packaged.

3.  Sandwich the end of the cord between the backs of the two appliqués.  They can be glued together with an adhesive, or, following instructions on the back of the package, seal with a hot iron and pressing cloth.  


4.  Make a loop at the opposite end of the cord then cut.


Use ribbon you already have on hand, or look for different, color coordinated Gwen Studios Favor Packs at your local Walmart store, or online at Walmart.com.

Enjoy!

Yours Truly,
Julie 💝

KEEP CALM AND CARRY ON CRAFTING!