Showing posts with label Designer Crafts. Show all posts

Thursday, June 30, 2022

Curly Ribbon Crafts

 Rock your party with curly ribbon party lights! 

        It's almost time for a firecracker Fourth of July celebration, so let's get our red, white and blue craft on and create a few simple party lights to light up the night!  Here's a couple of ideas to start with...


Here's what I used:
  • Gwen Studios Curly Ribbon - Red, White & Blue
  • Gwen Studios 3/8" Grosgrain Taffy Stripe ribbon - Red & White
  • Double-sided Adhesive Tape
  • Glow Sticks
  • Solar Light Mason Jar Lid
  • Small Crystal Mason Jar
  • Scissors
  • 3 Small wood beads - 2 Red & White
  • Empty plastic bottle - Small
  • 12" Bakers twine, or jute (to hang)

Glow-Stick Light


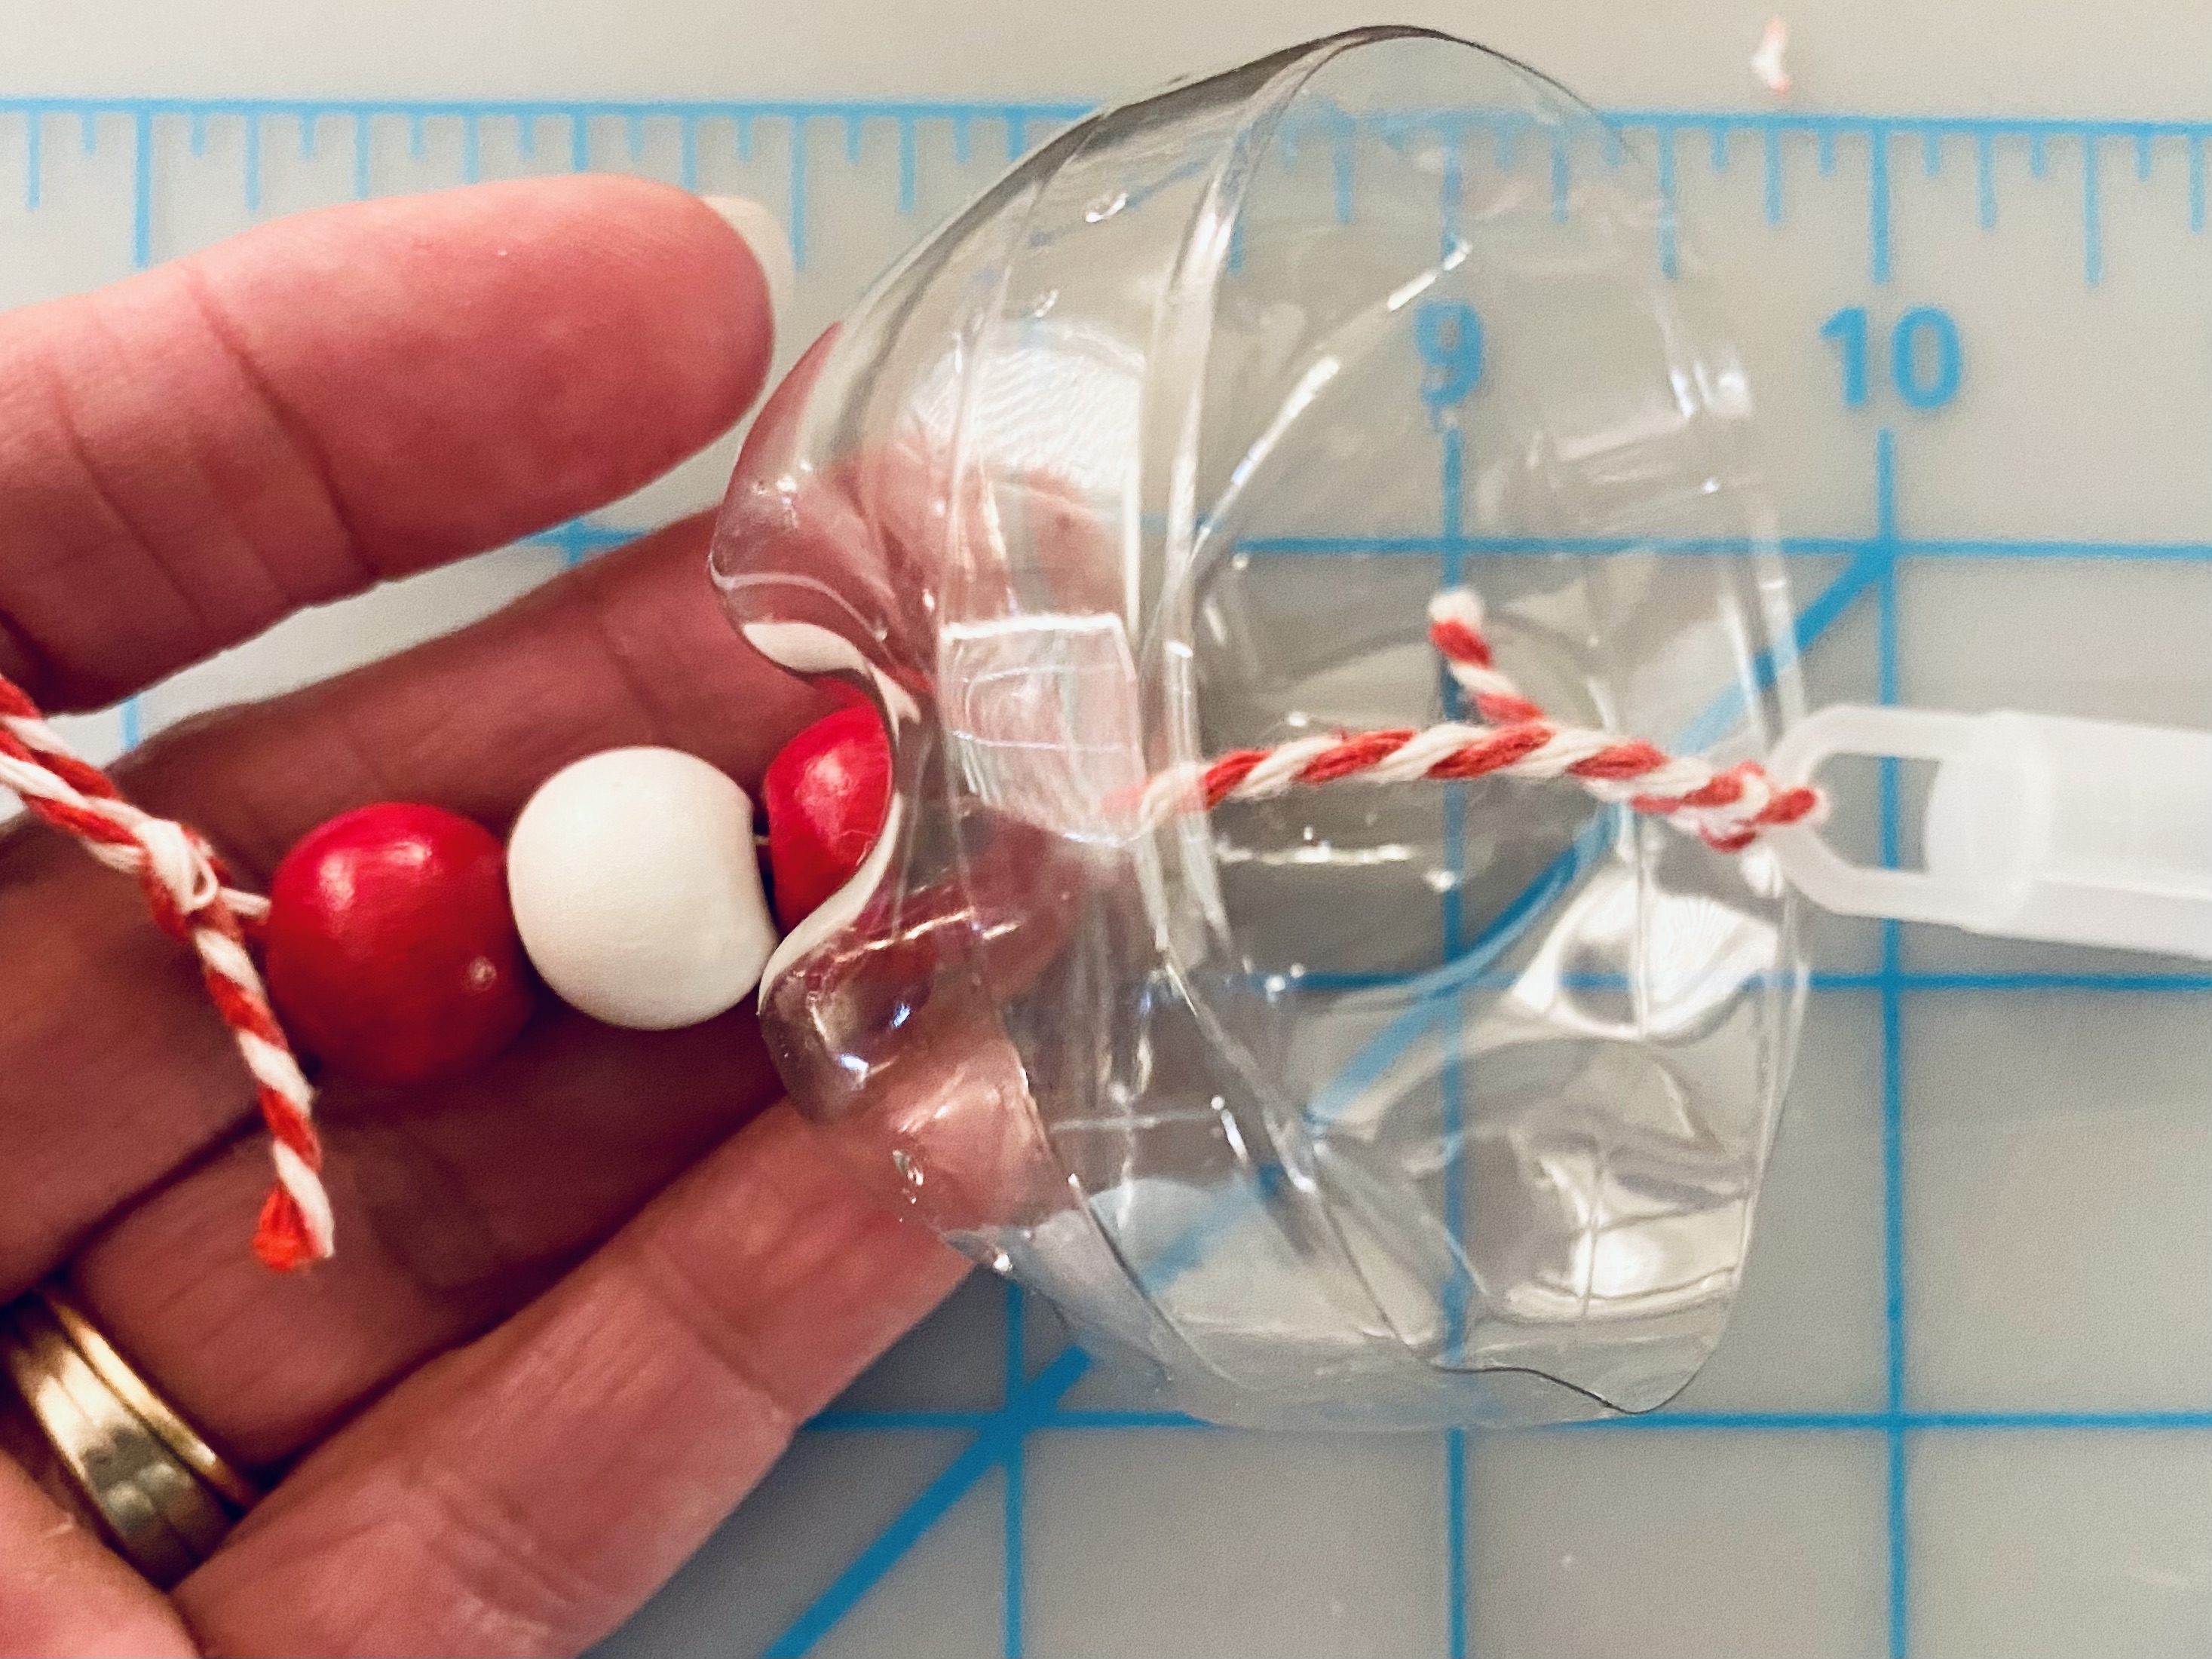
1. Cut about 2" off the bottom of the plastic bottle. Make sure to include about 1/2" of the flat side of the bottle.

2. Use the point of your scissors to make a hole at the center of the bottom of the bottle. Tie one end of the twine to the glow stick cap then thread the other end through the hole up from the inside. Thread the beads onto the other end then make a loop at the top to hang. This will be the top of your light.


3. With edges aligned, adhere the double-sided tape around the cut edge.

4. Cut equal numbers of each color of curly ribbon into 15" lengths then curl each piece by carefully running the length of ribbon between your thumb and the blade of your scissors.  You will need enough pieces to go around the edge of the bottle. Adhere the end of each curled piece to the adhesive tape around the edge of the bottle. 

5. Adhere grosgrain ribbon around the edge to cover the ends of the ribbon and, if desired,  tie a small bow around the hanger at the top of the beads. Trim the lengths of ribbon as needed then push the glow stick into the top and hang.  Remove the glow stick to activate then replace. 


Mason Jar Solar Light

        You probably have a mason jar, but you may need to purchase the solar light lids. I purchased mine from Amazon.


        This is quick'n EZ to make. You don't even need to use a mason jar since the fairy lights will simply hang down from under the solar lid among the strands of curly ribbon. All you need to do is adhere the double-sided adhesive tape around the edge of the lid, add the curled pieces of ribbon then cover the ends with the grosgrain ribbon to finish.  Note: The wire ring of the hanger that comes with the solar lid, is sized to fit around the neck of a jar. You will need to make an adjustment to it if you plan to use it around the lid if you don't use a jar.

Time to light up the decorations! 


        There are so many other colors of curly ribbon to choose from and with glow-sticks in abundance at different times of the year, I can imagine glow-stick lights with white curly ribbon and google eyes as ghost lights for Halloween in Fall, shades of blue, green and a little pink would make a fabulous jelly fish! What would you make?

Enjoy!

Yours truly,
Julie 💝

KEEP CALM AND CARRY ON CRAFTING!

Curly ribbon used in my projects was provided by Gwen Studios. It is available in a variety of colors at Walmart and online at Walmart.com  All other supplies were purchased by me. 

Look for more curly ribbon projects on the Designer Crafts Connection blog


Tuesday, January 11, 2022

Valentine's Day Ribbon Wreath

Valentine's Day - the most romantic day of the year!
 
        Christmas decorations are packed away and the house is looking so sad and dreary - definitely time to give it some love with a splash of Valentine's Day color!

        I received a wonderful selection of pink ribbons from Gwen Studios for a delightful romantic look, but I'm a traditionalist at heart and couldn't resist pulling out leftover red and white ribbon I'd received for my Christmas crafting.....  the perfect pop of color my home needed for chilly winter days.....

        A wreath is always a good project to start with......


You'll need:
  • Gwen Studios double faced satin 7/8"ribbon - Red & White
  • Gwen Studios double faced satin 3/8" ribbon - Red
  • Gwen Studios gros grain 3/8" ribbon - White
  • Wire wreath form  8" 
  • Large dimensional/3D glue dots
  • Glue gun - lo temp glue sticks
  • Scissors, needle and thread
  • Mini clothespins, or quilt pins are helpful to hold ribbon in place before gluing, or stitching
  • Zip tie
  • Heart ornaments
NOTE
Gwen Studios grosgrain and/or single faced satin ribbon is okay to use for this project too. 


1.  Make a four-loop bow. Secure the loops at the center with a staple. Place at the center of a 12" length of 7/8" ribbon, then secure with a zip tie. Set aside.


2. Attach about 6" of 3/8"ribbon to the top of each ornament.  Secure the end with a knot then trim away excess ribbon. 


3. Wrap the wire wreath with 7/8" white ribbon to cover, then wrap with 3/8" red ribbon.


4. Attach the ornaments and bow to the top with lo-temp glue. Trim away excess ribbon ends.


5. Make a ribbon rose to add to the center of the bow as follows:  
        Tie a knot at the end of a 6' piece of 3/8" white ribbon. Pull the knot as tightly as possible then push firmly into the center of the 3D glue dot.  Fold the ribbon down with the edge next to the knot and push into the glue dot. Continue folding the ribbon and pushing the edge into the glue dot all the way around the knot. Cut the end and fold under the glue dot to secure. 


6. To give the center of the bow a little more pizzaz, I added a rosette ruffle around the outside of the ribbon rose as follows:
        Fold about 6" of the 7/8" ribbon in half then using a needle and thread, gather the edges with a simple running stitch along the edge. Gather until it is long enough to go around the outside edge of the rose. Glue to the center of the bow. 


        I just love how creative we can be with ribbon and this wreath is perfect to brighten up any corner of my home. It was a little small for my front door however, so I made a second one and placed it on top of a Smoothfoam® wreath I had made a few years ago by nesting 2 rings together then wrapping with burlap strips.  Of course I wrapped it with red and white ribbon and it looks wonderful either on my front door or on the mirror in my entryway!


            You can find more ribbon project ideas using Gwen Studios ribbon here on the Designer Crafts Connection blog.

            Gwen Studios ribbon is available at your local Walmart and online at Walmart.com   The wire wreath form and heart ornaments were purchased at my local Dollar Tree.

 Happy Valentine's Day everyone!  Enjoy..........

Yours truly,

Julie 💝

KEEP CALM AND CARRY ON CRAFTING!

Thursday, September 21, 2017

Felt Crafts

L O V E working with felt.  We first met in the 50's when I learned simple sewing stitches in school so we could make dolls. We used felt for the bodies - and yes, my mum kept them.  Please note I was only 8 at the time.....


Felt and I are now grown up, but we remain fast friends.  We just don't see each other as much as we used to, so I was excited to participate in the Designer Crafts Connection blog hop sponsored by Kunin®.

Felt is SO versatile, the hardest part of the project was trying to decide what to create with the samples of felt and trim I received.


I grew up reading stories about fairies, elves and gnomes and over the past few years I've being seeing lots of fairy gardens and fairy houses. Thinking it might be fun for my granddaughter and I to make our own little village, I've been saving small cartons and plastic bottles.  Now seemed like a good time to start. Since felt is made from recycled plastic bottles, I thought it only right to start with an empty water bottle for my project and so it began......  First came the fairy house, which is also a night light,


then the "Kunikins".....


a tree of course.....


and before the day was over I had the beginnings of a small fairy village for the hearth:

Welcome to "Kunindorf"!


Fairy House/Night Light

You will need:
Classic felt 9"x12" craft cuts in 2 shades of green and a light color*
1" Smoothfoam™ Ball
Small and large Pom Pom trim as shown
Lo-temp glue gun
2" LED Tea light
Scissors
Metal (or metal edge ruler)
Craft knife
Cutting mat
Empty plastic water bottle
Small rubber band
* There are lots of wonderful colors of felt to choose from, so please feel free to use colors of your choice.

1.  Use the craft knife to cut the top (rounded part) off the bottle.  This will be the roof.
2.  Cut the bottom of the bottle to about 3" high.
3.  Cut a 3" x 9" strip of light colored felt.  Tip: I prefer to use a craft knife for straight cuts, but make sure the blade is sharp.


4.  Roll the felt and place inside the bottom half of the bottle. Trim as needed.  Place the tea light, upside down in the top.   


5.  Cut a 2.5" x 9" strip of neon green then cut 1.25" deep slits along the edge about 1/2" apart.


6.  With edges even, glue around the top of the bottle.  You may need to adjust the width of the strip to cover the top, since each brand of bottle is different.  Smooth the strips upward towards the neck of the bottle, overlapping as needed then hold in place at the top with the rubber band.


7.  Cut a second strip of felt about 2.5" x 5" in a darker green color.  Cut 4 slits from the edge to within 1" from the opposite edge.  Cut as shown to form an approximate leaf shape.  Cut 5 additional leaf shapes then glue these on top as shown.  With the added leaves on the under side, glue the "collar" around the neck of the bottle on top of the neon green.


8.  To finish, glue large pom pom trim around the bottom edge of the "roof" and the smaller pom pom trim around the neck.  Glue the Smoothfoam ball over the opening at the top of the bottle.  


9.  Since this is a Kunin sponsored project, I printed the Kunin logo onto adhesive backed paper, wrapped it around a toothpick, then inserted the toothpick into the top of the ball.  To finish I added a small pom pom to the top of the toothpick and glued a door shape on the front of the base.  A quilt pin pushed into the bottle is the door knob.


Kunikins

You will need (each):
1" Smoothfoam ball
Classic felt cuts (your choice of color)
Fur yarn - white
Toothpicks
Quilt pins - large red; 2 small black

1.  Cut a 2" x 9" strip of felt.  Roll tightly then secure end with lo-temp glue.


2.  Insert a toothpick into the ball to use as a handle, then glue fur yarn around the center for hair and beard.  Add as much as you like, then trim as needed. Insert the toothpick into the center of the rolled felt (body) and secure with glue.  Push the red quilt pin into the center of the ball for a nose and the 2 black quilt pins will be the eyes.  If the quilt pin is long and comes thru to the opposite side, trim with wire cutters. 


3.  To make a long, skinny hat, roll a 3" wide strip of felt into a cone shape.  Glue then trim into shape.  Secure to the head with 1 or 2 small pins, or glue.  Glue a white pom pom to the tip of the hat.


4.  To make the arms, roll felt (about 3" long) around a piece of cord.  Glue along the edge to secure, then glue the center to the back of the body.  Trim if necessary.


Kunindorf Tree

You will need:
Green or other color of either Classic or Premium felt
2" Wood spool for base (Option: recycle a spool of thread)

1.  For each tree, cut one each 2", 3" and 4" circles.  I used my Cricut® Maker for this - quick and easy, but scissors work fine of course.


2.  Cut each circle in half then roll into a cone shape.  Secure with glue.  Starting with the largest cone, stack and glue the cones on top of each other then place over the top of the spool.  Trim the edge of the bottom cone with small pom pom trim to finish.


3.  Cover the spool with scraps of felt.


Our little village wouldn't be complete without a "Welcome" sign, so I cut small, 1" x 1.5" banner shapes (one for each letter) from felt on my Cricut Maker (easy to cut with scissors too), then added Joy® iron-on embroidered letters.


I hung them from a length of cord with tiny clothes pins between 2 bamboo skewers, stuck into a rectangle of Smoothfoam. 


I'm sure I'll be adding more to our little village as the days go by....  this is just the beginning......  Look for more felt projects on the Designer Crafts Connection blog then comment on your favorites for a chance to win a collection of Kunin felt.  Enjoy!  Y'all come back now. 

Yours truly,
Julie :)

KEEP CALM AND CARRY ON CRAFTING