Showing posts with label DCC. Show all posts

Thursday, June 30, 2022

Curly Ribbon Crafts

 Rock your party with curly ribbon party lights! 

        It's almost time for a firecracker Fourth of July celebration, so let's get our red, white and blue craft on and create a few simple party lights to light up the night!  Here's a couple of ideas to start with...


Here's what I used:
  • Gwen Studios Curly Ribbon - Red, White & Blue
  • Gwen Studios 3/8" Grosgrain Taffy Stripe ribbon - Red & White
  • Double-sided Adhesive Tape
  • Glow Sticks
  • Solar Light Mason Jar Lid
  • Small Crystal Mason Jar
  • Scissors
  • 3 Small wood beads - 2 Red & White
  • Empty plastic bottle - Small
  • 12" Bakers twine, or jute (to hang)

Glow-Stick Light


1. Cut about 2" off the bottom of the plastic bottle. Make sure to include about 1/2" of the flat side of the bottle.

2. Use the point of your scissors to make a hole at the center of the bottom of the bottle. Tie one end of the twine to the glow stick cap then thread the other end through the hole up from the inside. Thread the beads onto the other end then make a loop at the top to hang. This will be the top of your light.
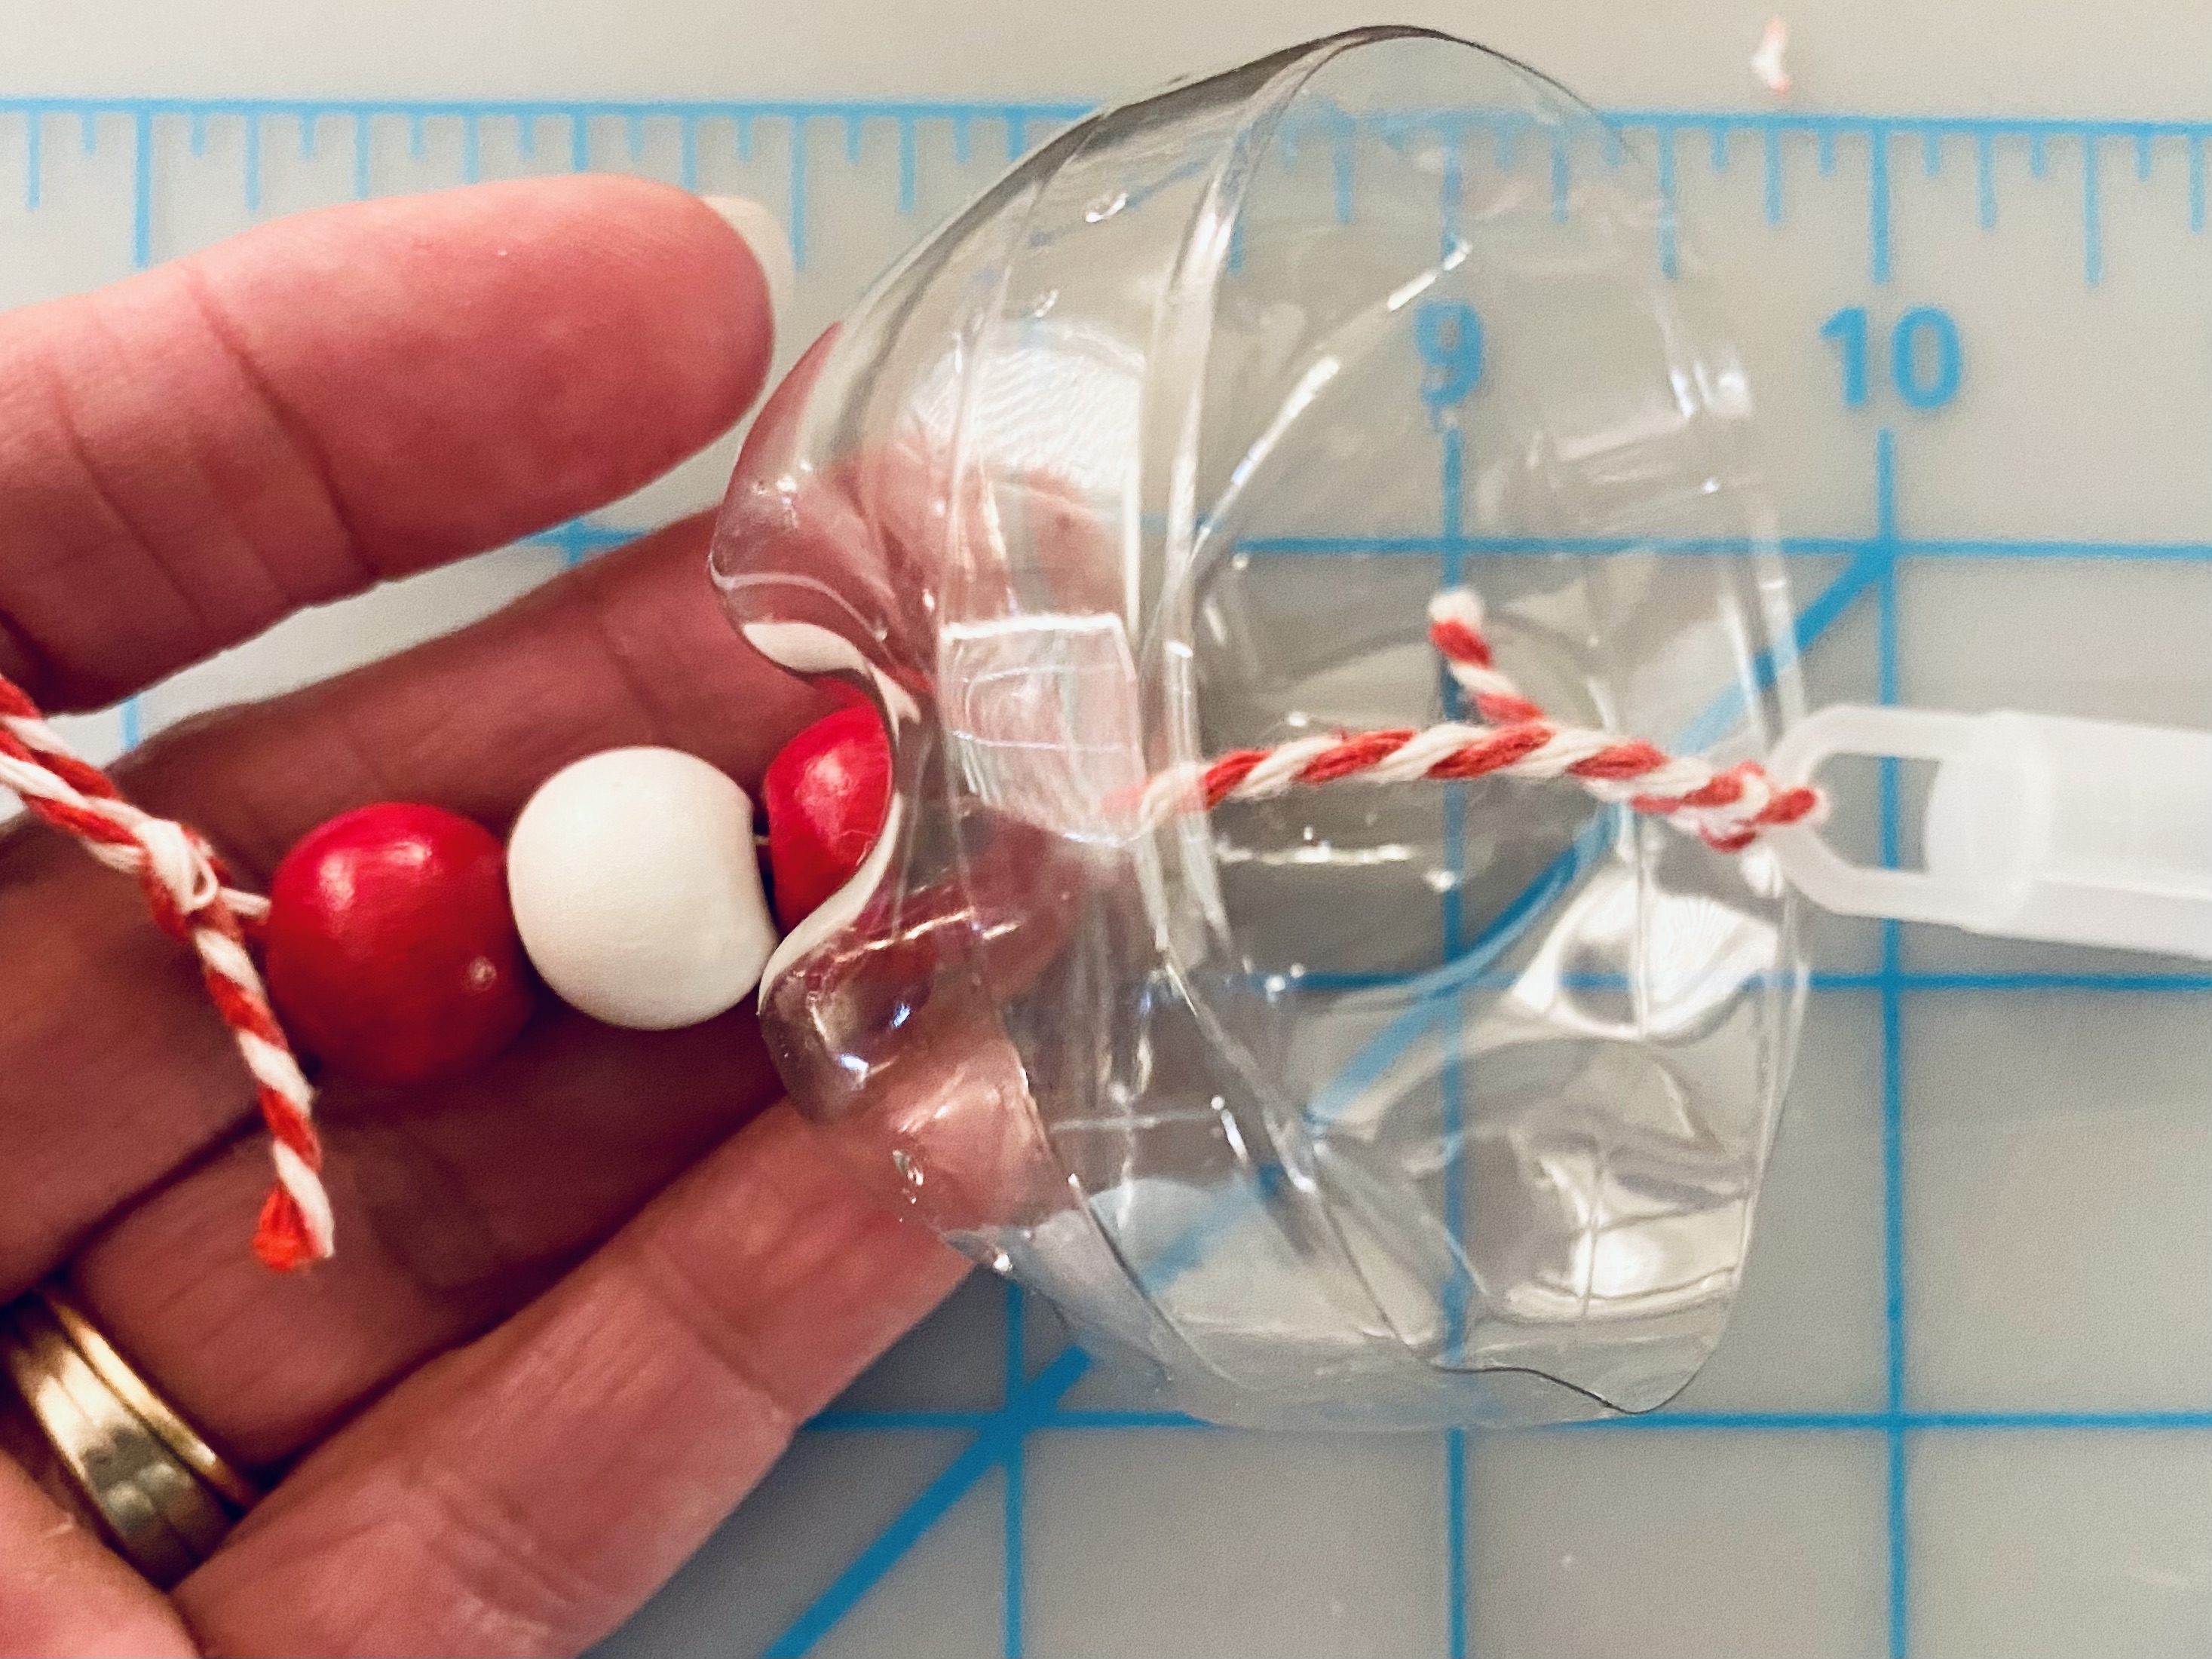

3. With edges aligned, adhere the double-sided tape around the cut edge.

4. Cut equal numbers of each color of curly ribbon into 15" lengths then curl each piece by carefully running the length of ribbon between your thumb and the blade of your scissors.  You will need enough pieces to go around the edge of the bottle. Adhere the end of each curled piece to the adhesive tape around the edge of the bottle. 

5. Adhere grosgrain ribbon around the edge to cover the ends of the ribbon and, if desired,  tie a small bow around the hanger at the top of the beads. Trim the lengths of ribbon as needed then push the glow stick into the top and hang.  Remove the glow stick to activate then replace. 


Mason Jar Solar Light

        You probably have a mason jar, but you may need to purchase the solar light lids. I purchased mine from Amazon.


        This is quick'n EZ to make. You don't even need to use a mason jar since the fairy lights will simply hang down from under the solar lid among the strands of curly ribbon. All you need to do is adhere the double-sided adhesive tape around the edge of the lid, add the curled pieces of ribbon then cover the ends with the grosgrain ribbon to finish.  Note: The wire ring of the hanger that comes with the solar lid, is sized to fit around the neck of a jar. You will need to make an adjustment to it if you plan to use it around the lid if you don't use a jar.

Time to light up the decorations! 


        There are so many other colors of curly ribbon to choose from and with glow-sticks in abundance at different times of the year, I can imagine glow-stick lights with white curly ribbon and google eyes as ghost lights for Halloween in Fall, shades of blue, green and a little pink would make a fabulous jelly fish! What would you make?

Enjoy!

Yours truly,
Julie 💝

KEEP CALM AND CARRY ON CRAFTING!

Curly ribbon used in my projects was provided by Gwen Studios. It is available in a variety of colors at Walmart and online at Walmart.com  All other supplies were purchased by me. 

Look for more curly ribbon projects on the Designer Crafts Connection blog


Friday, May 27, 2022

Red, White and Blue!

         It's been really, really windy in Texas this Spring, so a wind sock seemed like a pretty good project to feature some red & white striped ribbon! Plus, it's always a good idea to be able to look thru the window to see which way the wind is blowing before stepping outside....  and, it's another way to show support for the red, white & blue on Memorial Day, Independence Day and Veterans' Day if you don't have a flagpole...

Here's what you'll need:


1. Separate the embroidery hoop then cut a piece of fabric long enough to go around the inner hoop, plus 2".  I measured the length along the selvedge edge of the fabric, then cut the width between the 6th & 7th rows of stars. (I adjusted later by removing the 6th row of stars.) 


2. Cut two, 30" pieces of string. Use a small piece of tape to attach one end of one piece to the outside edge of the inner hoop.  Note: Unravel the ends so they will lay flat.  Attach the opposite end to the opposite side of the hoop, then add the other piece of string to the hoop in the opposite direction.


3. With the ends of the string facing upwards and the loops hanging down, wrap the fabric around the outside of the hoop with the pattern facing inward. You may find it easier to put double-sided tape around the outside of the hoop first to hold the fabric in place. Overlap the ends then fold the upper piece of fabric back 1".  Adjust the top edge so about 1" of the fabric shows above the edge of the hoop.


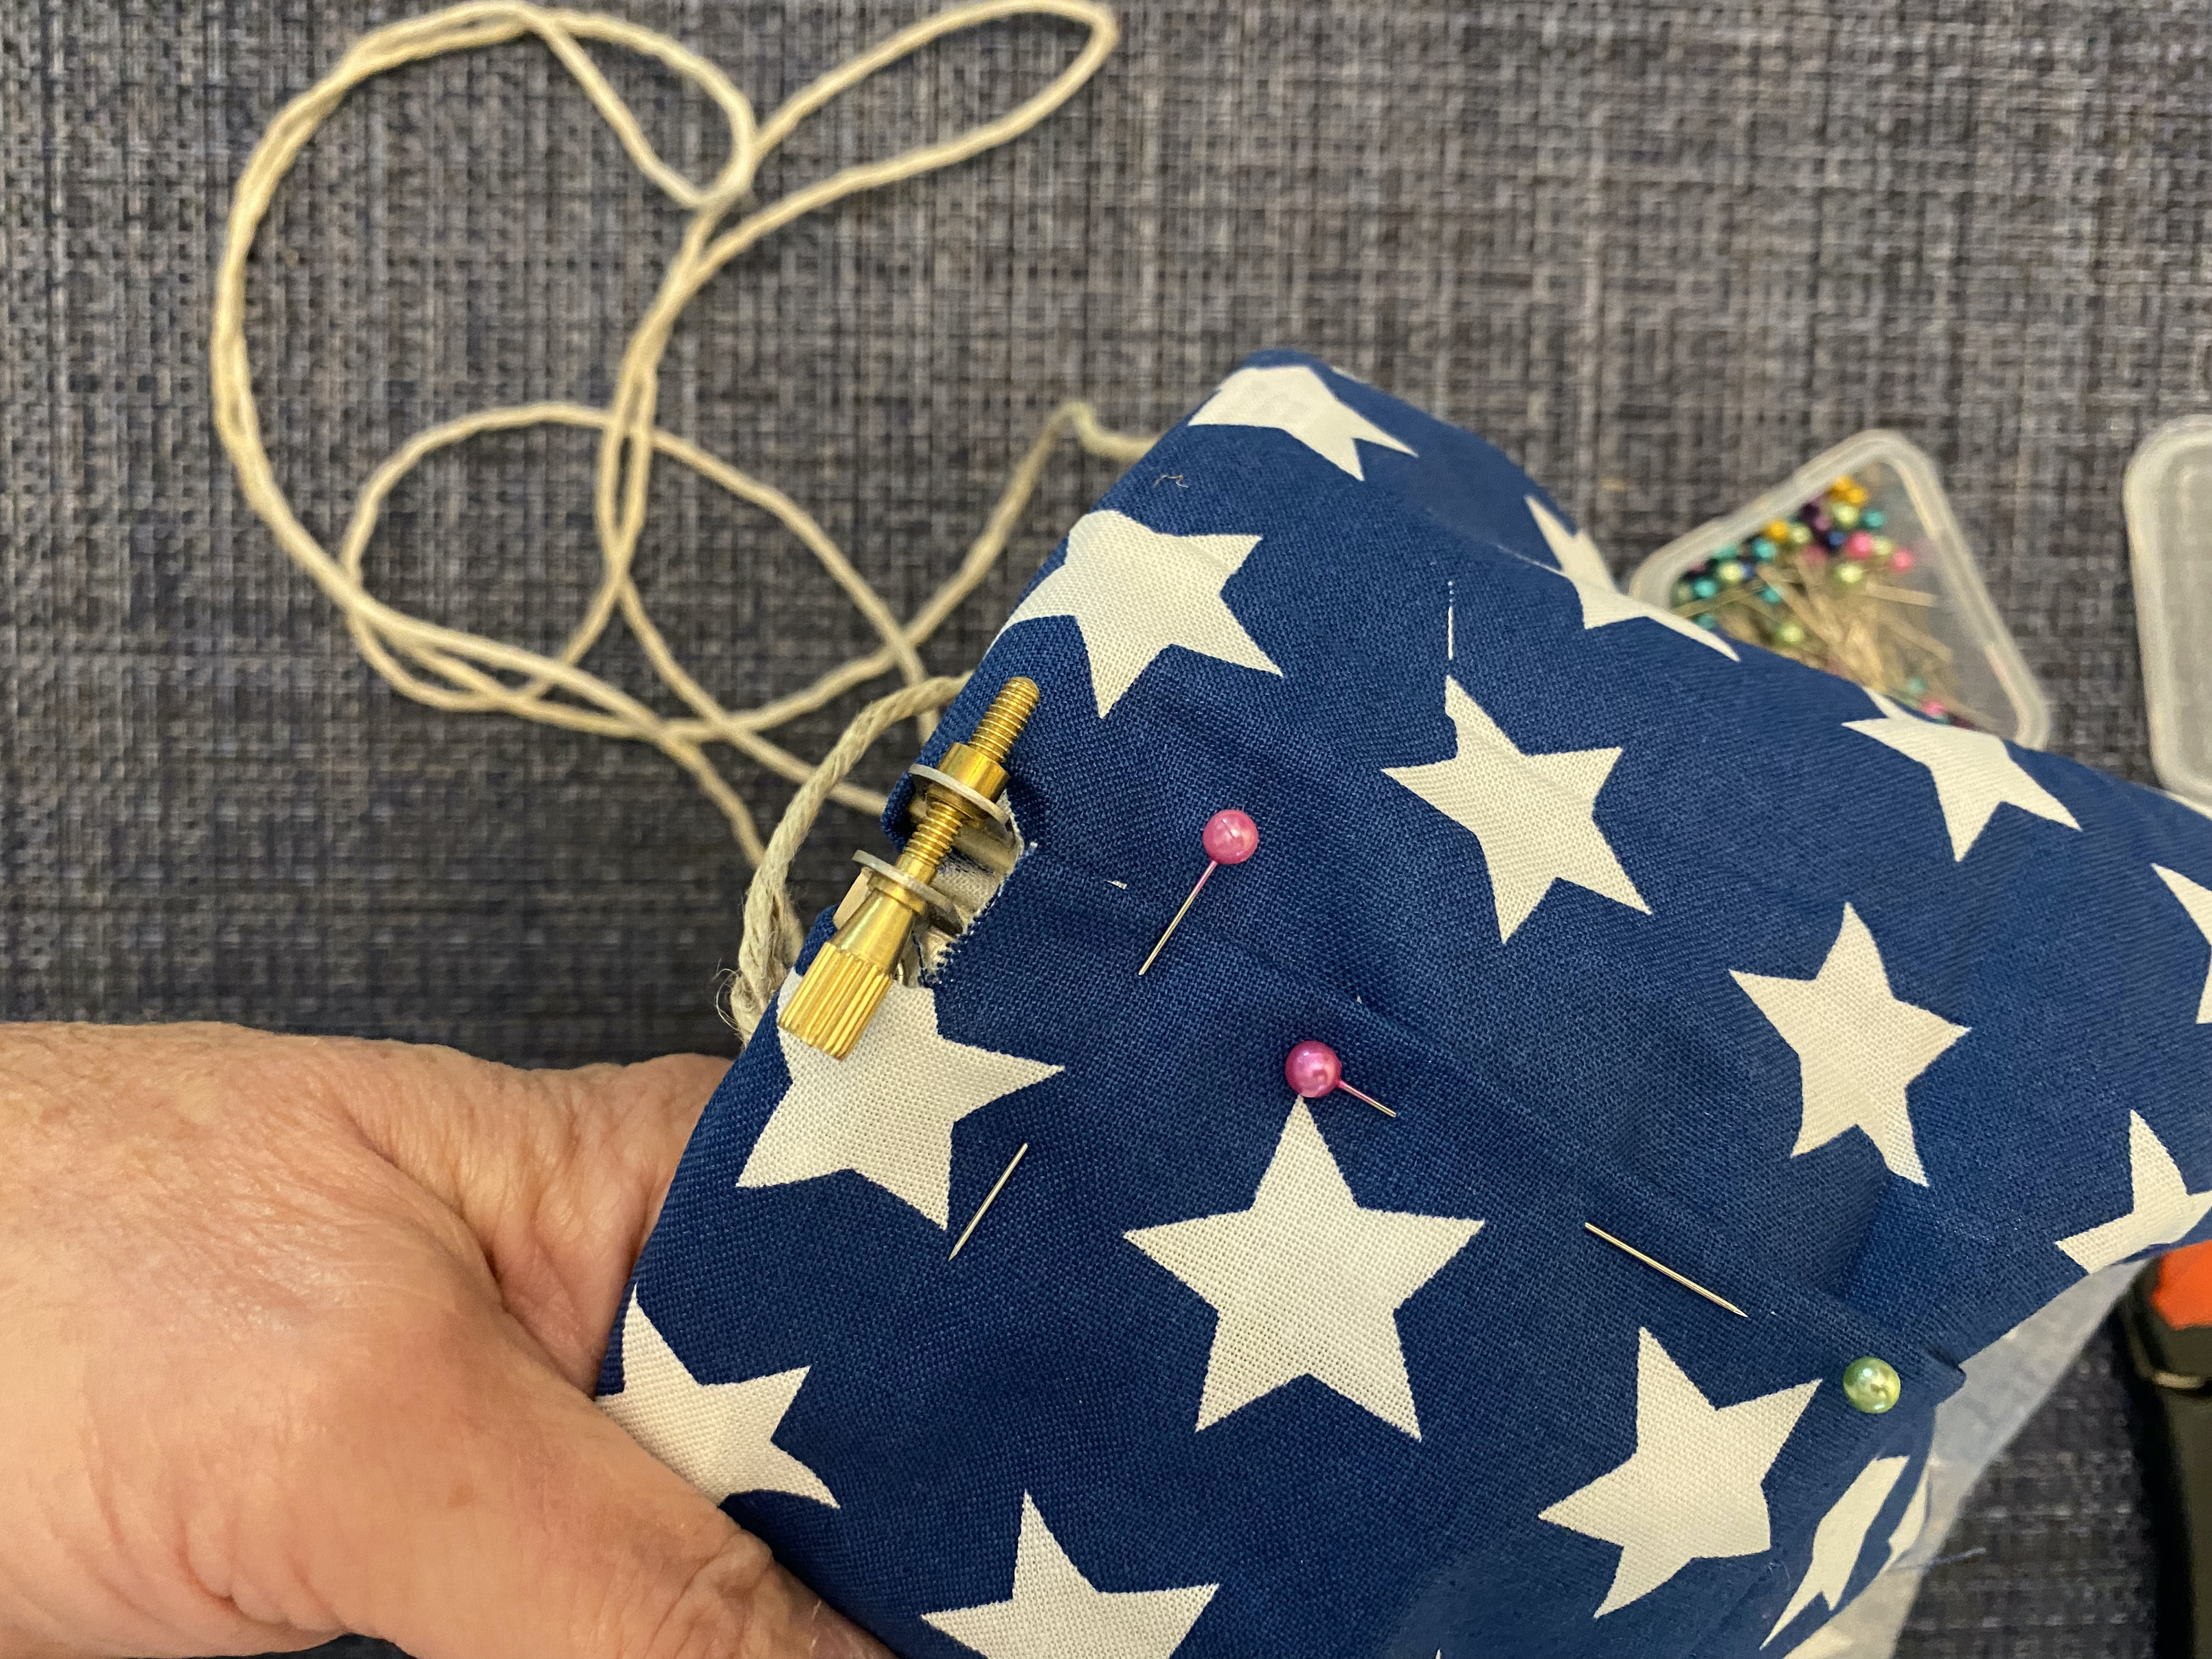
3.  Unscrew the outer hoop so you can slide it around the fabric covered inner hoop with the screw placed where the ends of the fabric overlap.Tighten the outer hoop to hold the fabric and the ends of the string in place. Flip the fabric over the outer hoop. 


4. Snip the fabric where the ends overlap around the screw. Fold one end under then pin together.  "A stitch in time saves nine, but I hot glue mine" is a popular saying in crafts, but for this project I used a simple running stitch to stitch the sides together. 


5.  Cut one spool of ribbon into 8 pieces. (I folded the full length of ribbon from the spool in half, then in half two more times to create 8 equal pieces.) Using one of the pieces as a guide,  cut 6 additional pieces from the second spool. 

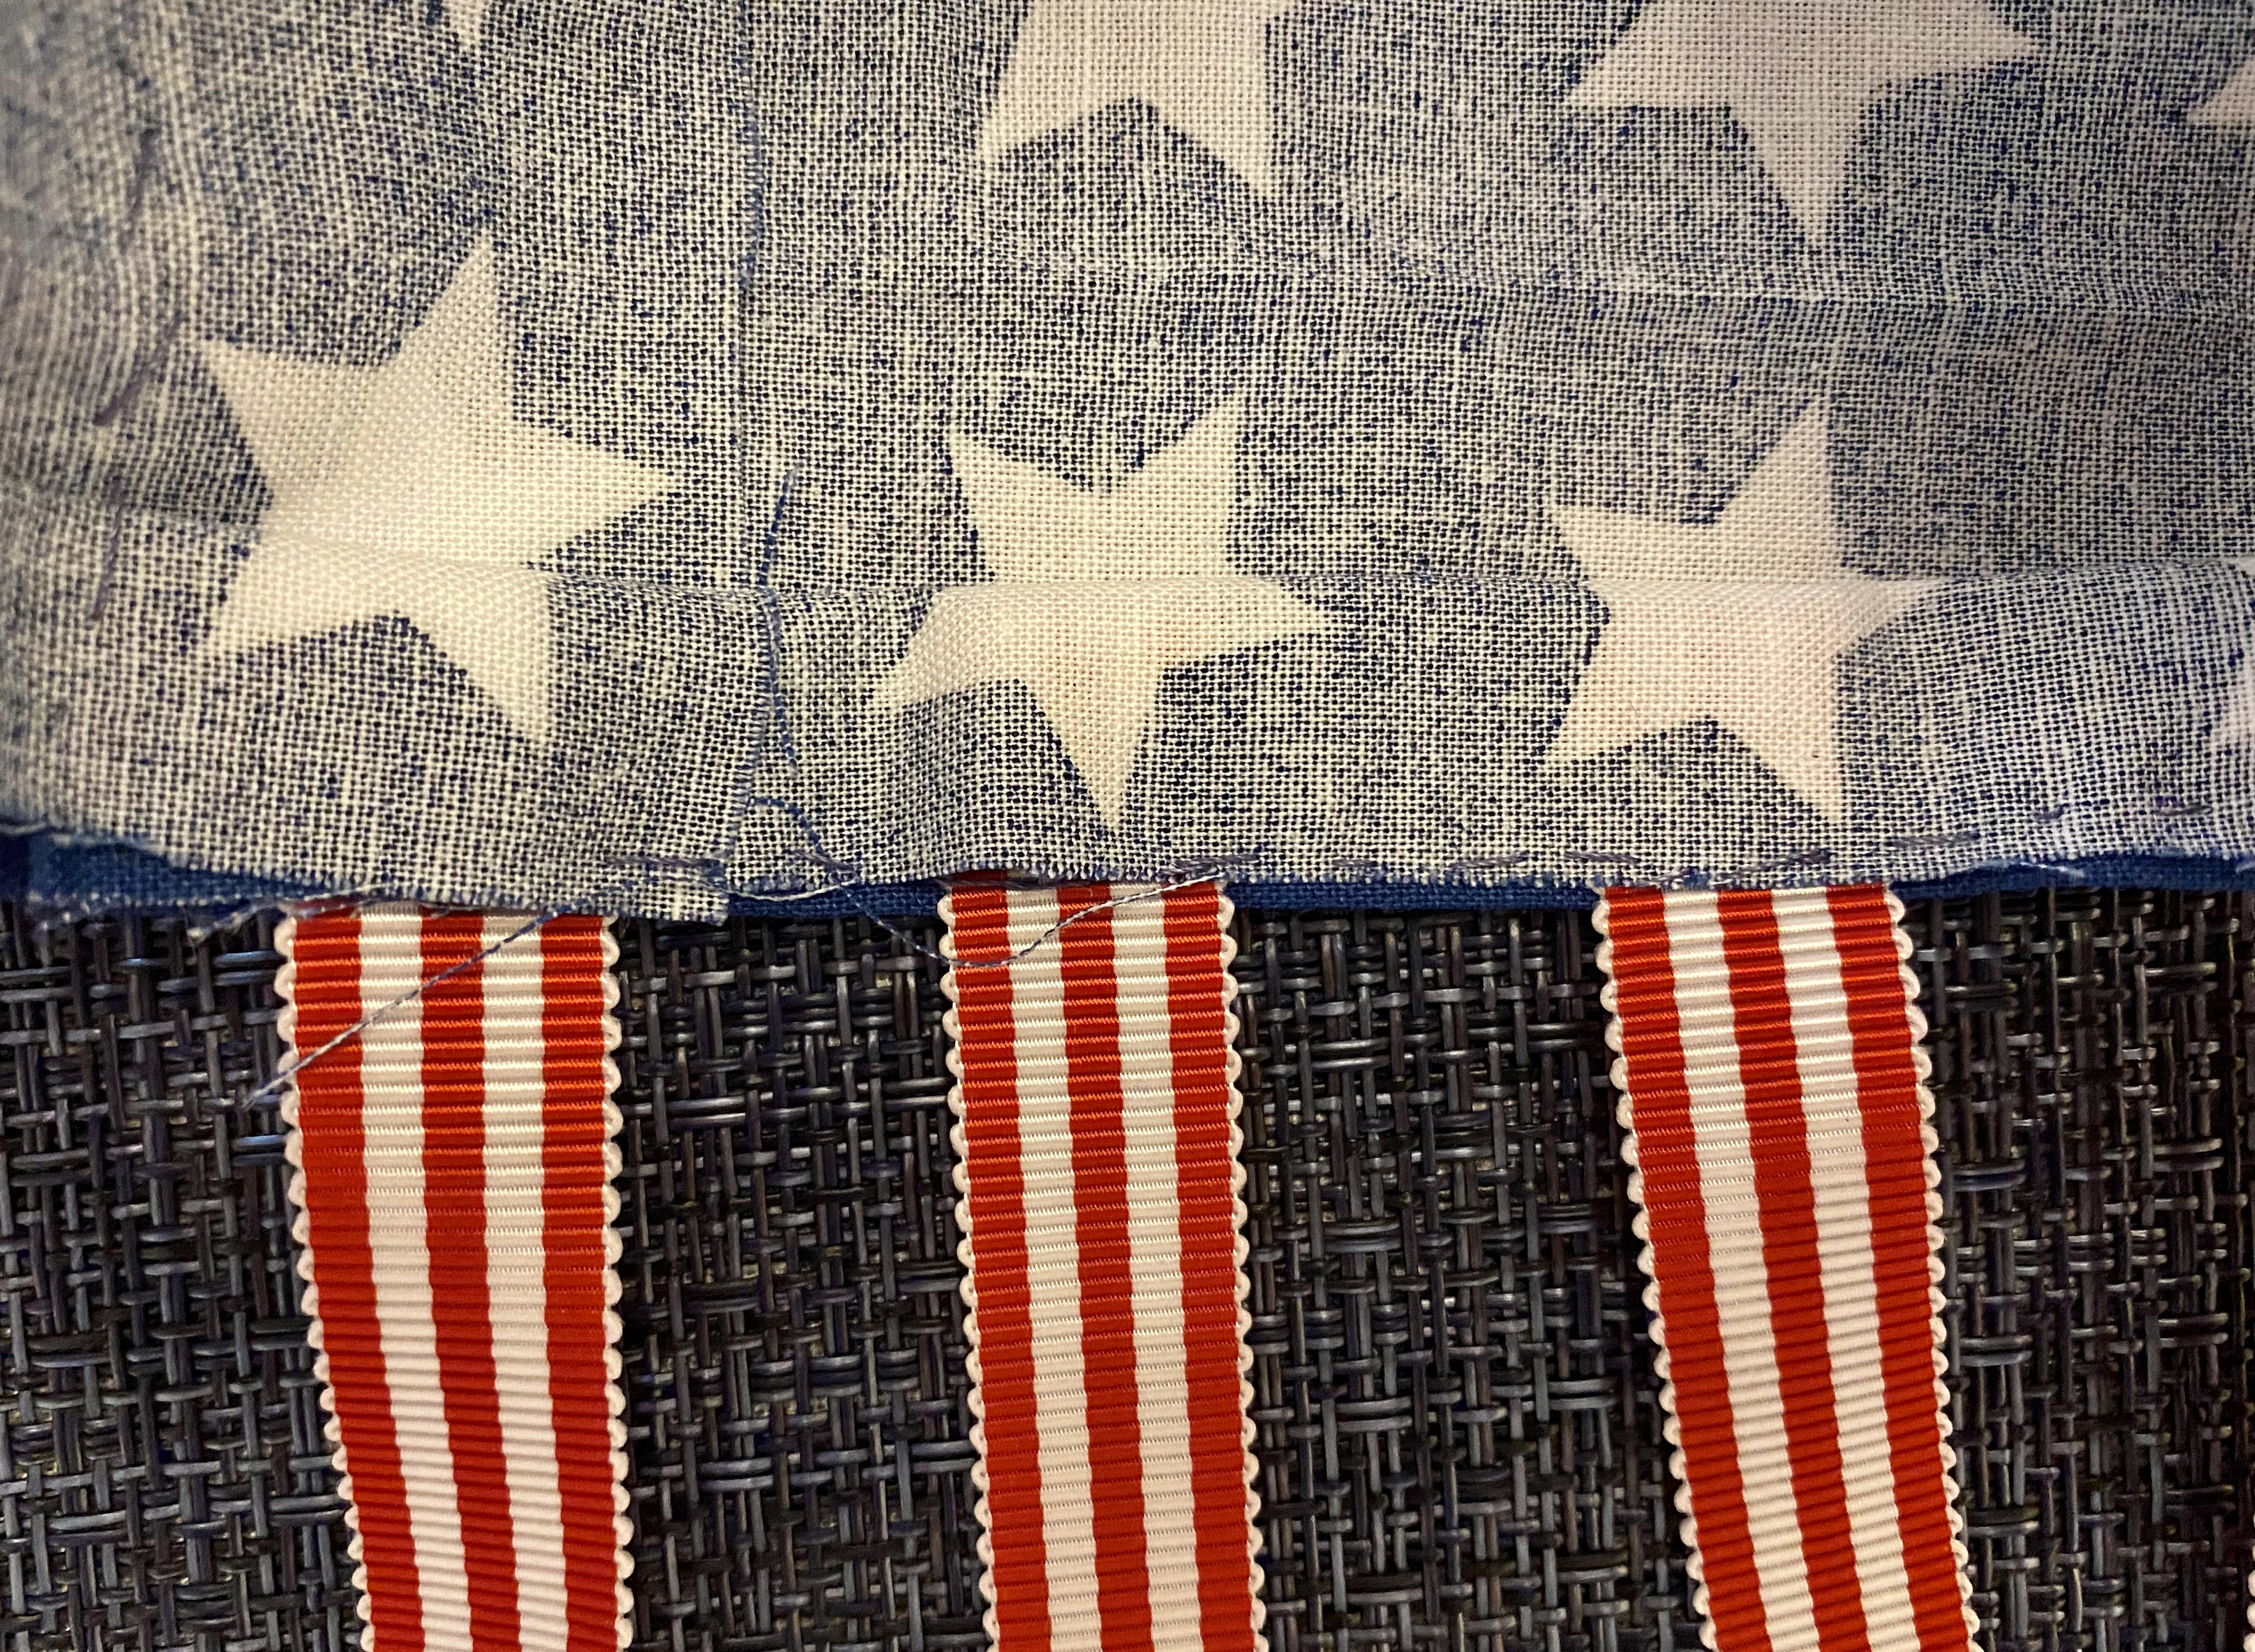
6.  Attach the ribbons around the bottom of the fabric as follows:
  • Fold the bottom edge of the fabric upward then place the end of the ribbon at the center.  (I used the stars as a guide for placement.)
  • Pull the top of the fabric down over the end of the ribbon. 
  • Pin in place all around the edge, then stitch to secure.


7. Thread the bead over the folded ends of the strings. Make sure the ends are aven then tie an overhand knot above the bead to create the hanger. 


With a wide variety of ribbons to choose from, this is a fun project for parties and celebrations! Enjoy!

Yours truly,
Julie 💝

KEEP CALM AND CARRY ON CRAFTING!

Look for more inspiration using the red & white stripe ribbon from Gwen Studios on the 


The red & white striped ribbon was provided for this project by Gwen Studios. 
The fabric and embroidery hoop were purchased at my local Michaels store.


Monday, February 21, 2022

Leprechaun Gnome

       Guess what! It's almost March! Whether it comes in like a lion or a lamb, it'll be here before we know it! We'll be springing forward, cleaning out flower beds, planting spring flowers,  pruning rose bushes and, if you're like me, you'll be ready to get your green on and celebrate St. Patrick's day!  

       Before we start thinking corned beef and green beer,  let's put together a few Leprechaun gnomes and decorate! After all it isn't St. Patrick's day unless we have a few shamrocks,  gold coins and Leprechauns (even if they do look like gnomes).... 😜 

You'll need:
  • Gwen Studios* 3/8" single face satin ribbon - Green
  • Gwen Studios* 3/8" Polka Dot grosgrain ribbon - Green
  • Kunin® Presto Felt - Green
  • Double stick 1/4" tape
  • Smoothfoam® 1" ball
  • Small wood bead
  • Orange/Red yarn
  • LoTemp glue
  • Scissors 


Instructions:

1.  Cut a 6" circle from the felt, then cut into quarters. You'll need one quarter for each hat.

2. Remove the backing from one piece of felt then cover the adhesive with alternating strips of solid and polka dot ribbon. Place the first strip along one straight edge allowing about half the width of the ribbon to overlap the edge.  Flip over and trim the ends even with the felt.


3. To make the beard wrap the yarn around a ruler.  Wrapped yarn should be long enough to go along the curved edge of the felt piece.  Place a piece of double stick tape along the wrapped yarn.  Remove the backing.  TIP: Extend one end of the tape past the end of the yarn to make it easier to remove the backing paper.  Cut the yarn along one edge of the adhesive strip then attach to the bottom edge of the felt.


4.  With the beard on the inside, fold the felt into a cone shape overlapping the ribbon edge as shown. Glue in place with lo-temp glue.


5.  Flip the hat upside down, allowing the yarn to fall away from the inside, then push the foam ball into the hat. 

6. Cut a 1" x 4" piece of felt then remove about 1" of the backing from one end. Fold 10"-12" of grosgrain ribbon in half then press onto the end of the felt.  Roll up the strip of felt with the ribbon at the center and the adhesive to the inside. This will be the body and "legs". Glue the top of the roll to the base of the ball inside the hat. Tie a knot at the end of each ribbon leg then glue the small wood bead to the front for a nose to finish.  


        Much like an an elf, these little Irish gnomes can be found anywhere around the house; hiding in the center of a decorative shamrock, chilling on the mantel, or hanging from a wreath.  You can even attach one to your sweatshirt or jacket when you head out on the seventeenth so you don't get "pinched"..... 


May the road rise up to meet you
 
May the wind always be at your back
 
May the sun shine warm upon your face
 
and rains fall soft upon your fields... 
 
And, until we meet again
 
May God hold you in the palm of His hand


Enjoy!

Yours truly,
Julie 💝

KEEP CALM AND CARRY ON CRAFTING! 

*Ribbon used in these projects was provided by Gwen Studios and can be found at your local Walmart and online at Walmart.com

Look for more ribbon crafts featuring Gwen Studios ribbon here: