Showing posts with label Christmas Crafts; Julie McGuffee; Scrapbook Memories. Show all posts

Monday, December 12, 2011

Basic Christmas Crafts

I love working with small wood shapes.  I love to draw and maybe that's why.....  everything is made up of basic shapes - circles, squares, hearts, ovals, etc and these can be combined into all sorts of things.  Check out these simple projects.  All you need are some basic wood shapes, acrylic paint, a paintbrush and some glue. You can find instructions for these projects and more at michaels.com


Enjoy!  Y'all come back now.........

Yours truly,
Julie :)

Friday, June 24, 2011

Chipboard Baby Album

My nephew and his wife are expecting a baby next month, so, of course we've been talking about different ways to display and scrapbook baby pictures.  One of the projects we talked about was a chipboard album I designed for Elmer's for show 1407 of Scrapbook Memories.  Here's a recap of the segment. Enjoy!


Don't forget to check back here on July 1st for our monthly giveaway.  It's a FIRECRACKER of a giveaway brought to you by ilovetocreate and you won't want to miss it!!

Yours truly,
Julie :)

Thursday, May 5, 2011

May Giveaway!

May 5th is a great day!  
It's National Scrapbook day, Cinco de Mayo 
and it's my birthday!  

So, for the month of May the giveaway is a  
BIRTHDAY PRESENT - FOR YOU! 

   
This month's winner will receive a box full of crafty products including some cool tools. To enter to win you must guess what at least 4 of these products will be.  To help with the guesswork, there is a different clue on 4 of the blogs throughout our group.  You'll find a clue wherever you see this photo of the birthday bag.  List your answers in the comments here at Life in the Craft Lane.  Comments won't be published until the winner is revealed on May 19th.  BTW, the clues may not be in numerical order.  Good Luck!

Y'all come back now..........

Yours truly,
Julie :)

Tuesday, February 1, 2011

Stuck in LA...........


It's not snowing here, but heard on the news this am that Dallas/Fort Worth airport is closed... so, we've had to change our flight to tomorrow.  Not sure the ice will be cleared up by then, so we may even end up having to stay till Thursday!!!!  Luckily we can keep the hotel room here - better than being stuck at the airport.... what a mess.  The airport isn't the real problem either.  The roads are so bad in the area, I doubt my hubby can get to the airport to pick us up.  We may need to rent a snow plough....LOL

On a positive note however, this was a great show and I have LOTS & LOTS of photos to share. This will give me time to plug in the MacBook and start to upload them, so Y'all come back now....

Yours truly,
Julie :)

Wednesday, December 1, 2010

Christmas Cards - Quick'n EZ


'Tis the season to think about sending Christmas cards, so here's an idea for you.  You can cut a letter size piece of cardstock in half to create two, 8.5" x 5.5", pieces which, when folded in half will each make a "Quarter Card", or look in the "dollar" bins at Michaels for a package of plain cards and envelopes!  It doesn't matter if there's something on the front, because this will be covered up.  Pick two scraps of coordinating/complementary papers cut to half the height and the width of the card.  Glue, one above the other onto the front then glue a piece of ribbon over the area where they meet.  

Now here's the fun part.  Create the saying in a circle in Microsoft word, using the drawing toolbar, then add an image at the center.  If you don't have access to images and can't find any clip art that you like, check out my images under "Pages" in the sidebar to the left (Images for Personal Use).  You can drag these onto your desktop then import them into your Word doc and re-size as needed.  

Print the monograms onto white card stock then cut the circles you created with either a circle punch, or a set of nesting dies.  Mat with additional colors of card stock, using larger plain or decorative punches.  I used Spellbinders' Nestability™ circle dies and Pinking circle dies to make mine.  Glue the monogram pieces together then attach to the front with foam squares or circles for a little dimension.  I also added some crystal stickers between the wording.  Here are some samples for inspiration  Enjoy!


Y'all come back now!

Yours truly,
Julie :)


Sizzix Blog Hop - Project #5


Can't believe another week has already gone by, and, as usual I realize I have to post a project!  so Last Minute Lucy is at it again with something "Quick'n EZ" - definitely the title of my next book.  Not having time to figure out all the paper engineering, I used the frame with the words.  I covered this piece with silver glitter, then taped a piece of acetate to the back.  I cut a heart from red glitter card stock and glued it to the front and added a wire hanger.  It needed jazzing up a bit, so I gave my heart some feather wings and here 'tis.......  Yes, you've guessed it.  After using feathers on 3 of the 5 projects, so far, you've probably realized I have a lot of them.....  they are kinda fun.  Y'all come back now........


Yours truly,
Julie :)

Wednesday, November 24, 2010

Sizzix Blog Hop - Project #4


HAPPY THANKSGIVING EVERYONE!

And without more ado, since it is Thanksgiving, here are my projects - Quick'n EZ as usual.  I'm only using materials I have on hand and the mat board pieces that came for each project.  This frame is a die cut design from Eileen Hull.  I découpaged the large board with a scrap of scrapbook paper then wrapped ribbon around the inner frame.  One (Hearts and Flowers) then embellished with a Quick'n EZ ribbon rose, the second was matted with green glitter cardstock and actually features a photo.......  so, Ta Dah..... here they are..........


You may have guessed, I'm having a fling with ribbon and bling..............  Enjoy!  Y'all come back now.

Yours truly,
Julie :)

Sunday, November 21, 2010

Christmas is Coming!


The goose is getting fat.  Please put a penny in the old man's hat.  
If you haven't got a penny, a ha'penny will do.  
If you haven't got a ha'penny, God Bless You!

It's Thanksgiving this week and 4 weeks later it will be Christmas.  There always so much to do and sometimes those dollars and cents get away from us so we make our own Christmas ornaments and in true crafty fashion we usually make them from things we already have on hand, after all a "penny saved is a penny earned".  

I've been making these wax ornaments since the 60's.  They're easy to make using left over candles - recycling at its best - and they look so pretty on the tree since the wax glows when it catches the light.    You can also make them from beeswax for an "antique" look and color them with "Rub'n Buff".
BTW:  This is a adult craft and not recommended for children.


    Here's How:   Melt wax in a double boiler.  I have an old one I use only for this.  Place PLASTIC
cookie cutters onto wax paper.  You can use a variety of sizes and shapes.  Don't let the wax overheat.  You'll know when it's ready by dipping a metal spoon into the liquid wax.  If the wax coats the spoon as soon as you pull it out, then it's at the right temperature.  Spoon wax slowly into the cookie cutters.  It should be about 3/8" thick.  Don't worry if some of the wax seeps out around the sides, you can break it away when the wax becomes hard.   Let the wax harden then gently pop the cookie away from the wax.  The little angels were made by pouring wax into a candy mold.  Let these harden in the freezer for 15-20 mins, then tap the mold sharply on the counter - the shapes will pop right out.  The best thing about this project is, that if one of the ornaments breaks, or doesn't look right, you just pop it back in the double boiler.  Definitely a "McGoof proof" project.  Once all the ornaments are made I thread gold or silver thread onto a tapestry needle, then heat the end of the needle in a candle flame and push thru the top of the ornament.  When using a candy mold, make a hanger first by knotting the ends of about a 4" piece of thread, then placing it into the mold before adding the wax.

More ideas to come so, ya'll come back now!

Yours truly,
Julie :)

Friday, October 15, 2010

Grand Opening!!


Remember about a week ago, I said I was going to open an Etsy shop?  Well after signing up and spending hours on wording, photos and a whole lot more, I have opened my shop - but not on Etsy.  I got to thinking - always a dangerous pastime, usually while I'm driving.  I really don't want to be in the "selling" business, but I have things that I can give away.  Unfortunately, there are charges involved in getting something from A (me) to B (you).  Therein lay my dilemma - I can give away the product, but it has to ship.  So, I had an awesomely bright idea and have opened my shop on my website.  There you'll find a photo of things I can send you.  Just click on the shop banner above and it will take you there.  Since shipping charges vary from state to state, each item will have a set fee - same for everyone and easy for me.  It will be loosely based on the size of those pre-paid boxes the USPS is advertising.  I will try to use the smallest box, but if I need a bigger one, I will add some "goodies".  You will definitely get more than your cost for shipping.   Hope you like the idea!

Here's a picture of the first kit for the Christmas Crafts projects.  It even includes things like scissors, glue, glitter paint, sponge brush, etc., and most of the pieces are pre-cut.


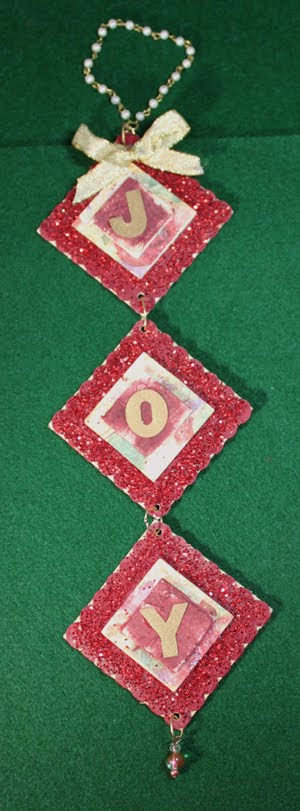
These are the projects again.  The instructions are here on my blog under PAGES in the sidebar.


Enjoy!

Yours truly,
Julie :)

Tuesday, October 5, 2010

It's a Slippery Slope


Can you believe it's already October, the beginning of the busiest craft season of the year! During the next few weeks we'll be decorating for Halloween/Fall, if you haven't done so already, followed by Thanksgiving then Christmas (or any other holiday you may celebrate). It's definitely not too soon to start thinking about all the cool gifts and decorations you can make to amaze your friends and family.

My friend, and business partner, Jean, and I taught Christmas craft classes at the CHA Supershow this past summer in Chicago. Christmas in July is always a "stretch" for me, but October.... well that's another story. If I don't start now, nothing will get done. I have to admit though, that I live by the old adage, "if it weren't for the last minute, nothing would get done". Christmas is like birthdays, it comes every year whether we're ready or not, and each New Year I make a resolution to be more prepared - let's just say, I'm not the boy scout type.......

However, YOU may want to start early, so here are photos of the projects I designed for my Christmas Crafts class. All the supplies are easy to find at your local craft store and I will post a list of instructions on the Christmas Crafts page (see left column under pages). I also have some kits available, which I will post in my Etsy shop. The kits will include everything you need to create ALL of the projects, including things like glue! ETSY Shop!!!!!! Yes, I have an Etsy shop, but it's empty at the moment.........


You'll have to be patient with me, I still have to load everything to the shop. Once I've got it all figured out, I will announce the GRAND OPENING of Craft Lane Designs. Hopefully it will be up and running by the weekend. I have "Nana duty" thru mid October, so my time is a little limited at the mo; another reason I haven't posted for a week! My bad.............

Yours truly,
Julie :)