It's Mothers Day in a little over a week! Are you ready?
Mothers Day is always celebrated the 2nd Sunday in May in the US, but in England "Mothering Sunday" was celebrated on the fourth Sunday in Lent - not quite as easy to remember since, like Easter it would change from year to year. You can read about the history of Mothers Day here if you're interested, but nowadays the biggest question top of mind is, what to get mom!
How about a gift basket?
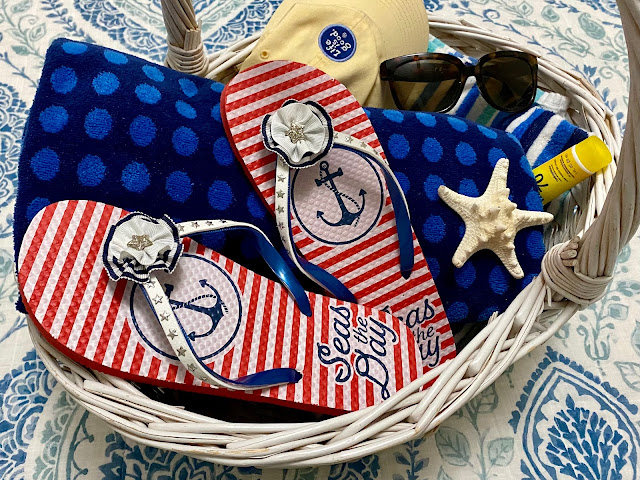
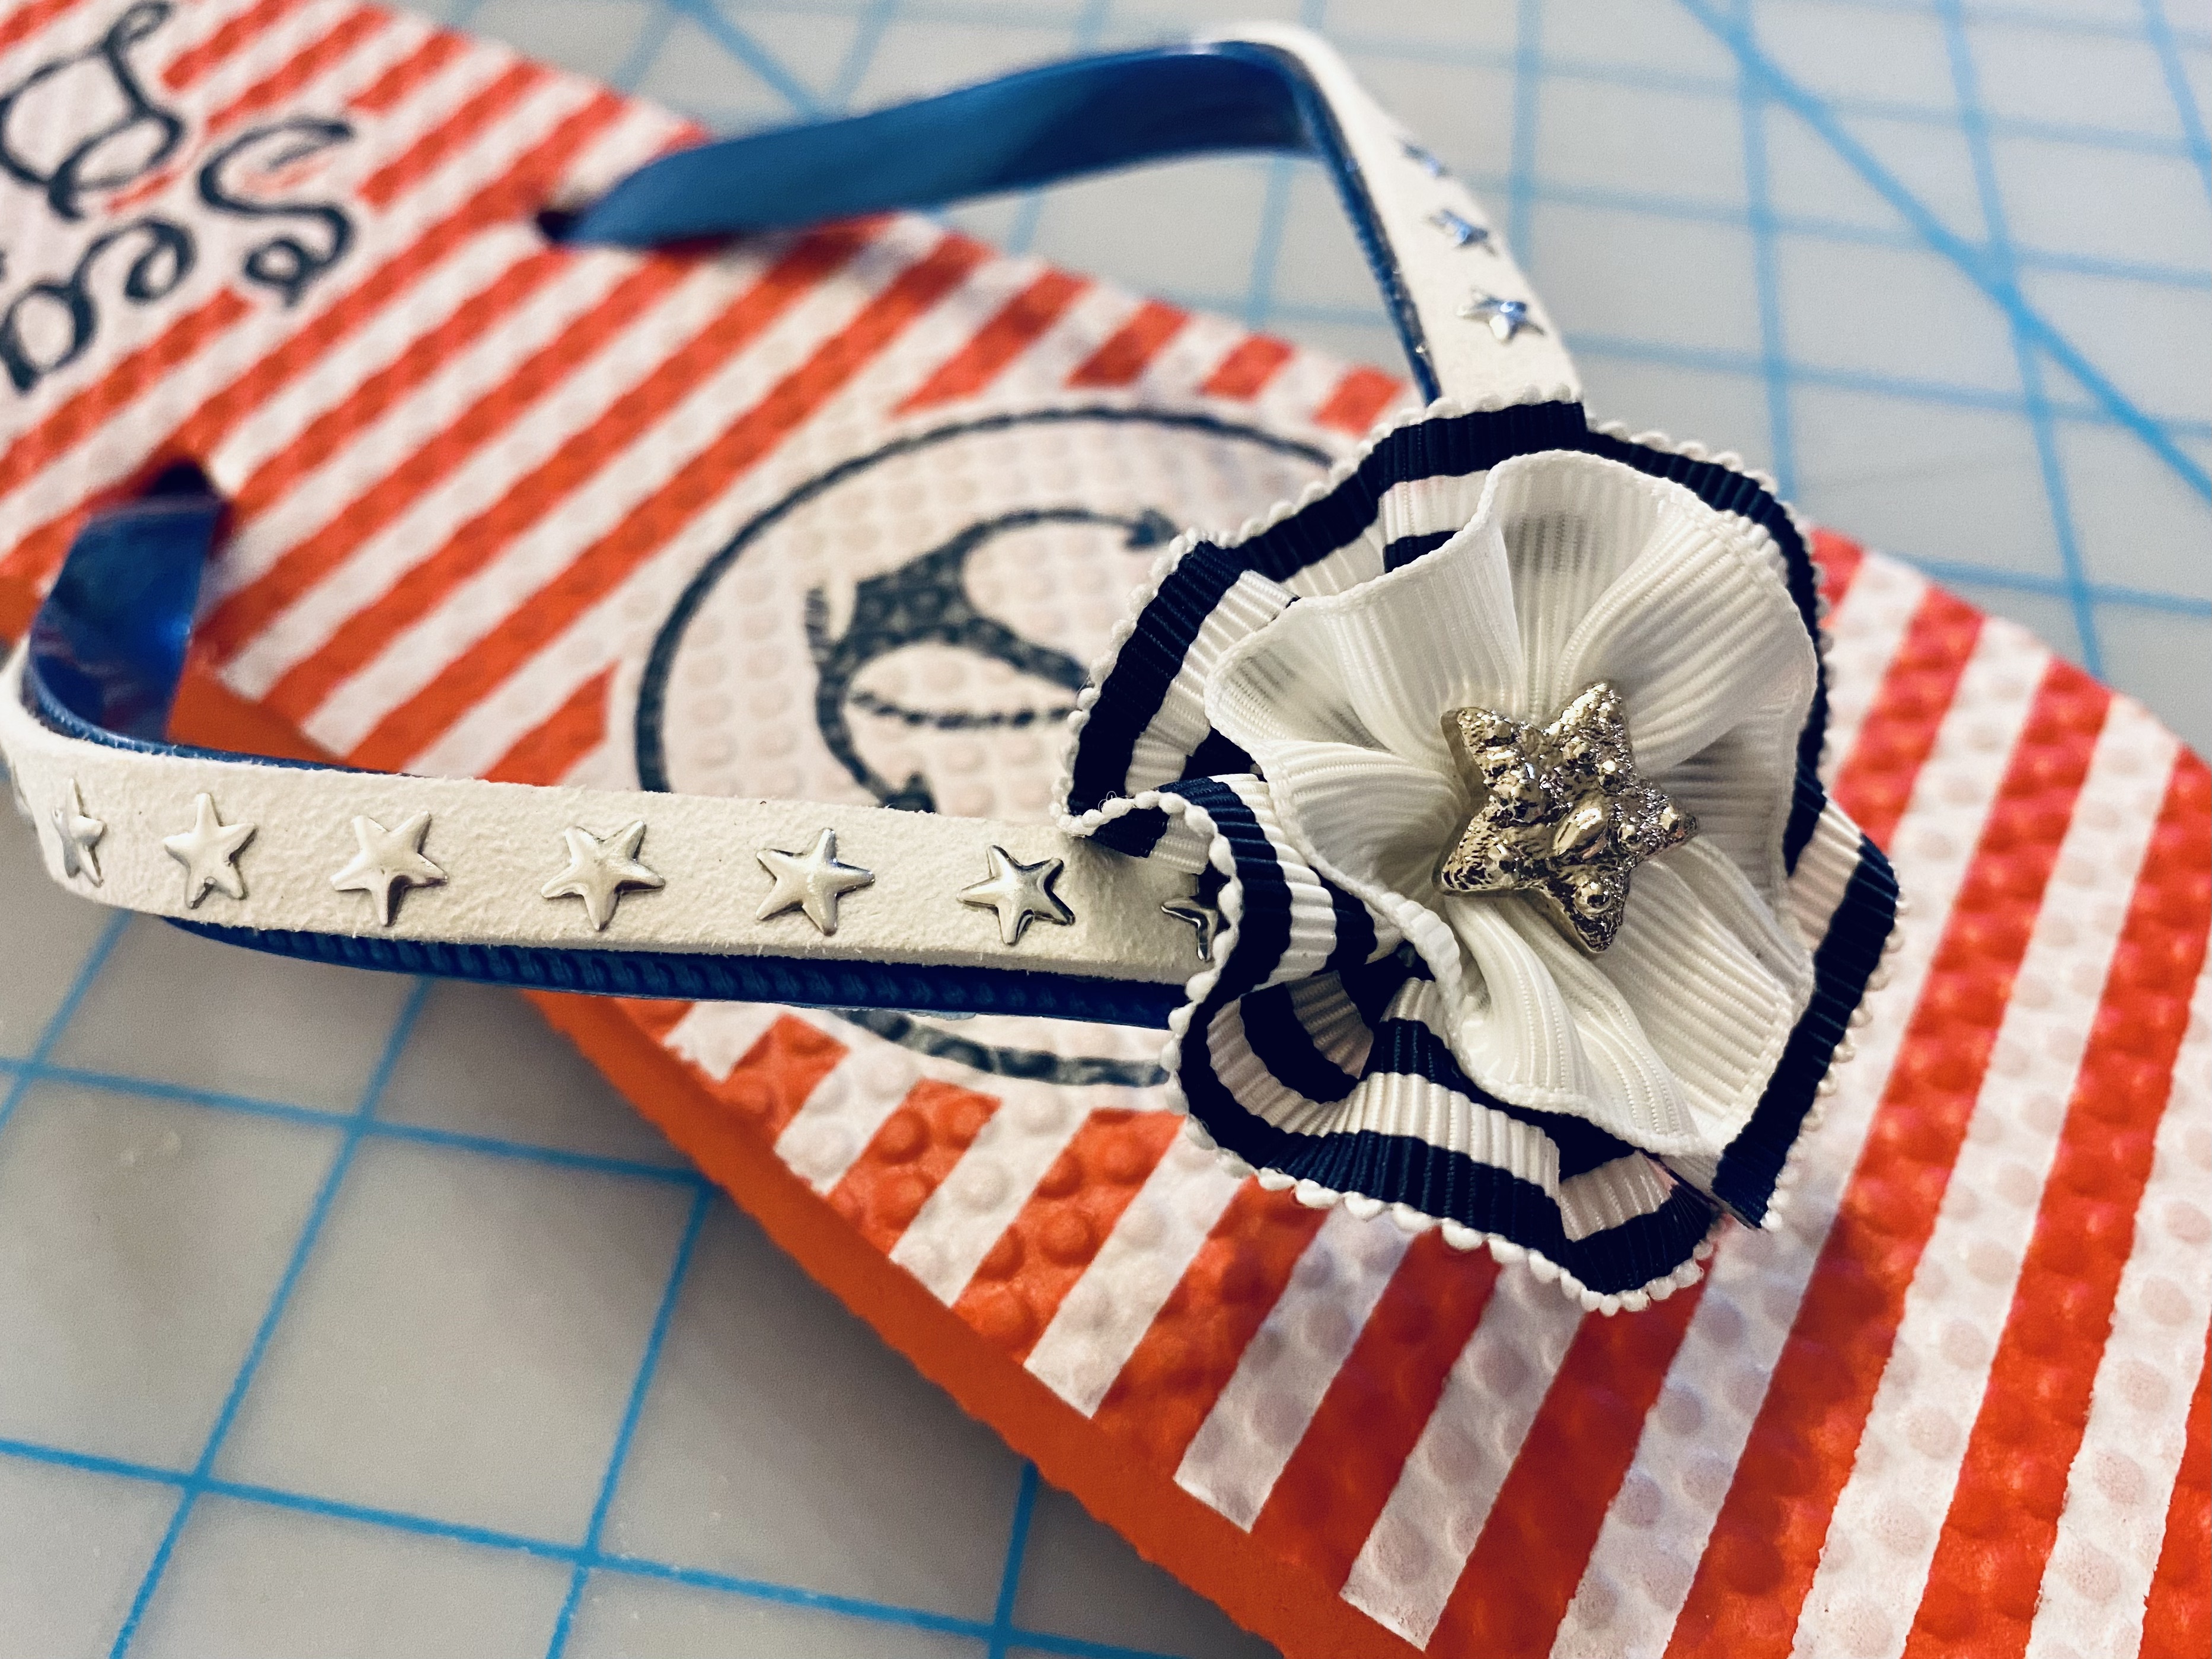
Everybody loves a gift basket, right? This mom loves the beach so a basket filled with something special for the beach would be my top choice. I loved these "Seas the Day" flip flops from my local Dollar (& a quarter) Tree, but they needed a little extra pizzaz. I had some white, star studded suede ribbon, blue Taffy striped and white grosgrain ribbon from Gwen Studios. I also found two, star shaped, silver buttons in my stash and got to work.
1. Measure then adhere pieces of the suede ribbon to the top of each strap. NOTE: I planned to use double-sided adhesive tape, but found it did not stay securely on the plastic straps, so I used hot glue instead. Please use an adhesive that works best for the flip flops you plan to decorate.
2. To make the rosettes, cut a 7" piece of the blue Taffy ribbon and a 5" piece of white grosgrain ribbon. Gather each piece with a small running (up and down) stitch along the bottom edge. Pull the ends together to create the ruffle, leaving a larger circle at the center of the stripe ribbon as shown. Stitch ends together to secure. Place the white ribbon ruffle on top of the stripe ribbon and the button shank thru the center hole, then glue to the top of the flip flop straps to finish.
Don't they look cute!
All that's needed now is a sun hat, sun glasses, beach towels and sunscreen and mom is good to go to her favorite beach where she can "seas the day" in style.
But wait! Not just for beach flip flops, I can see all kinds of potential for up-cycling some older flip flops for later in the day. I also had some Gwen Studios satin and rhinestone trim and decided to go all out and bling it on!!!
1. Measure then cut the wide trim to fit over the fabric straps on these older flip flops. Secure with double sided adheive since it works well on fabric. You can also stitch the trim in place to make it really secure.
2. I covered the center with additional trim from the same card. To make the short piece a little wider, I adhered one layer of trim at the center of the satin trim. Cut to size then adhere to the center as shown.
This mom is definitely walking out in style when heading out for a sunset cocktail don't you think...
It's amazing what can be done by simply adding ribbon and trim!
You can find more Mothers Day project inspiration using
Gwen Studios ribbons from industry designers on the
Designer Crafts Connection blog. Check it out and let us know what you think!
Yours truly,
Julie 💝
KEEP CALM AND CARRY ON CRAFTING
Ribbons and trims used in these projects was provided by Gwen Studios. It is available at your local Walmart store and Walmart online