
I see them here, I see them there, wooden beads are everywhere!
I'm sure you've noticed too, and, like me, you've thought - "I can make that'! I especially like beaded wreaths so, of course, I had to make one for Fall. The finished ones I saw had beads threaded onto a metal hoop, but I wasn't sure how to accomplish that. Metal hoops are readily available, but I'd need a band saw and metal blade to cut one to add beads. No matter, where there's a will there's always a way...... I came up with an easy and easier way.....

You'll need:
5/8" (20mm) Beads - 21 for a 12" wreath, or 25 for a 14" wreath (sizes are approximate)
Grapevine garland
18 gauge 18" covered wire stem (12" wreath)
Wire coat hanger (14" wreath)
Assorted Fall flower picks
Jute
Wire cutters
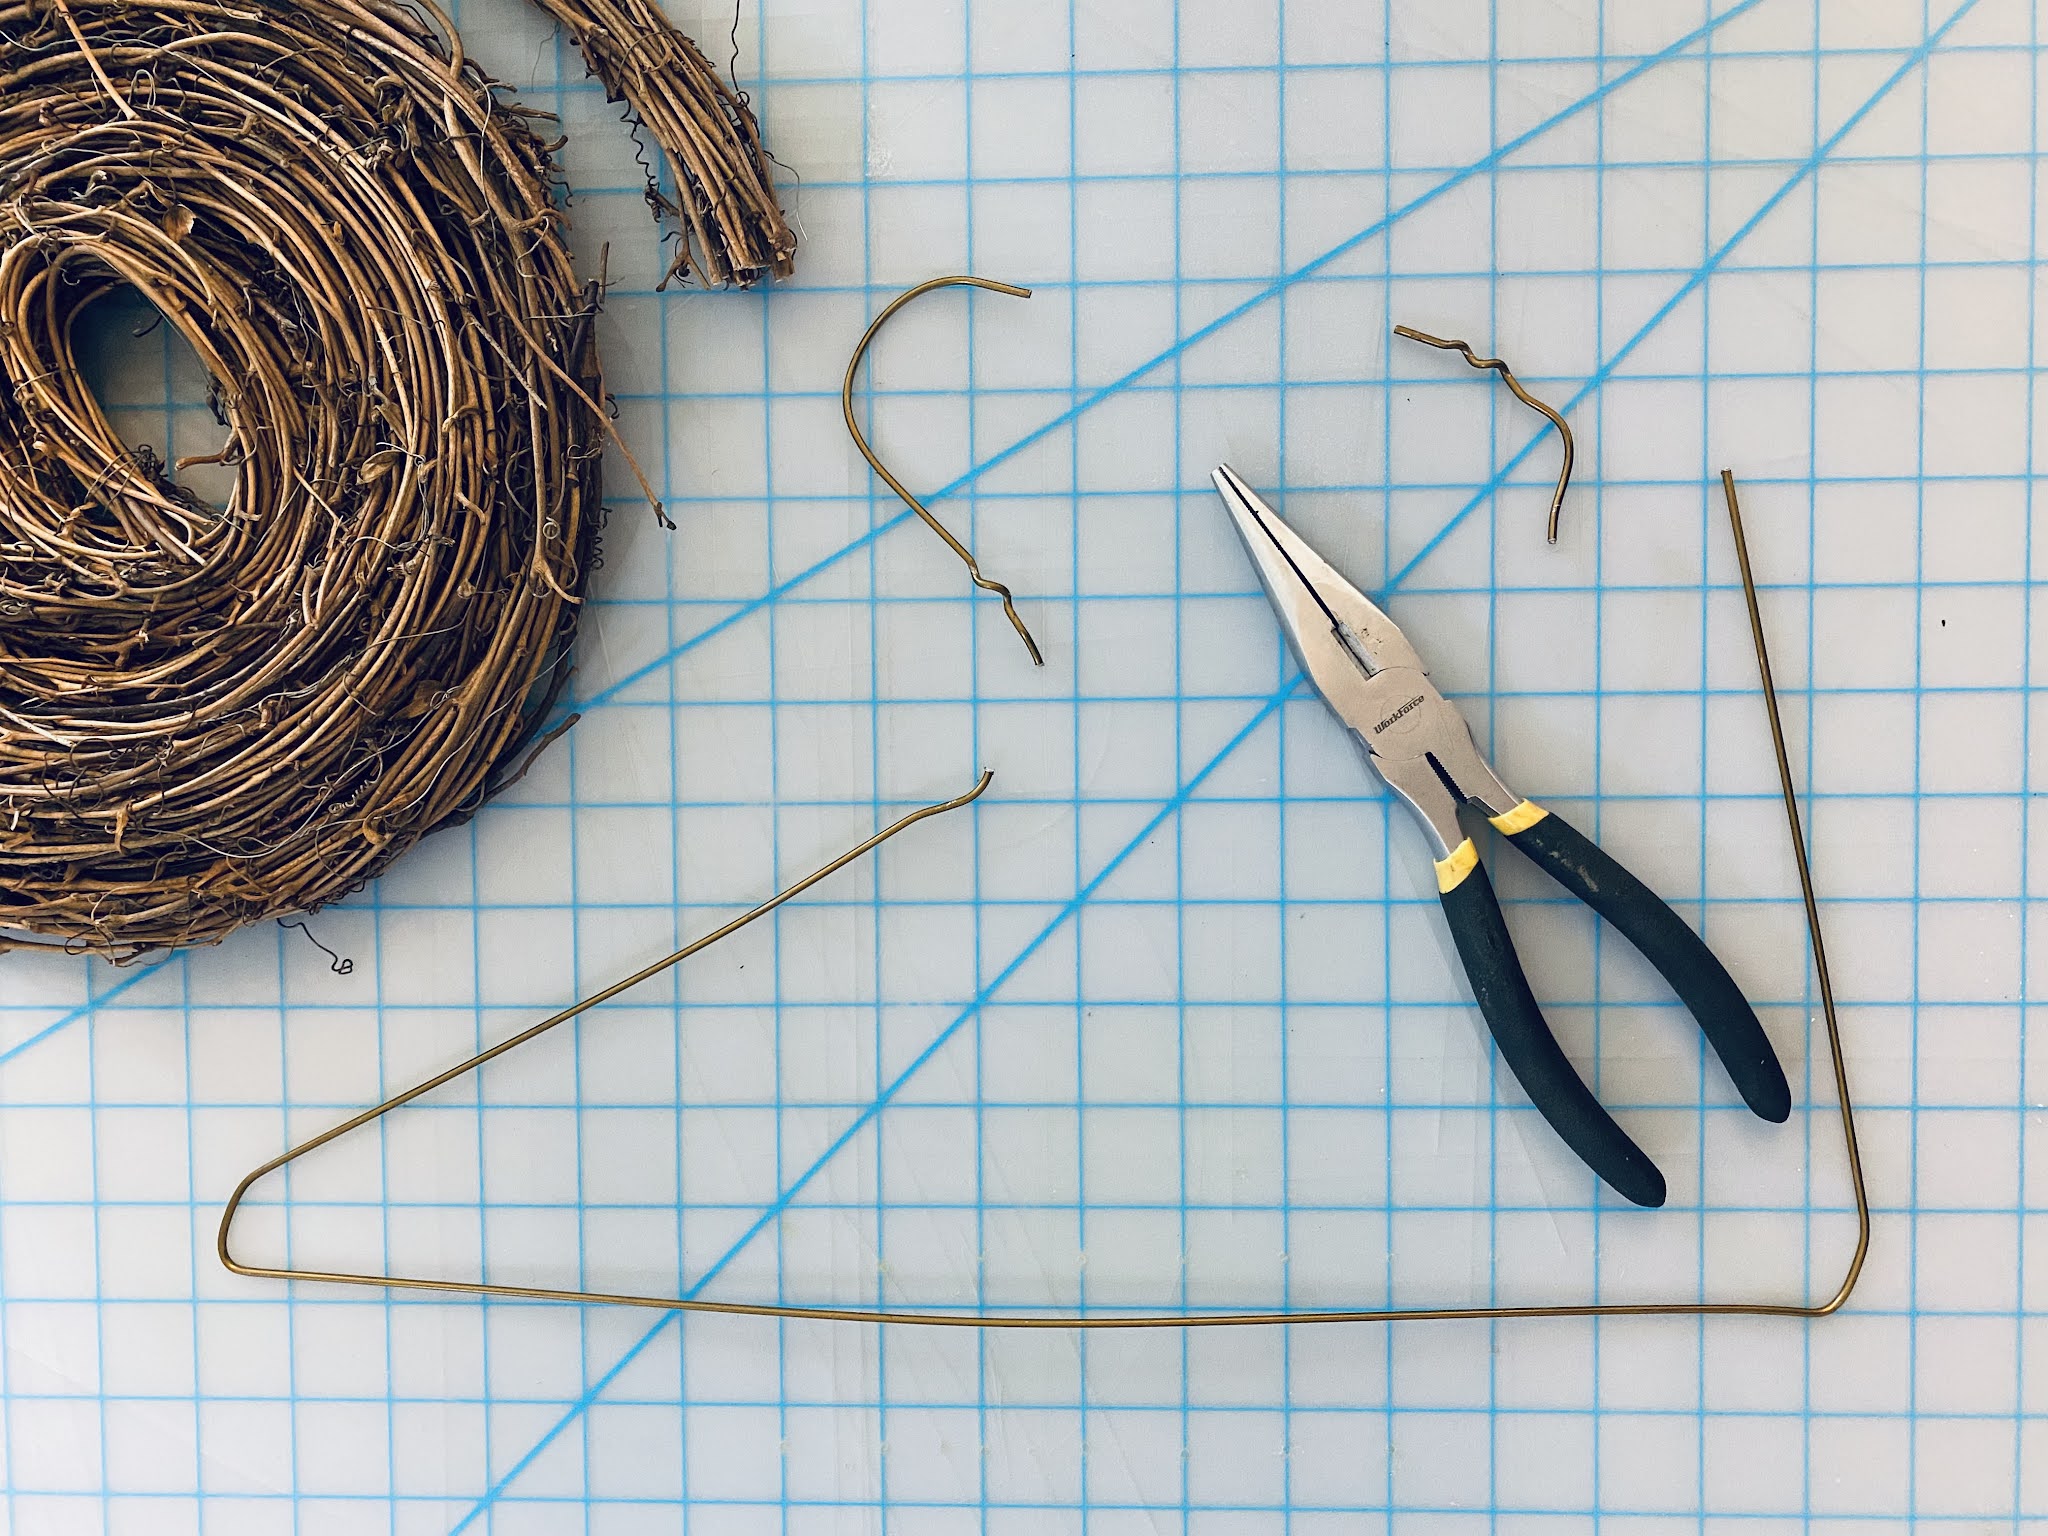

a. Carefully cut the hook from the top of the coat hanger then gently shape the wire into a circle. Work slowly, especially when straightening the corners. Bend one end over then thread the beads onto the wire. Bend the opposite end over then link the ends together to form a circle.


2. The wire stem is easier to work with, but will only accommodate 20-22 beads. Thread the beads onto the stem leaving about 2" of stem at each end.
Step 2:


a. Remove the thin wire holding the coiled garland together then cut 2 pieces* long enough to cover the coat hanger wire between the beads. Sandwich the wire between the two pieces then, starting at one end wrap the garland with jute finishing and securing at the opposite end. Adjust the curve of the garland and beads to create the circle. *Two pieces are needed for thickness.
b. Cut 2 pieces of garland for the smaller wreath, Gently straighten out the curve from each piece then, starting at one end wrap the pieces together with jute. Insert the ends of the stem wire into the tightly wrapped ends of the garland. Adjust the curve of the beads and garland to create the circle.


Step 3:
Separate the stems from the floral picks. Starting at the outer edges of the garland, insert the ends between the twigs. The twigs should hold the picks firmly in place, but you can dip the ends in lo-temp glue for extra security if desired. Working from the outer edges to the center, add pieces from contrasting picks to finish. You can also find a selection of laser cut words at your local craft stores to add if desired.


All you need now is a place to hang your finished wreath! Enjoy!

TIPS: Check the sales at your favorite arts & crafts stores for seasonal floral picks for best prices! You can also find plain wire coat hangers at your local Walmart if you don't have any.
Happy fall y'all!
Yours truly,
Julie 😍
KEEP CALM AND CARRY ON CRAFTING!
No comments:
Post a Comment