Sunday, November 29, 2015

Night Light

Create a candlestick night light with a custom shade for a guest room, or any room in your house.


I started with a 12", glass candlestick and products I use for glass etching.


My theme was stars, so the first step was to create a star design on the base of the candlestick as follows:

1. Using a small punch, I cut stars from extra pieces of etchmask® then adhered them to the base.  To help place the stars evenly, place the base on top of a mat with a grid and use the guidelines visible thru the glass as a guide.


2. To etch the base, place the candlestick in a plastic dish deep enough to accommodate the base and about 1" larger. Carefully pour dip'n etch glass etching liquid into the dish until only the base is covered.  Pour to one side of the dish, not directly onto the glass. Leave for 15 minutes then remove the candlestick. Rinse and remove the stars, then pour the dip'n etch back into the container. Remember, etchall dip and crème are re-usable.  NOTE: You can also etch the base by covering with a liberal coat of etching crème.

The candlestick is now perfect for displaying an LED candle, but we can also add a custom shade in place of a candle.


You will need a Lighten Up kit from www.etchall.com plus fabric. I used Fairfield OlyFun™ fabric. Available in solid colors, this fabric does not stretch or fray when cut. It's easy to work with and the weave allows light to shine thru. You will also need white glue, a sponge brush and trim.


1. Use the template included in the kit to cut the fabric. Cover the outside of the shade with an even coat of glue, then press the fabric in place.  Let dry then glue trim to the bottom and top edges of the shade.  Cut stars from paper then glue to the inside of the shade.  They will be visible when lit.


2.  Following instructions provided in the kit, add the batteries and and replace the cover. Push the button to switch on. The shade will only light up when the center (underneath) is depressed since it is designed to work when placed on top of a bottle. To keep the center depressed (and the light on), insert 2 ends of a toothpick into the edge around the center button as shown. Use the small button to switch the light on and off.


Light up your life and enjoy!  Y'all come back now........

Yours truly,
Julie :)

KEEP CALM AND CARRY ON CRAFTING! 

Friday, November 20, 2015

Creative Lettering

From 1996 to 2003 I had the privilege of working with EK Success, specifically their line of ZIG® markers.  I have always loved to draw and my dad taught me that handwriting could be beautiful. I took a calligraphy class in the late 70's and quickly decided that Copperplate wasn't for me, but learned the techniques of using wide nib pens to create beautiful lettering. I still have my brause nibs and wooden pen holder, plus the fountain pen I used in school.  Yep, I was born in the 40's and still remember inkwells in the school desk.  Ballpoint pens were a definite "NO NO" back then. 

I loved working with all the different types of markers and wrote "Creative Lettering", a regular column in Scrapbooking & Beyond magazine.  Each issue featured a fun alphabet.  Here's one I created for a Winter issue - SNOW CAPS:


The ZIG markers may not be available any more, but all you need is a fine black marker and a white opaque marker. There are lots of brands available in craft and office supply stores and they don't have to be "acid free".  You'll also need a glue pen.
 
It's an easy alphabet, just follow the steps shown below.  Have fun! Next time I'll show you how to create a Candy Cane alphabet.......  enjoy!


Y'all come back now................


Yours truly,
Julie :)


                                           KEEP CALM AND CARRY ON CRAFTING

Thursday, November 19, 2015

Decorative Holiday Pillows

Say it with pillows!  

A decorative pillow is a great way to add a seasonal touch to any room and they are SO easy to make. Cover a pillow form with your favorite fabric, or purchase ready made, inexpensive pillows in a solid color.  Add iorn-on 3-D embroidered letters and voilà, you'll have a holiday pillow in no time at all.


To create this pillow you will need:

JOY 3-D, Embroidered White Varsity letters


18"x18" Pillow
Felt Snowflake Embellishment
Tulip Color Shot Fabric Paint - Silver
Holographic Silver yarn
Silver Thread
4 Decorative Silver Beads with large holes (or pony beads)


1. Spray the letters with silver fabric paint (or other color) if desired, but white letters look just as pretty. Remove the backing then press in place on the pillow.

2. Add a silver yarn tassel to each corner to finish.  

Tassels are easy to make as follows:
1. Wrap yarn around your fingers, a 3" wide piece of card, or a quilt ruler.


2. Use a tapestry needle to pull a 6" piece of silver thread thru the loops of yarn at the top. Knot the ends together to secure.

3. Slide the loops of yarn off the quilt ruler then cut the loops at the opposite end. Slide the bead onto the threads used to tie the loops at the top.
 

4. Pull the bead down over the loops, about 3/4" from the top to create the tassel.  Use the threads to attach the tassel to the corner of the pillow.


Decorative pillows are fun to make for your own home, or a friend's........  Enjoy!  Y'all come back now.....

Yours truly,
Julie :)

KEEP CALM AND CARRY ON CRAFTING! 

Saturday, November 7, 2015

Handmade Holidays


It's that most wonderful time of the year when
we're making lists and checking them twice... 
remembering friends who have been really nice.... 
and racking our brains over the choice of a perfect gift. 

As I said in an earlier post this month, there is nothing more special than a gift you make yourself and it's the perfect way to share your talents with family and friends.  I love decorative painting so this is the time of year when I pull out my brushes and paint and get to work.  Before you start to feel inhibited by the thought of having to use a paint brush, this project is something you can do - I promise.

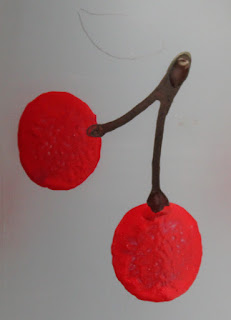
My sister-in-law loves cherries, so this vintage style milk bottle is for her.


I started with an inexpensive bottle


and supplies from the following sponsors:

Paint, paint markers, paint brushes and daubers from DecoArt,


 Bakers twine from the Twinery and buttons from Buttons Galore & More to embellish.


I also used a few general supplies from around the house - paper towels, toothpick, disposable foam plate, (or wax paper) for a palette, etc.

NOTE:  I love working with glass and DecoArt has a line of glass paint that you can use directly on a glass surface. For this project however, I wanted a "milk" glass look, so I etched the bottle by immersing in etchall® dip'n etch, a reusable glass etching liquid. For readers who don't know how easy and quickly this is to do, instructions are at the end of this post.  Because my bottle is now etched, I can use any of the DecoArt paint lines and chose Americana Multi Surface Satin colors.

STEP 1:  Pour a small puddle of  Red Hot paint onto a disposable plate, or piece of wax paper. Holding the dauber upright, dip the sponge end into the paint then press onto your palette and twirl to spread the paint evenly in the sponge.  Press gently onto the glass to create a circle.  Make 3 sets of 2 circles, evenly spaced around the center of the bottle, then an additional 3 sets around the bottom. 


STEP 2:  Pour a puddle of Dark Scarlet onto your palette then dip about half of the surface of the sponge into the darker color. Pat gently to blend then press on top of the original circle. The darker color will create a subtle shadow on your "cherry", so always make the shadow on the same side of each one.  Use a pencil to draw lines for the stems and make a simple outline for a leaf.


STEP 2: I used a liner brush to paint the stems Coffee Bean, but you can also use a glass paint marker, no problem.  


STEP 3:  Outline the shape of the leaf Apple Green with either a liner brush or marker, then fill in the center. Use white paint to make the highlights on the cherries. It's easy. Dip the end of a small paint brush handle into a puddle of white paint. Press on top of the cherry then drag to create the "swoosh". Practice on your palette first. Let dry overnight then use a dampened cotton swab to remove any visible pencil marks.


FINISH:  I wrapped black & white Bakers' twine around the neck of the bottle then used a lo-temp glue gun from AdTech to attach a cherry button to one side.  I think my sister-in-law will love it!


Thanks to DecoArt, The Twinery, Buttons Galore & More and AdTech for sharing their wonderful products with me.  I wish I could have created projects with supplies from all our amazing sponsors.

You can find even more Handmade Holiday projects by visiting the following blogs.  Be sure to visit all of them so you can enter our amazing giveaway of over $600 in craft supplies donated by our blog hop sponsors. 


Here are instructions for etching the glass bottle.

You will need:
    etchall® dip'n etch, re-usable glass etching liquid
    Empty soda bottle.  Cut the top off as shown, so you will also have a funnel.


Step 1.  Fill the bottle with water (so it doesn't float), then place it in the soda bottle, or other plastic container.  Fill the container with water up to the rim of the bottle. Remove the bottle. The water level in the soda bottle will drop.  Mark the water level then empty the soda bottle. Dry the inside of the soda bottle and outside of the glass bottle thoroughly.


Step 2.  Fill the soda bottle with dip'n etch up to the mark.  Fill the glass bottle with glass pebbles, or something to weight it down then carefully place it in the etching liquid. The liquid will rise, stopping at the rim of the bottle.  Leave for 15 minutes, then remove the bottle and rinse thoroughly. Pour the dip'n etch back into its container using the funnel you created when you cut the soda bottle.


Etched glass has "tooth" which makes it a perfect surface for acrylic paint and rubber stamping.  If you haven't etched glass before, please read the directions carefully. This product produces a REAL and permanent etch so don't use near porcelain sinks, granite or other glazed surfaces.  It will etch them permanently too.  If you're interested in glass etching, you can purchase dip'n etch and more at www.etchall.com Use the code JULIEMC to receive a 10% discount on your purchase. 

Happy holidays!

Yours truly,
Julie :)

KEEP CALM AND CARRY ON HOPPING!

Monday, November 2, 2015

Handmade Gifts

'Tis the season for gift giving and nothing says, "I was thinking about you", more than a gift that you made yourself.  When thinking about what to give, it's important to consider what you do best.  For example, I can do all kinds of things: knit, crochet, sew, embroidery, jewelry, sing - no not really, but my family and friends who really know me, know that I love to paint. I'm not what someone would consider to be an artist, by any stretch of the imagination, but I do love decorative painting with emphasis on the "decorative" part. In fact, my first book, published in the early 90's was Basic Steps to Painting. It was the first of many of my books to feature both decorative and craft painting skills and my goal in each one, was not to show how well I could paint, but to show others that they could paint too.  I was all about teaching techniques, so that others could be successful.

I've had a lot of projects featured in books and magazines over the past 25 years or so and I've kept a few favorites packed away in boxes, until the holiday season rolls around each year.  Here are some glass ornaments I've painted for friends and family over the years


and a wine glass and plate from one of my books, Garden of Glassware, published by Leisure Arts.


This is the base of the wine glass. One of my favorite techniques is to paint on the front and the back of the glass pieces.


If you're wondering why I'm sharing things I've painted in the past, it's to whet your appetite for a project I'll be posting on Saturday, Nov 7th as part of the annual Handmade Holidays Blog Hop. I think you'll enjoy the one I'm working on now - I promise it will be something you can do too!

Y'all come back now.........

Yours truly,
Julie :)

KEEP CALM AND CARRY ON CRAFTING!