Monday, January 19, 2015

CHA 2015 - Anaheim, CA


It's taken me a while to post photos of my walk up and down the aisles at the CHA show, but I ended up with over 400 images to edit and re-size..... 

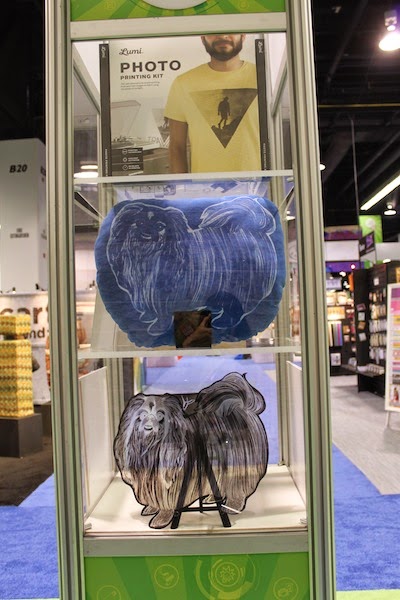
The post is mainly "eye candy", but it will surely give you a feel for coming trends, colors, styles, etc.  All images of what look like green, glass tower displays feature the top hot products for this year.  Now it's time to grab a cup of tea, coffee or a glass of wine, put your feet up and join me on my journey up and down 30 aisles of creative goodness.

It's hard to capture how vast the show floor is, but this is a shot taken the first day before it opened.


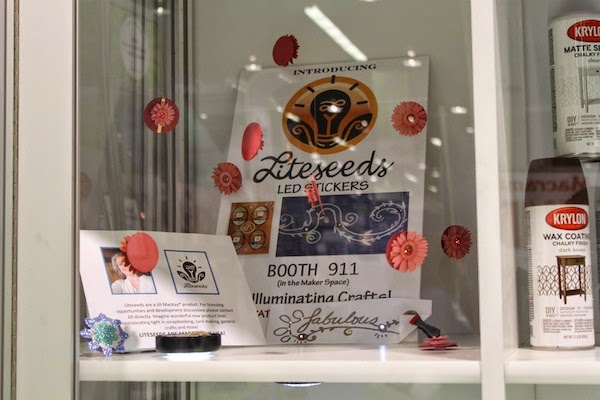
The first few photos were taken at the "Sneak Peek" event for designers.  Unfortunately I arrived late then spent waaay too much time looking at how the circuit light stickers worked, so I only saw a few of the new products featured........  There were a number of booths on the show floor with the same kind of product, notably Lightseeds made in the USA by CHA designer Jill MacKay.


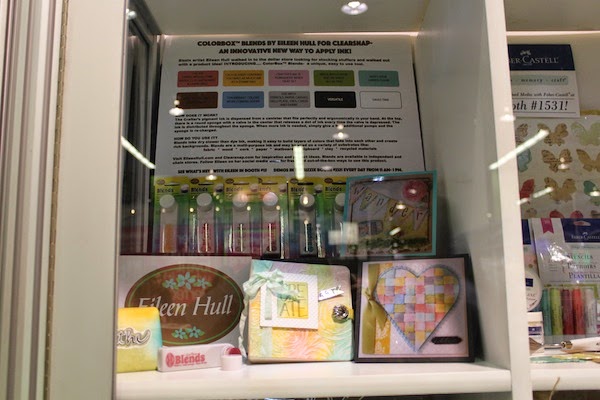
 These are the first of the new product displays on the show floor. They were all behind glass - not easy to photograph.


The yarn companies made a big impression this year.  Lion was promoting "knit your selfie a scarfie", "hat institute" together with other timely tag lines.  Spinrite, which you'll see later on your walk, turned their booth into "Yarnia" including a walk through wardrobe.  (You'll see this further down.)


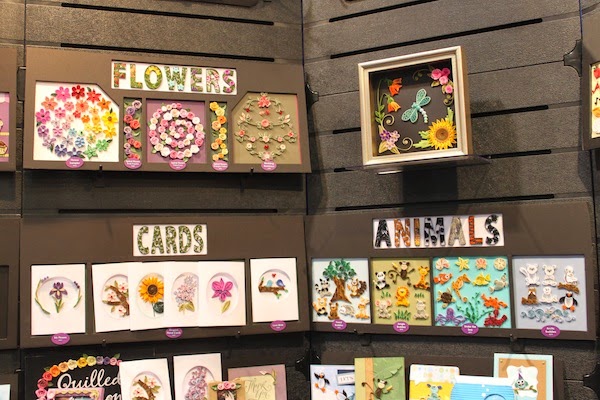
Quilled Creations - Quilling for jewelry (above) and more!


Vintage papers made in Sweden available to download from PION design




 Crystal Ninja... both the mural and jump suit were covered with crystals!


Laura Bray presents a Make'n Take at the Smoothfoam booth.


Look what's new at the Spellbinder's booth!


At the Smoothfoam booth:  Projects for all seasons.  


Michelle Frae Cummings demonstrates cutting techniques while Lisa Fulmer presents a Make'n Take project from her new book.


 Pattie Wilkinson demonstrates in the iLove to Create booth.


 Steve Piacenza demonstrates Mod Melts by Mod Podge at the Plaid booth.  
Partner, Cathie Fillian picture below.


Calorie free, sugar free, gluten free cake pops and petit fours with 
Smoothfoam and Mod Podge Collage Clay...


Michelle Ruth Ohlsson shows how easy it to decorate these Smoothfoam Frames!


Designer in action - Cheryl Boglioli


All about beads... above and below


The indomitable Margot Potter at Impress Arts


 Kristi Parker Van Doren - you've been framed!


Yours truly, with Lisa Rojas and Ann Butler from Bella Crafts Quarterly


Carmen Flores Tanis demonstrates how easy it is to carve Smoothfoam


 Hot Product from Little B - Paper Blooms


Courtney Chambers and Tanner Bell


 Designer Eilieen Hull presents her new products at the Sizzix booth.


 Kellycraft features guests from Duck Dynasty with designer, Cindi Bisson


Someone said "duck" - so I did!


Martha Stewart products presented by the Simplicity Group.


Doily punch, fringe cutter and linked banner punches


Blockwallah carved wood stamps - original designs from Finland 


Mark Montano demonstrating DecoArt Chalk paint


Chalkboard markers from Marvy Uchida


3D Printer in action


Ken Oliver Crafts product debut


Yet another designer, Liz Hicks has been "framed".....


Proxxon. Industrial looking, but fabulous machines for the crafter!


Product to "dye" for.... sorry, couldn't resist it...


Smoothfoam is a family owned company.... this is the family.  Left - right, Bill Ohlsson with brother Scott Ohlsson and his wife, Michelle


 Jesse James beads, buttons and so much more!


Decoden cupcakes


Maker Space at CHA


More from Spellbinders - A Gilded Life


 another frame-up with Holly Fossen


A new Folk Art program from the UK


Selfie with Elena Lai Etcheverry founder of Charity Wings


Being true to our selfies - with Stacey Caron and Terre Frye


and Cindy Alexander (Stacey's sister)


Ann Butler demonstrating for Makin's Clay


Myléne Hillam, jewelry designer, travelled all the way from Australia to be at the show.


Sara Neuman demonstrates in the Clearsnap booth.


Charms and more from Becky Nunn..


Last, but by no means least, this is Rebekah Meier showing her new fabric line for Mixed Media, voted best product for 2015.  Congratulations Rebekah!!!!


It was a looong walk with SO much to see.  Hope you enjoyed it almost as much as I did.  Y'all come back now!

Yours truly,
Julie :)

Wednesday, January 7, 2015

Craft & Hobby Association - CHA


 Heading to the CHA Mega trade show tomorrow....  CHA is the Craft & Hobby association and I'm a designer member.  I've been going to these shows since 1991 and love every minute.  It's an opportunity to see new products to create with, to try them and visit with old friends.  If you're planning to be at the show, don't forget to stop by the Smoothfoam booth, #301.  If you're there on Sunday morning, you can make this adorable Decoden Cupcake with Vicki O'Dell.


Katy Sue Designs & Flower Soft will also be at the show featuring new moulds for cake decorating (and paper clay!) and their updated selection of Flower Soft Sprinkles - that makes you think of cupcakes too, right!  Their booth is # 347.

The show has changed a lot over the past 20+ years, but creativity is the nature of our industry, so change is inherent in what we do.  I'll be posting photos to FB  from the show floor (so don't forget to "friend" me if you haven't already) and I'll be posting lots more here after I get back.......  Y'all come back now!  Enjoy your week!

Yours truly,
Julie :)

KEEP CALM AND CARRY ON CRAFTING!

Sunday, January 4, 2015

Favorite Products - Designer Crafts

HAPPY NEW YEAR!  

To start the year, Designer Crafts Connection members are sharing the products they enjoy working with the most.  I love to craft, so it's really difficult to say which I like best - I sincerely love the creativity of crafting with all kinds of products.  Looking back however, I think etching glass with my own designs and decorative painting would be at the top of the list. 

My friend, Lisa Fulmer interviewed me recently for an article on the Craft Foxes website about glass etching and decorative painting.  You can read all about it here: http://www.craftfoxes.com/blog/interview-with-glass-etching-and-decorative-painting-expert-julie-mcguffee 

Here are a few of the projects I've created over the past few years from simple glass etching to decorative painting on etched glass.  Enjoy!

Decorative Painting on Etched Glass


Glass Jars etched on the inside with dip'n etch, glass etching liquid


Designs created with stickers and dip'n etch


Original stencil designs using dip'n etch and etching crème


Simple design using Scotch Brand Magic Tape


Glass etching is really easy with etchall® from B&B products. "Like" their Facebook page for up to date information on sales, project ideas and more.  Etchall produces a smooth etched surface and doesn't have an unpleasant odor, plus it's re-usable!  There are lots of videos and books to show how easy it is to add painted designs to etched glass and, of course, other surfaces in your home.  The important thing to remember, that this style of painting is decorative and isn't supposed to look realistic, so give it a try - you'll be glad you did!  Y'all come back now........

Yours truly,
Julie :)

KEEP CALM AND CARRY ON CRAFTING!

Sunday, December 21, 2014

Last Minute Christmas!

OMG!  Only 3 more days till Christmas so here's a last minute idea for either your home or a gift for a friend. 

I love LED candles, especially the ones that have the timers, and I always pick them up whenever I find them on sale - usually at the Dollar store.  The tall ones look kinda plain though so I decided to dress one up a bit for a centerpiece.  I think it took 10 mins....  Quick'n EZ, right.... and it looks awesome!


I simply printed some Christmas sheet music onto a sheet of Craft Attitude™ then glued it to the front of the candle.  I measured the height of the candle first then sized it about 3/4" shorter before printing.  Pretty cool huh...........   Not just for Christmas decorations, you can also use this idea year round with all kinds of music or even old movie posters and photos, etc. 

Don't forget, you can also use Craft Attitude on any surface including glass, wood and even fabric!!!  Enjoy!  Y'all come back now.........

Yours truly,
Julie :)

KEEP CALM AND CARRY ON CRAFTING!

Friday, December 5, 2014

Smoothfoam Holiday Ball

Every year Smoothfoam has a Holiday Ball and everyone is invited! 

Smoothfoam balls are SO easy to decorate and definitely meet my criteria - Quick'n EZPZ.  So here are a couple of my guests for the "Holiday Ball" - (I'd say they were my Holiday Balls, but would hate to offend anyone).

I made two versions - one for a fancy tree and one for my "kid friendly" tree and here they are:
 

1.  This one is kind of elegant, but still easy to make.  You'll need a length of 18 gauge floral wire, crystal glitter, white glue, sponge brush, fancy beads, a decorative ornament hanger and I thought the feathers added a nice touch.  You'll also need a Smoothfoam ball.......  this one is 3", but you can use any size.

       Step one is to push the wire thru the center of the ball.  Smoothfoam is very dense, so I heat the end of the wire in a candle flame then push thru the ball, using the hole at the bottom of the ball as a guide.  EZPZ.  Use needle nose pliers to make a small loop at the top.  Next step is to cover the surface with an even coat of white glue, then sprinkle with glitter.  I push a bamboo skewer into the bottom of the ball (next to the wire) so I have something to hold onto while I do this. Set aside till the glue is dry, then remove the skewer, trim the wire and make a small loop at the bottom.  Thread whatever beads you have on hand onto an eye pin, beading wire, or thread then secure to the loop at the bottom of the ball.  To finish I added the feathers by poking the ends up thru the bottom bead, then added the ornament hanger to the loop at the top.

2.  The snow "ball" is even easier. (there's actually 2 versions).      


 Push a piece of wire thru the ball as above then make a loop at the top for the hanger.  Cover the ball with glitter.  His eyes and center of his mouth are large, black quilt pins.  I used 2 smaller quilt pins for each side of the mouth.  The nose is a red pony bead held in place with a large, red quilt pin.  Now you can hang on the tree as is, or decorate him in variety of ways.  I used a cupcake paper for the hat, and chenille and pom poms to make ear muffs and a scarf for the other.  The pom poms were held in place with quilt pins.  I also used a small, "U" shaped piece of wire to attach the bell to the bottom.  So many ideas, so little time - Christmas is only 3 weeks away - oh my!!!   Better get cracking...........  Enjoy!  Y'all come back now.................

Yours truly,
Julie :)

KEEP CALM AND CARRY ON CRAFTING!