Showing posts with label Lanterns. Show all posts

Friday, June 24, 2022

Party Lights with K&S Precision Metals

         Summer is here! Time to think picnics, cookouts and pool parties!       

        On a recent trip to the annual arts & crafts show I was excited to find a new product with amazing craft potential! A colored metal, aluminum foil that was easy to work with and held its shape - believe me, this is not your mother's aluminum foil found in most kitchen drawers. Industry designers were offered samples to work with and a few weeks later these arrived on my doorstep. There are 5 colors on one side of each 12" x 24" roll and silver on the other.


         I love summer and all the fun things that come with sunshine and warm weather.  Living in Texas usually means a house with a pool - the perfect spot for outdoor fun and celebrations. Decorations were a big part of any kind of party of course. We would hang strings of lights and decorate with lanterns, so I was always on the lookout for a sturdy material to make my own......   


            The best thing about making your own lanterns is that they can be any size and you'll probably have most of the other supplies needed in your craft stash and around the house.  

Here's the list of what I used for the basic lantern:
  • 12' x 24" Roll of blue K&S Metal Aluminum Foil
  • Paper trimmer
  • Double sided adhesive tape
  • Scissors
  • Embossing tool/stylus
  • Flameless candle with remote
  • Empty plastic/soda bottle cut to the height of the candle (or taller if desired)
  • 1/8" Hole punch
  • Small brads


1.  Cut a custom sized rectangle of metal foil 

    Width = measure around (diameter) the soda bottle 

    Height = height of the bottle plus 1-2".

2.  Starting 1/2" from the edge and 1/2" from the top edge, cut to within 1/2" of the bottom edge.  Make 1/2" wide, top to bottom cuts along the width of the metal foil.

Note: I like using this particular trimmer because of the marks on the blade which show starting and stopping points on the ruler. 

3.  Cut two, 1/2" strips of metal foil the same length as the width of the foil piece PLUS 1"

4.  With one end aligned with one side, use double sided adhesive tape to adhere one strip along the top and the other along the bottom with the silver side facing up.  


5.  Fold the edges upwards along the inside edge of each strip then place over the curve of the candle*, or other round surface. Press the foil gently around the candle to curve.  (*The plastic bottle is too soft.)


6. Curve the metal foil around into a circle so the strips at the top and bottom overlap. Use double sided adhesive tape to secure. Place upright on a solid surface then gently press down on the top so the sides curve outward.  Place the plastic bottle inside then adjust the top of the lantern so the top edges are even.


7.  Make a Handle:
     Using an embossing tool and the cutting channel in the paper trimmer as a guide, emboss a line about 3/8" from the edge of a 10" piece of metal foil (any width), then a second line 1/2" away from the first line.  Cut the foil about 3/8" from second embossed line to create a 10" x 1 1/4" strip. Using the embossed lines as guides, fold the outer edges inwards and overlap to create a strip for a handle. 


8.   With the top edge of the lantern even with the top edge of the bottle, punch a hole thru the bottle and lantern.  Punch a hole about 1/2" from one end of the handle. Line up the holes then secure the handle to the inside of the bottle with a brad. Trim the length if necessary then secure the other end of the handle at the opposite side.


9. Slide the candle into the plastic bottle then place on a table, or hang from a tree branch. This flameless, flickering candle came with a remote, so it can be switched on and off as needed without having to be removed from the lantern.


        Of course I didn't stop there! With so many kinds of lights and sizes of votives to choose from it was easy to make lanterns in a variety of sizes.  I had small and medium plastic bottles to hold smaller votives and candles, plus tea lights, puck lights and even a solar mason jar lid with fairy lights. The rest was easy. 


Using the basic instructions above I made the following using the solar mason jar lid with fairy lights:

        Cut metal foil 6-8"H x the diameter of the lid. Cut the foil same as above then attach the top of edge around the lid with double sided adhesive tape. Charge in sunlight then use indoors as a night light. 


        Tea lights with or without small plastic bottles are perfect for small lanterns. Cut the top off the bottle then attach the lantern following instructions in the feature project above, or simply adhere the bottom of the lantern around the tea light with double sided adhesive tape (see photo below).  Since tea lights are so small, I cut the sides of the lantern every 1/4".


        Now that you know how to light up your party with  lanterns I'd be remiss not to add that there is SO MUCH MORE that you can do with this product: 

        I've pictured a few of the  things I have on hand that I've been playing with and have so many more ideas to share.  Add texture with crimpers, cut with a digital cutting machine, dies, punches, decorative scissors, emboss with stencils and a stylus, embossing envelopes and I haven't even started to list the number of things you can use on the surface. 
 

        You can find more inspiration from other designers who received samples of the metal foil. Their projects are featured on the Designer Crafts Connection blog.  Enjoy and party on! 

Yours truly,
Julie 💝

KEEP CALM AND CARRY ON CRAFTING!
 

Monday, December 18, 2017

Etched Christmas Lantern

I love pretty much anything that has to do with lights, especially around Christmas.  Lanterns are pretty trendy right now, so I decided to breathe some new life into an old lantern that had been on the patio for a few years and give it some holiday pizazz!


Here's what I used and what I did:
  • etchall® etching crème
  • etchall® etchmask™ and transfer paper
  • Pik tool and squeegee
  • LED candle (I used a tree shaped one that changes color)
  • Ribbon
  • Christmas piks to embellish
1.  Remove the glass pieces from the lantern, wash thoroughly then dry.  Clean the lantern with a damp cloth.
2.  I love to etch on both sides of a piece of glass for a dimensional look, so I uploaded the following designs into Cricut Design Space.  These are my personal designs, but you may use them for personal projects.  PNGs are available on my blog under Images for Personal Use.  


3.  Load etchmask onto a cutting mat then cut the designs. (I needed 2 sheets of etchmask for these designs.) You will need 4 sets of birch trees and one each of the additional designs.  Turn the trees 90˚ to maximize each piece of etchmask.  The glass pieces in my lantern measured 4" x 7", so the trees needed to be 7" tall.  You will need to measure the size of the pieces of glass and size the designs accordingly for your project.  The additional designs need to be sized relative to the size of the trees.

4.  Weed the designs while still on the mat.

  
 5.  To determine the size to cut your "trees" stencil, place a piece of glass on top then cut out around the edge of the glass.


6.  You can use the "trees" stencil as is, or cut the stencil to etch 2 trees on one side of the glass and the third on the other.  Cut a piece of transfer paper the same size as the piece of glass, remove the backing paper then place on top of the stencil.


7.   Use the squeegee to burnish the transfer paper firmly onto the stencil. I also use my finger to rub firmly around the edge of the design.  Remove the stencil from the mat.  

8.  Slowly peel the backing from the etchmask. Do not discard, you can use this to protect uncovered areas of the glass while etching designs.  Position the stencil on the glass then use the squeegee to smooth firmly in place. You can etch each piece of glass individually, or lay the pieces of glass side by side on a mat then etch one side of all four at one time.    


9.  Make sure that any part of the glass not to be etched is completely covered.  Use scrap pieces of etchmask, painters tape, etc. to avoid accidental etching in unwanted areas.


10.  Cover the design(s) with crème.  Leave for 15 minutes then scrape the crème back into the container.  Don't forget, etchall crème is reusable.  Rinse away any remaining residue.  DO NOT rinse over a porcelain sink. Etching crème will remove the glaze from many types of surfaces it comes into contact with.  If you haven't used this product before, please read all the directions on the container and previous posts on this blog (search "etching").  You can also find video tutorials at www.etchall.com


11.  Rinse away any remaining residue then remove the stencil. Buff the glass dry with a soft cloth.

12.  Make sure your work surface is completely clean then place each piece of glass, etched side down on to the mat.  Position the remaining stencils on the back of each piece, cover any open areas then etch the designs on the back of the glass in the same way.

13.  Replace the glass pieces in the lantern.


14.  Decorate the top with Christmas piks, ribbons, etc then place your LED candle inside to finish.


May an etched lantern make your home extra merry and bright this Christmas.....  Enjoy!  Y'all come back now.

Yours truly,
Julie :)

KEEP CALM AND CARRY ON CRAFTING!

Thursday, April 20, 2017

Summer Party Lights with Rinea® Paper Foil

Nothing says "party" like bright, shiny, decorative, paper foil lanterns and color changing LED lights!


These lanterns are quick'n EZ to make using double sided Rinea® Paper Foil available online @ www.Rinea.com


You will also need: 
Empty disposable bottles of water - small (one per lantern) 
18 gauge wire stem
Crystal stickers (to embellish)
Color changing LED tea lights
+ a few tools:
Paper trimmer
Wire cutters
1/4" Hole Punch
Adhesive runner
Scissors or Craft knife

1. Measure around the bottle at the widest point below the top.  Bottles vary depending on the manufacturer, but mine was 8".  Cut the top from the bottle about 4" from the bottom.  Do not discard the top.


2.  Cut a rectangle of foil paper 1/2" longer than the diameter of the bottle and 1 1/2"- 2" wider than the height of the bottom piece of the bottle after it has been cut.  My bottle was 4.5" tall and 8 " diameter, so the piece I cut was 8 1/2" x 6".

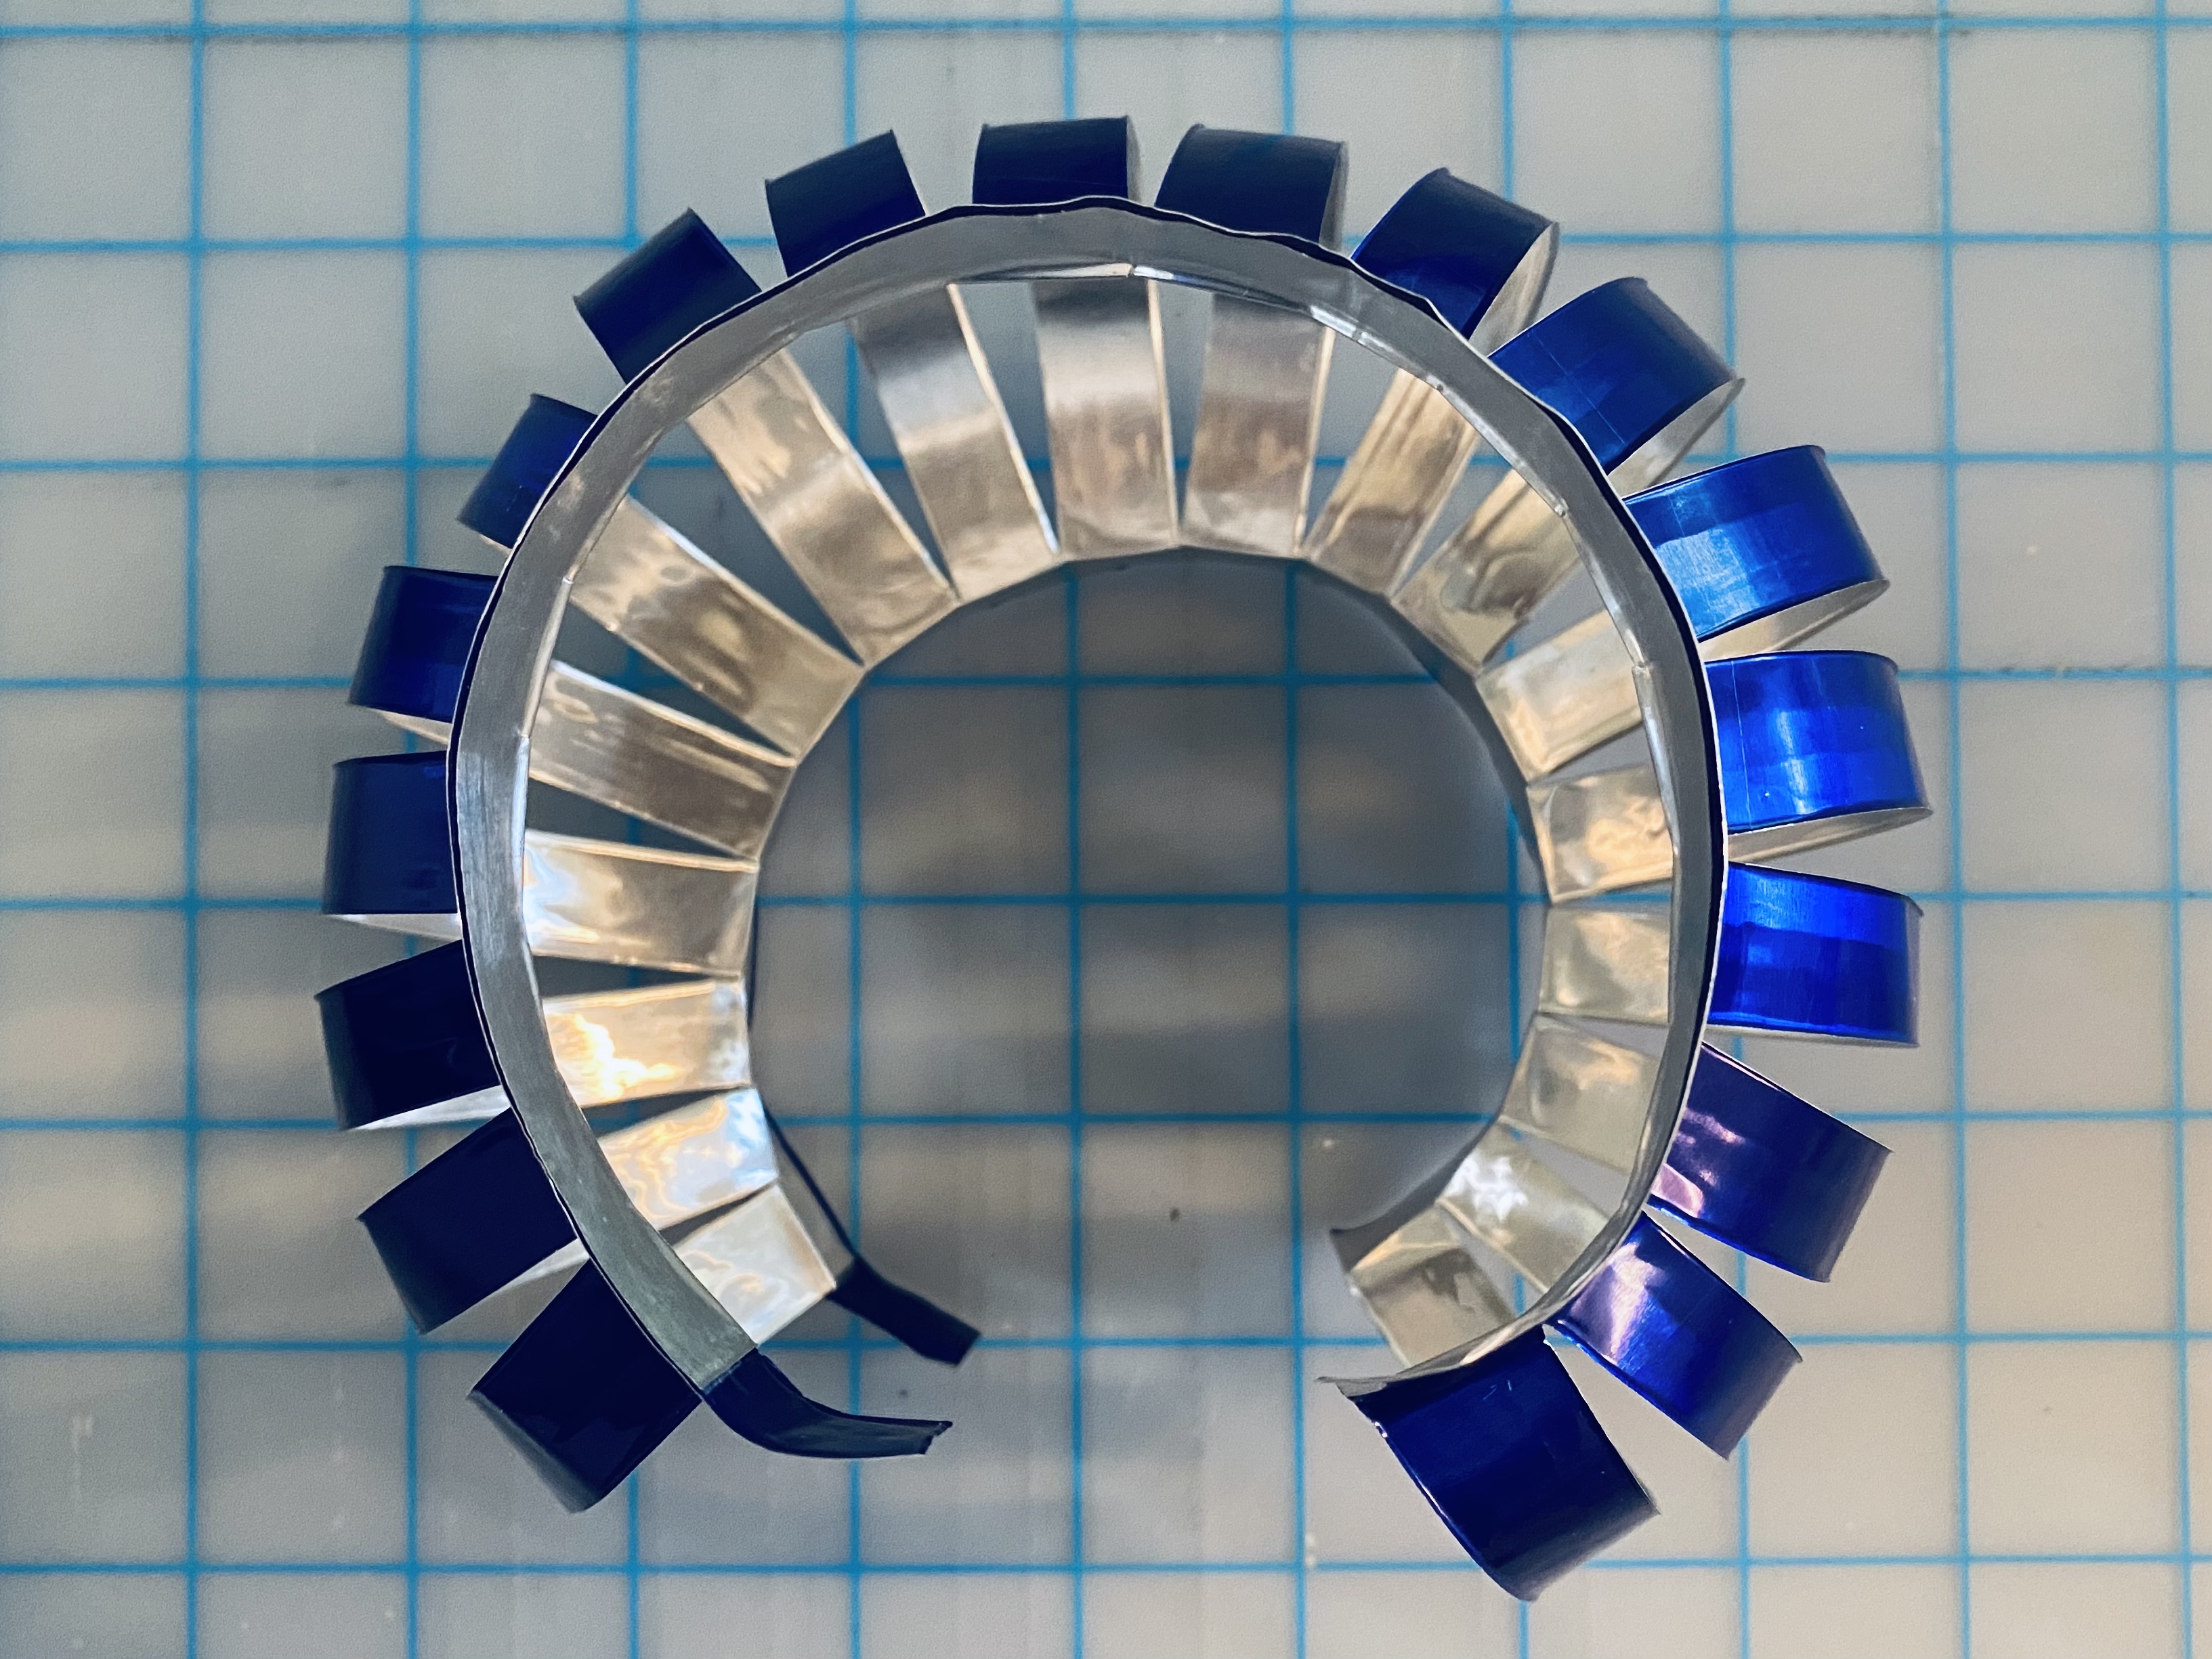
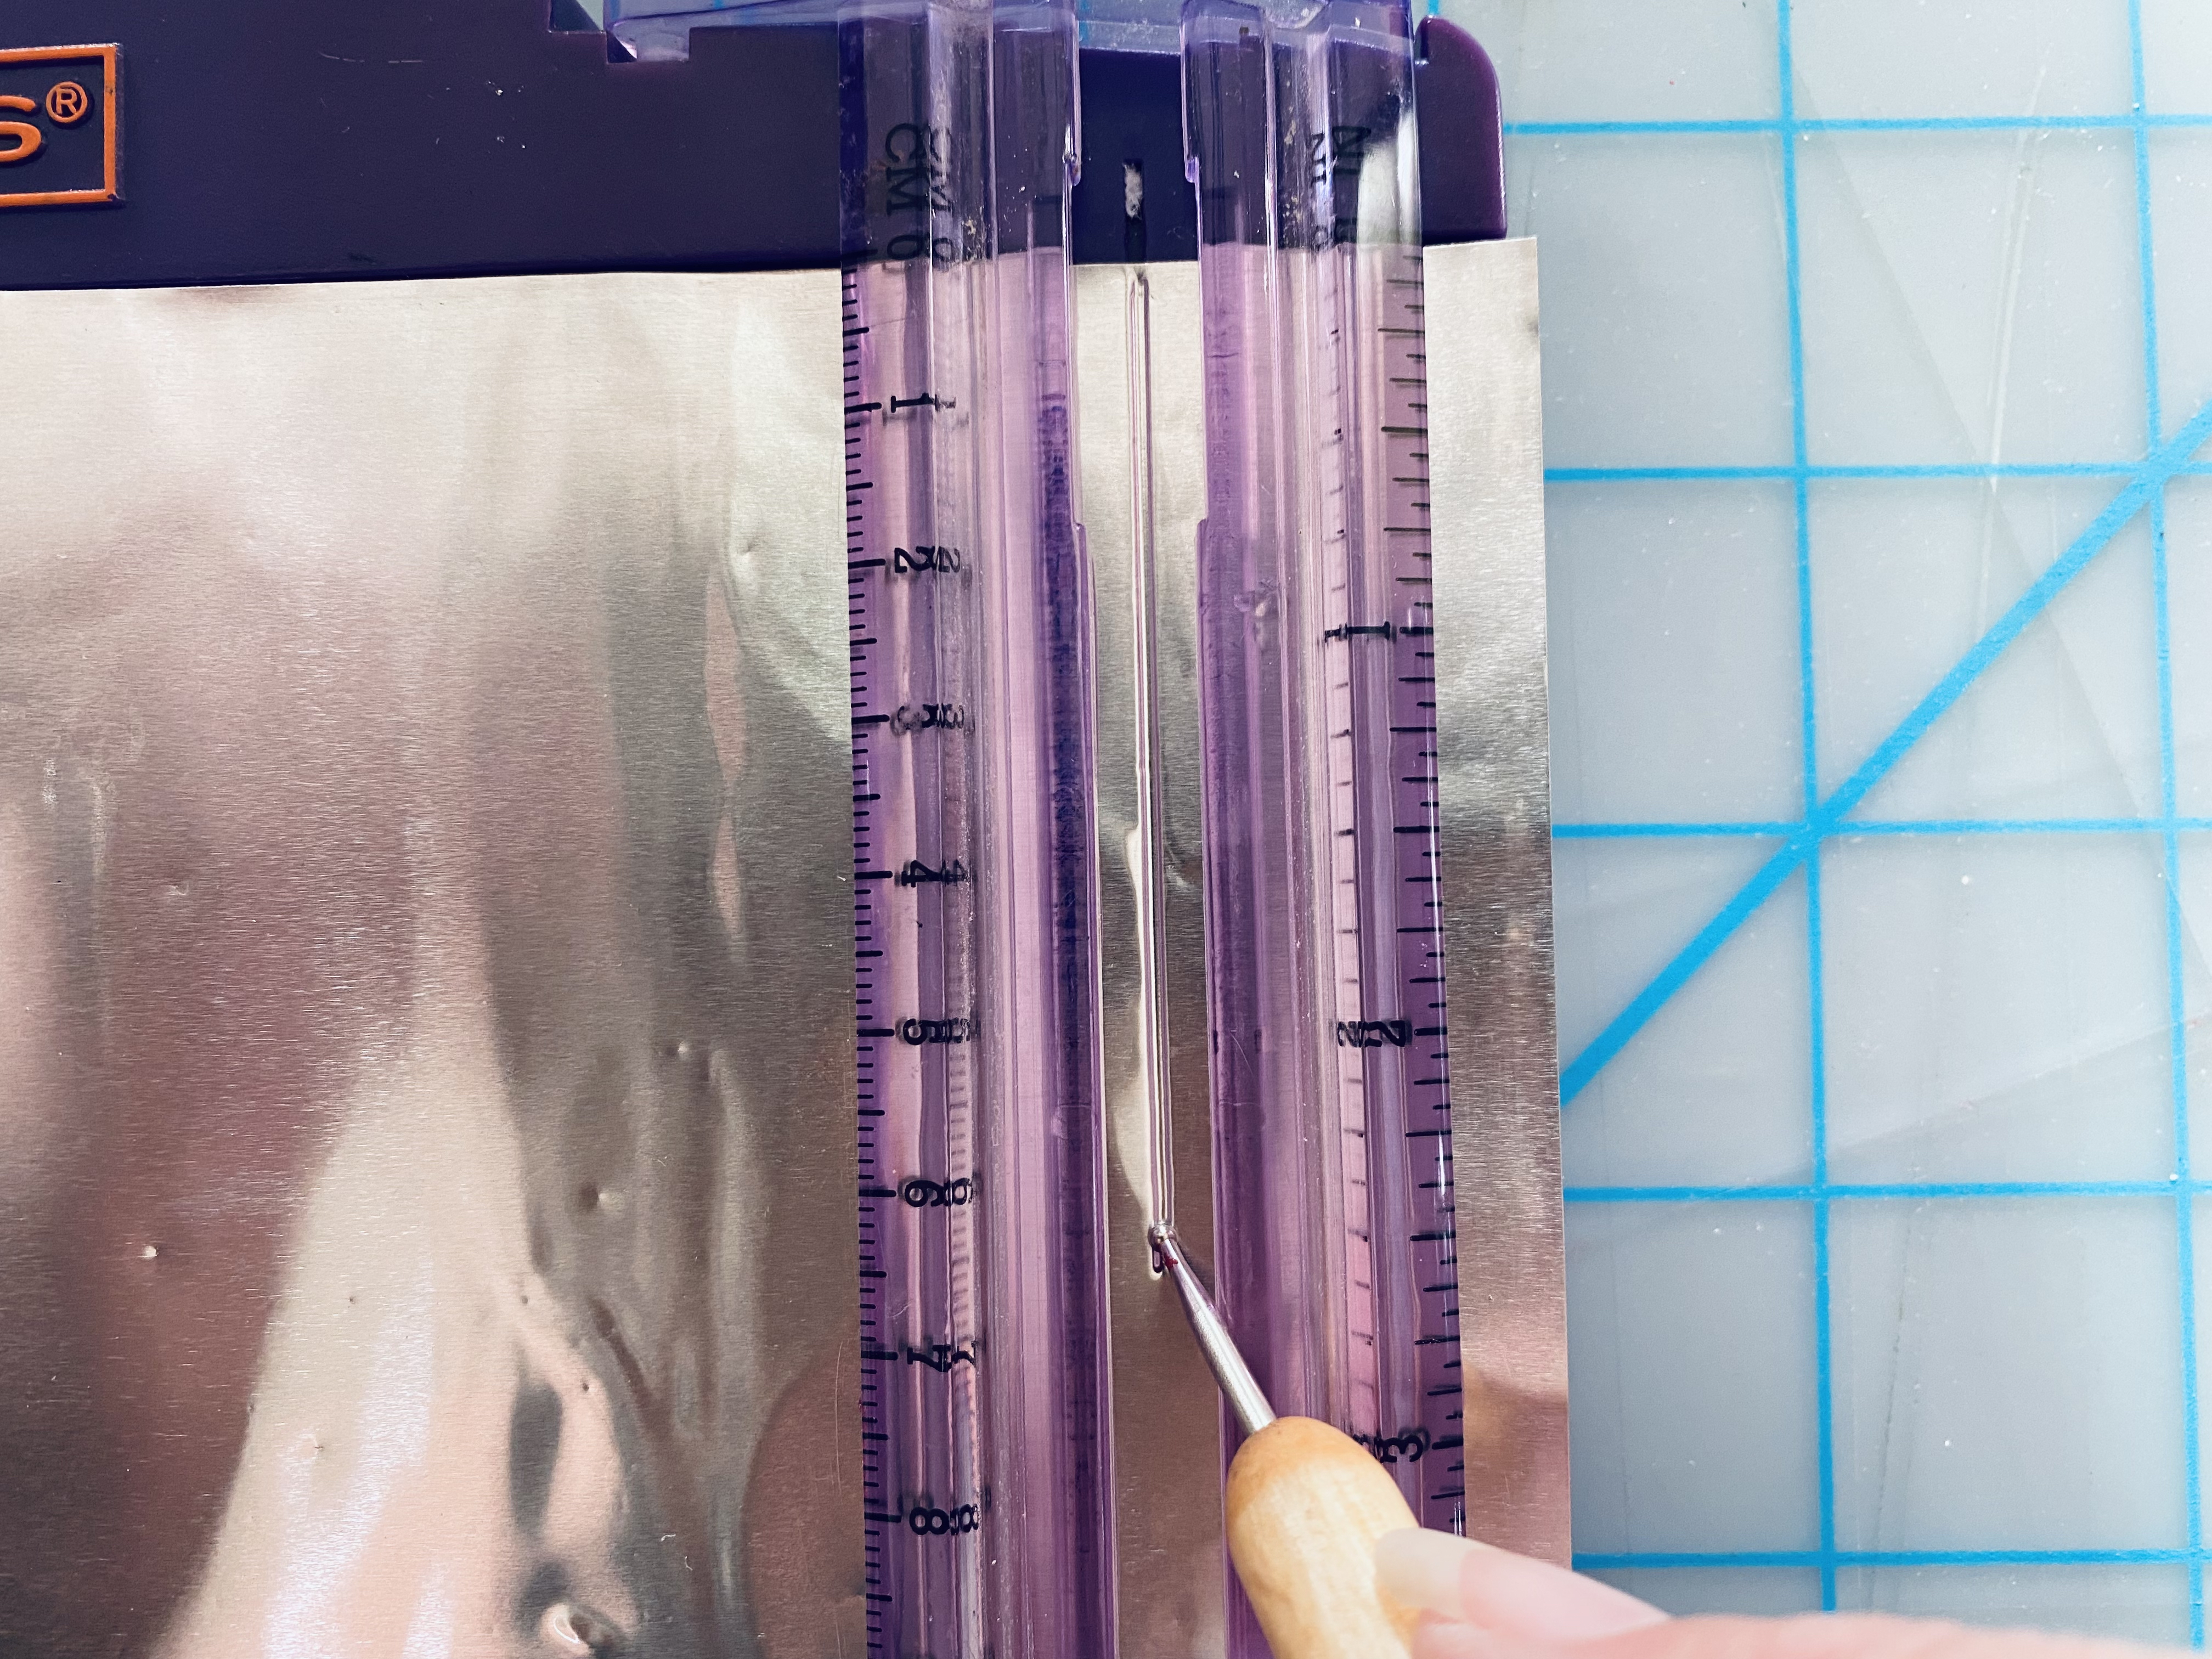
3. Using the rounded tip of a ball point pen, or an embossing stylus, score a line along the length of the piece of foil half an inch from the top and bottom edges.  Emboss a second line one inch from the top and bottom edges.  It will be one half inch from the first line. Fig. 1.  Cut strips, half inch apart between the embossed lines from end to end across the foil. Fig. 2.  I use the channel in my paper trimmer to score.  I also like the little arrows on each side of the cutting blade to indicate where to start and stop each cut between the embossed lines.

  Fig. 1    Fig. 2


3.  Fold the top edge down along the scored line. Fold back then repeat along the bottom edge.  Apply adhesive along the top and bottom edges, Fig.1,  then fold the edges down to secure. Apply adhesive along the side, from top to bottom. Fig.2  Roll the piece around the bottle overlapping the opposite end on top of the adhesive. Fig.3

Fig.1    Fig.2 

  Fig.3

4.  Punch a hole at the top edge of the lantern where the ends overlap and a second hole at the opposite side. This will be for the ends of the wire hanger. Align the top edge of the lantern with the cut edge of the bottle then punch holes in the bottle through the hole in the lantern.  The lantern should sit snugly around the top of the bottle, but if not, add a little adhesive to hold it in place. If you would like to add crystal stickers, decorative Washi tape, ribbon, or other embellishments around the top and bottom edges of your lantern, it can easily be done at this point.  You can also add your choice of embellishments while the lantern is still flat, but remember to mark where the holes will be punched along the top edge and to leave 1/2" at the end where the ends will overlap.

5. Cut a 9" piece of wire for the hanger.  Curve it at the center around a small glass, or similar then turn the ends outwards.  Place the ends thru the holes from the inside of the bottle outwards on each side of the bottle then either bend upward to secure, or curl around needle nose pliers, a pencil, or similar.


6. The lantern will be longer than the bottle, so push gently upwards from the bottom to create the lantern effect.  Your lanterns will sparkle in the sunlight,


but as the sun sets, place an LED tea light in the bottom of the bottle.  I found these color changing lights at Michaels, but simple LED lights are just as effective.  

DO NOT USE REAL TEA LIGHTS, OR VOTIVE CANDLES!


NOTE: Let the lantern rest on a flat surface level with the bottom of the bottle as shown above on the right, or gently push the bottom of the lantern up a little further for a more rounded effect.

Variation:
                     The pink lantern was created in the same manner, but instead of placing the bottom of the bottle inside the rolled paper, the top of the bottle was placed facing downwards in the top with edges aligned. Keep in place with adhesive if necessary.  The top of the bottle was also embellished with sticker crystals.


With the top of the bottle facing upwards, this lantern can be placed on top of an LED light on a solid surface. e.g. table, or candlestick.
 

It can also be used with a hanger.  Simply place the LED light upside down into the neck of the bottle with the flame facing downwards.


 With so many bright shiny lanterns, you are going to rock your summer parties! Enjoy!

Y'all come back now.............

Yours truly,
Julie :)

Paper foil provided free of charge by Rinea® for members of the Designer Crafts Connection blog hop. Check the DCC blog for more ideas and inspiration!

KEEP CALM AND CARRY ON CRAFTING!