Independence Day is around the corner...
Happy Birthday U S A !!!
Let's make an extra special card to celebrate....

Don't you love the twinkle! This comes courtesy of Pear Blossom Press who makes it possible to light up your paper crafts with an assortment of tiny light opportunities. Amanda, the owner, gifted me samples to play with and I thought the twinkle lights were perfect for this special card. There's also a Halo light, and a special light for a birthday card candle - the light goes out when you blow on it! You really need to check out their website. In the meantime, here's how I made this card....
You'll Need:

- Pear Blossom Press Twinkle Light
- 8 1/2" x 11" sheet of white card stock
- Red and Blue card stock (6" x 6")
- Tape glue runner
- Double stick foam tape
- Stick glue
- 1/16th" hole punch
- Small star punch
- Embossing stylus
- Paper trimmer
- Tape
Instructions:
1. Cut the sheet of white card stock in half to create two, 8 1/2" x 5 1/2" pieces. Using the embossing stylus, score a line down the center of one piece then fold in half to create a 5 1/2" by 4 1/4" card. Set aside. TIP: I use the channel in my paper trimmer as my embossing guide.

2. Cut the following pieces:
One, 5" x 3 3/4" piece of white card stock. This will be the base for the "flag".
Five, 5" x 3/8" strips of red card stock
One, 2 1/4" square of blue card stock
Punch six small stars with a 1/16th hole at the center as follows: Punch 6, 1/16th" holes about 1" apart along the edge of white card stock. With the star punch upside down so you can see the hole, punch out the star shape with the small hole at the center.

3. Arrange, then glue the stars on top of the blue card stock square.

4. Using the hand punch, punch thru the hole in each star thru the blue card stock. Hold the square up to the light to check.


5. Align the top left corner of the blue square with the top left corner of the 5" x 3 3/4" white card stock rectangle, then glue the top edge only of the blue square to the white rectangle. Punch thru each hole in the star thru the white card stock. The hole punch cannot reach the star at the bottom right corner, so make a straight cut about 1 1/2" long from the edge of the white rectangle, 1/4" up from the bottom of the blue square. This will allow you to punch the hole in the last star. You can also use the point of sharp scissors, or a spring punch to make the hole.


6. Use tape to close the cut on the back of the white card stock, then finish gluing the blue card square in place.

7. Use the tape runner to glue the strips of red card stock across the front of the white card stock as shown. Trim the long strips even with outer edge.
TIP: Place the first strip even with the top edge, the middle strip even with the bottom edge of the square, the bottom strip along the bottom edge, then the remaining strips centered in the openings between the first, middle and bottom strips.

8. Carefully remove the light units from the package then push the batteries in place. Press the tiny button at the opposite end from the wires, to check you placed the battery the correct way up.


9. Carefully use a sliver of tape to hold each light in place behind each hole at the back of the flag. Tape the "button" ends of the battery units together on the back of the units.

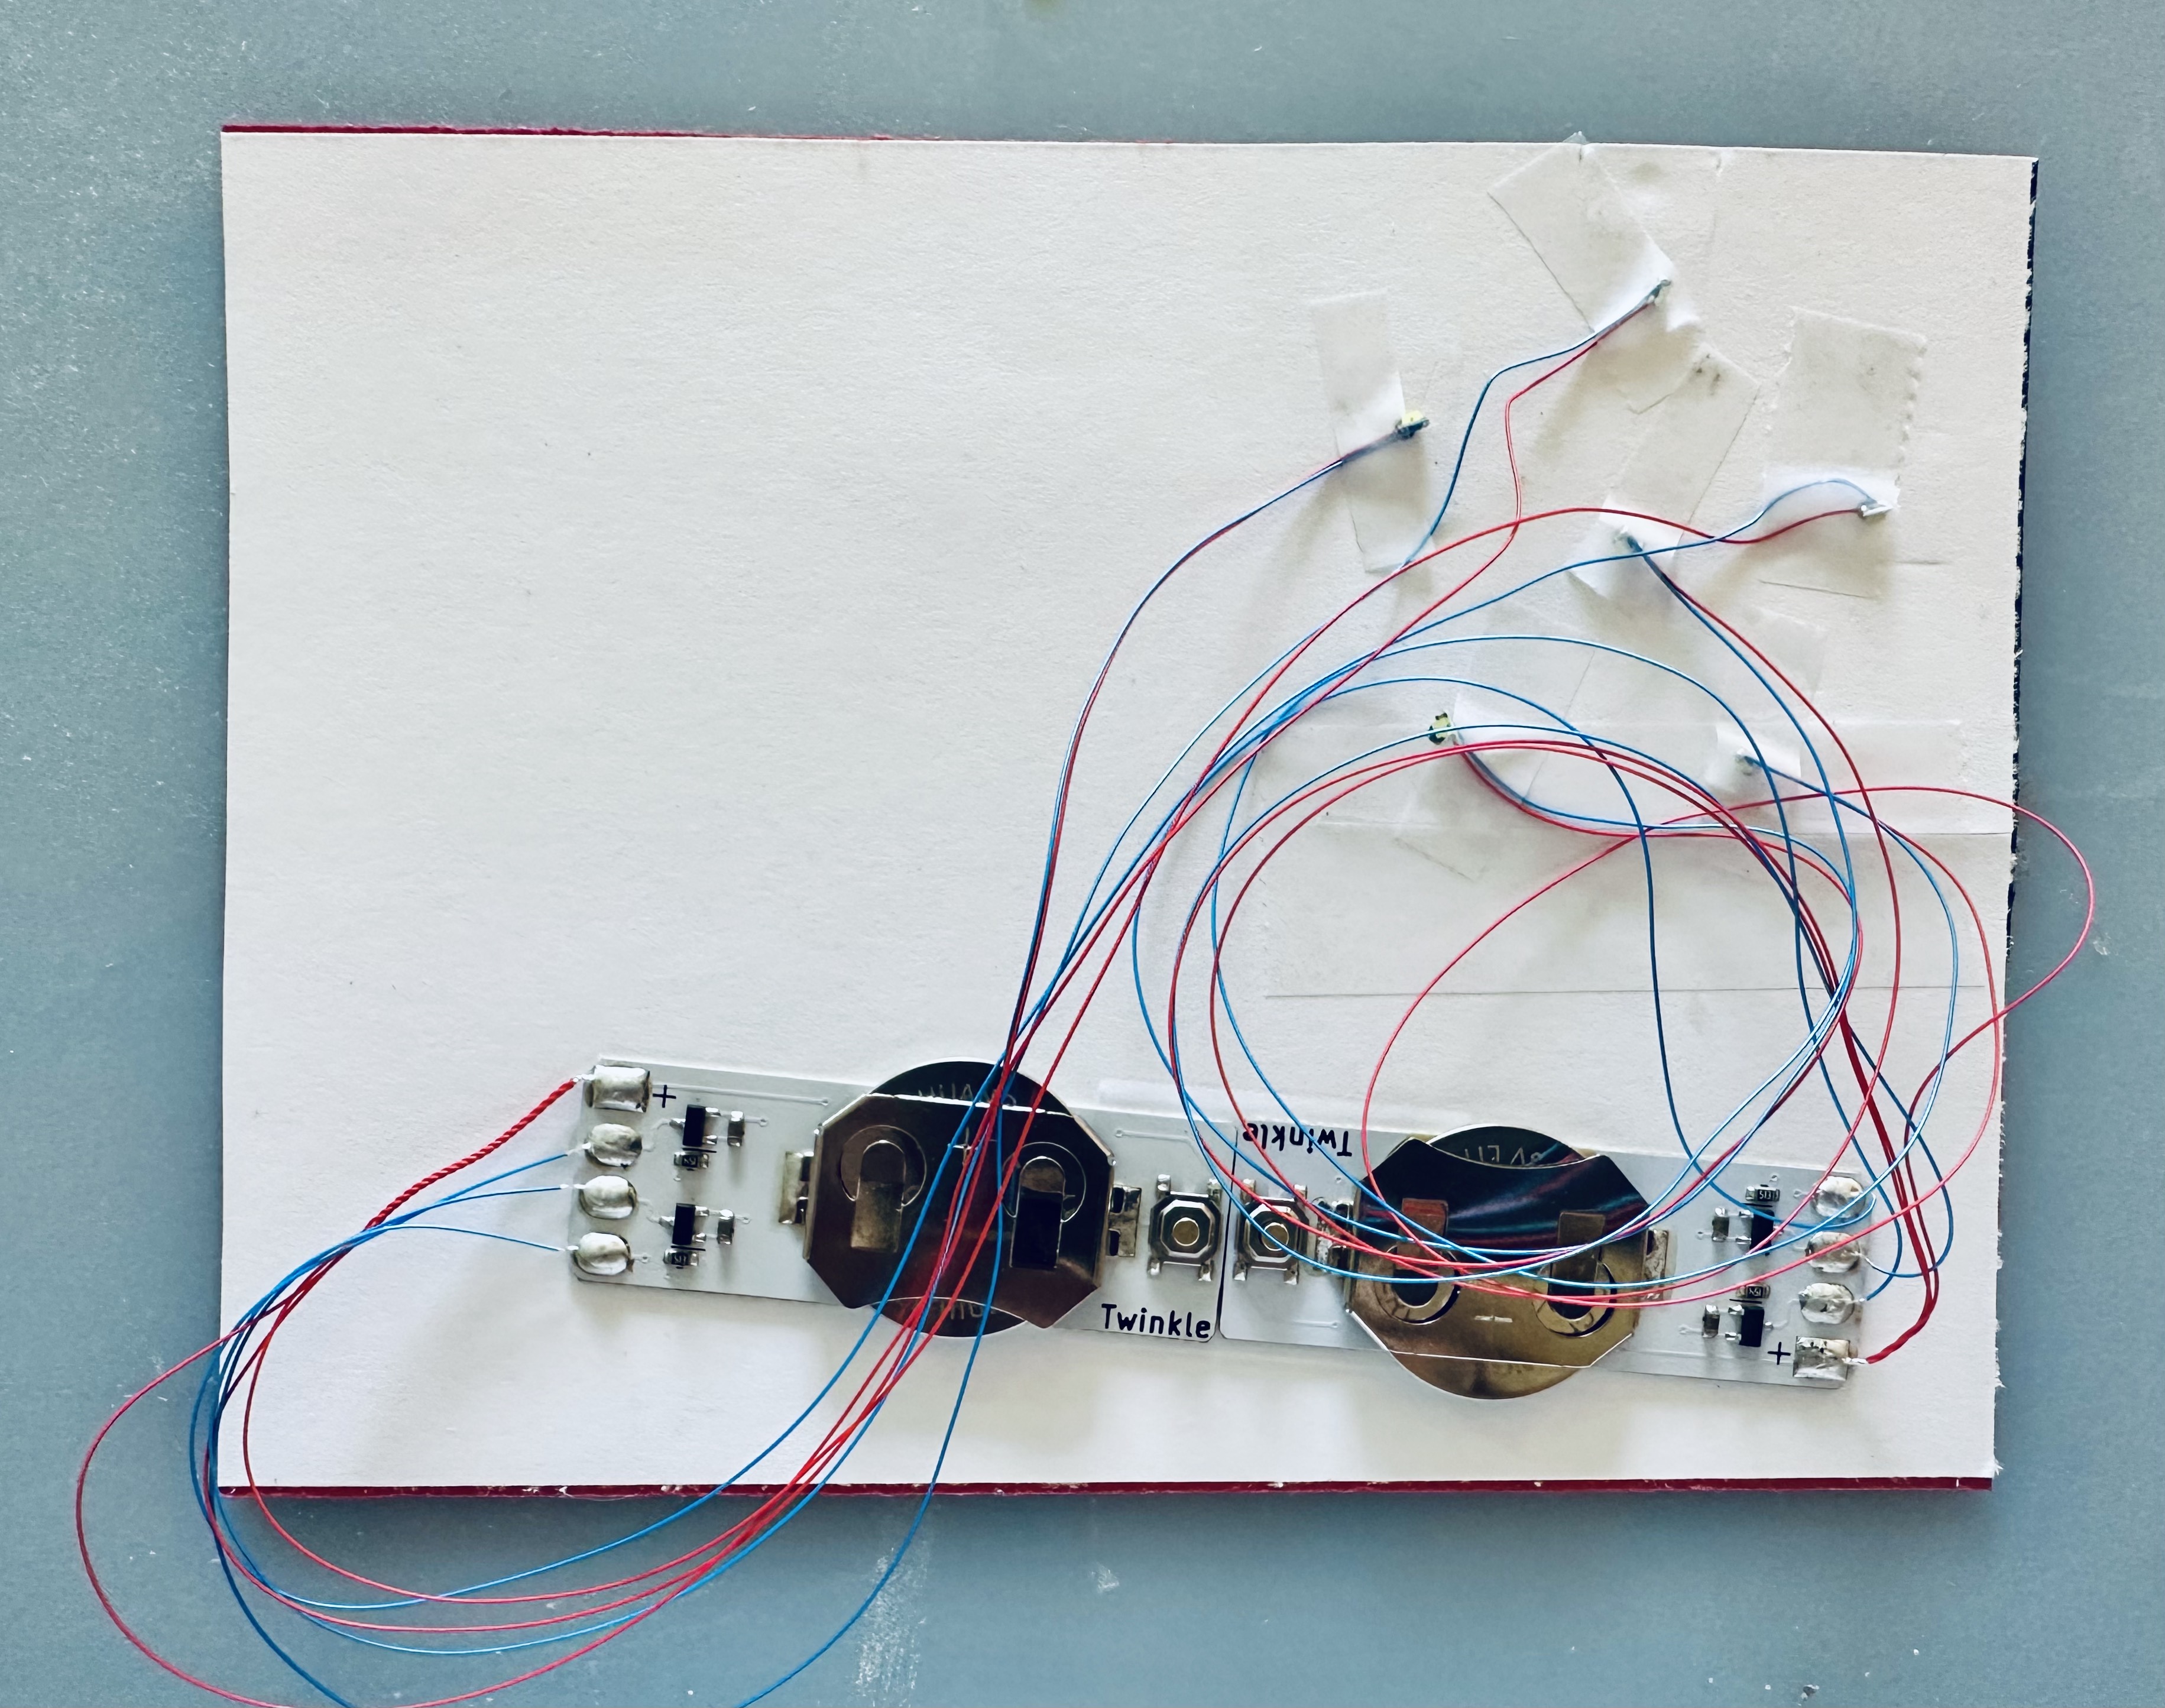
10. Carefully place the wires within the edges of the card stock, secure with tape as needed, then adhere foam tape along the top and side edges. Make sure the battery units are at the bottom with the buttons for the lights at the center between the two, red stripes.

11. Adhere to the center of the card. Press your finger firmly over the bottom of the flag to check the location of the buttons to activate the lights.

12. Write "Let's Celebrate" & "PRESS" directly onto the flag, or print on white card stock. Cut strips with the lettering sized to fit between the red strips then glue in place.
OPTIONAL: Add sticker letters U S A if desired.

Have an aaahmazing Independence Day celebration!!!
Yours truly,
Julie 💝
KEEP CALM AND CARRY ON CRAFTING!