Thursday, December 20, 2012

Scrapbook Soup Show 211

Not sure what the problem is, but I've been unable to connect to the show these past couple of days.  My internet has been a little erratic this week - I'm on satellite, so I'm sure it's weather related.  I do hope you've been able to watch.  I featured a postcard album this week.  I used to collect postcards from all over the world in the 50s and 60s and, as you'll see, my makeshift album was in dire need of updating.  One of the things I neglected to mention during the segment was that the reason I used clear document covers, was so that I could see both the front and the back of the postcards.  The back is pretty important, because that's where the "journaling" is.

Not sure I'll get post about the next couple of shows since the holidays are almost upon us and I seldom have time to log on to the computer when the family is around.  I'll try though, but please excuse me if you don't hear from me for a while.

Hope you all have a very Happy Christmas and a healthy and blessed New Year!  Y'all come back now....

Yours truly,
Julie :)

KEEP CALM AND CARRY ON CRAFTING!

Thursday, December 13, 2012

Scrapbook Soup Show 210

Show 210 is now airing online at www.scrapbooksouptv.com.  Here's what you'll see this week:

This show is all about wall art.  We start by sharing a couple of ideas on how to use your scrapbooking supplies for wall art - brought to you by the letter "J".   Scrapbook paper comes in so many different colors and patterns, it's easy to find something to match the décor of any room.  I used torn scraps to cover a piece of foam board, or, if you need something thicker as a base, glue 2 or more pieces together.  I then glued the narrow ribbon around the outside edge and the letter on top.  This letter was decorated with doodles using dimensional glass paint.   The second was a simple frame covered with paper and additional embellishments from my stash.


If you loved the magic of a kaleidoscope as a child, then you'll LOVE this next project using software from KalCollections.  Julie takes you step by step thru the software and you can find detailed instructions on our website.


Marilyn Gossett joins me next with an entirely different kind of wall art using paper, burlap and a new kind of crazy hook!  You'll definitely be "hooked" on this new product.


Suzy West then shows Julie even more embossing techniques.  Yep, I'm going to say it - prepare to be "wowed"!  I especially love the tip about putting it in the freezer - you'll have to watch to see what I'm talking about.


And finally I have another project that hangs on the wall.......


Our featured journal this week was designed and created by Debra Quartermain.  Debra works primarily with fabric, so you'll see that her representation of a journal is much different than the ones we've seen before.


Don't forget that instructions for all the projects you see on the show can be found at


Enjoy the show and don't forget to comment here on your favourite projects and/or techniques and you'll be entered to win this week's holiday giveaway.  The winner will be announced on our Scrapbook Soup FB page.  (US addresses only please.)  You can also see photos of all the projects on our Pinterest board.  Have a great week and y'all come back now!

Yours truly,
Julie :)

Wednesday, December 5, 2012

Scrapbook Soup

Show 209 is online until Friday noon EST @ www.scrapbooktv.com   This is what you'll be seeing on this show:

During the open I shared a digital storybook/scrapbook I made for my daughter and a journal my sister made for my husband - years before scrapbooking was a trend.  I love photography and digital storytelling/scrapbooking is a natural creative addition to my hobby.   On each of the pages I used one photograph as the background then layered additional photos on top.  In the past, I've also created pages where I've scanned actual items, like a smocked dress my mum made for me when I was 7 years old.  I used this for the background to a black & white photo of me wearing the dress.  This wasn't even a digital page!  I printed the background then put the photo on top and placed it in an album.


The first project was designed to show some new, creative uses for Painter® markers and regular white glue from Elmer's.  I used the Painters to trace patterns onto acetate so I could create a design on top of tie dyed glitter paper.  For the second technique I showed how you can mix white glue with paint, sponge it on to foam board then sprinkle with glitter for a matching background for my page.  Then, as you can see, I framed the whole page (which was glued to the foam board) with a wood laser frame (from Michaels).


Susan Lenart Kazmer joined us next with a project that also celebrated mixed media art.  Watch the show to see how she combined mica, metal, ribbon and more for this elaborate steampunk style, mixed media journal.


Nancy Hill from Die Cuts With a View shared her grandmother's 100 year old scrapbook then showed us more recent journals it had inspired.  Scrapbooks, Journals, Smash Books, Jot Journals, Diaries and more are all ways we keep track of our daily lives.  They are places for photos, notes, ticket stubs - whatever you like and lots of fun to look back on 25, 50 or even 100 years from now!   


Our final segment was Party Time!  Julie and I are always up for a party and this collection was designed by Julia Sandvoss for Glue Arts.  You can find instructions for all the projects we showed on our website.


And finally we shared one more journal at the end of the show.  This one was designed by Ann Butler.  You can find information about how to create this journal on her blog @ http://www.creativitystirsthesoul.com/ 2012/01/journaling-with-designers-craft.html


Since December is the gift giving month of the year, I have another giveaway for you, but this time it's a mystery box, full of products you've seen on the show.  Enter to win by watching the show then commenting here about your favorite projects.  Don't forget to check our FB page @ http://www.facebook.com/ScrapbookSoup to see whether you are a lucky winner or not!  Enjoy the show and y'all come back now!

Yours truly
Julie :)

KEEP CALM AND CARRY ON CRAFTING!

Sunday, December 2, 2012

Handmade Christmas Crafts

It's First Monday and Designer Crafts Connection is posting handmade projects for Christmas.  I'm sure most of you have already finished decorating, but maybe you're like me and still unpacking boxes!

As usual, I needed something that could be "Made in Minutes" since I'm behind as usual.  I should know by now that it takes a lot longer than I think to fix the lights on the reindeer.... if you get my drift.  On top of that, it's been 80˚ degrees here in Texas (not exactly weather that's gets you in the Jingle Bell mood) and it's been very windy - you know that's true when the reindeer actually fly......

Anyway, here's a simple project I hope you'll enjoy!  My daughter loves anything red with white polka dots, so I just knew I had to do something for her with this tissue paper I found.  I cut a 12" x 5" piece of Smoothfoam™ and glued the paper around it with DecoArt®, DecoPage. Because, as its name suggests, Smoothfoam™ is nice and smooth, I didn't have prep the surface.  I let it dry for a few minutes then coated the top of the paper with DecoArt Crystal Craft Twinkles to give it a bit of bling.  Next I wrapped ribbon around the center then glued pre-decorated letters on top.  I found these at Michaels in the seasonal dept.  I glued the ends of a piece of ribbon to the back for a hanger, then added a bit of a Christmas embellishment with a quilt pin (this way I can change it out, if I find something better when I unpack my Christmas stuff).  Voilà, I now have a sign for her kitchen!

TIP:  I cut the Smoothfoam with a craft knife and a metal ruler.  I sometimes have a problem with the blade sticking into a regular cutting mat, so I always cut on a glass surface.  I use a 13x13 glass mat, which used to be available from EK Success.  If you can't find one,  you can use a piece of glass from a frame.  Be careful however, because the glass probably won't be tempered like my glass mat.

Well that's it for now.  I'll be featuring more handmade Christmas decorations as I unpack next week.  It's always been a family tradition for us to make something new every year, so I have quite a few ideas to share.  Hopefully it will inspire you to start your own handmade Christmas traditions!  Better hurry though, Christmas is only 3 weeks away!  Boy, do I ever need to get a move on.........  Enjoy!

BTW, I'll be posting notes later this week about Scrapbook Soup, show 209.  There'll be a giveaway too, so y'all come back now......  Regina Hamilton won last week's giveaway - Becky Fleck's Page Maps 2 and the matching dies from Spellbinders!  Hmmm, wonder what the next giveaway will be...

Yours truly,
Julie :)

KEEP CALM AND CARRY ON CRAFTING!

Monday, November 26, 2012

Scrapbook Soup

Are you familiar with Page Maps?  Becky Fleck put a book together a few years ago based on formulas for page layouts.  It was an immediate success and we open show 208 with a quick look at her second book, Page Maps 2 and companion dies.   This is a great guide for anyone needing help with page layouts, tips on the benefits of sketches and lots of ideas.  Wouldn't you just love to get this book and dies?  Yes?  Well carry on reading.........


Julie FF designed our first project specifically for those of you who may be "doodle challenged".  She has some great ideas to share to get you started.


Stacey Caron from Spellbinders joins us next to show us their new line of "Cut, Fold & Tuck" dies.  Check out how easy it is to create these layered and dimensional embellishments.


An eco-friendly double page spread is next with Julie FF.  You'll be surprised how easy it is create and it's a great project for the kids in your family.  Be prepared to get messy with us!


You may remember Rachel Carlson from an earlier show.  For this segment we gathered up all our leftovers to make cards.  BTW, if Rachel seems familiar, you may also have caught sight of her on the popular TV show Grimm where she plays an intrepid "detective".


This week's journal was sent to us by Tara Noel.  Another great example of journaling our daily lives, special trips and events.  You can find more information here on her blog: http://taranoel.typepa
d.com/.a/6a0133f 33387f0970b0168e538e3f4970c-pi


It's Christmas Day 4 weeks tomorrow, so here's a special giveaway for you!  Watch the show at www.scrapbooksouptv.com then comment here on my blog which project you liked best and why and you'll be entered to win Becky's Page Maps 2 book AND the Spellbinders Page Maps dies pictured above.  (US address only.)  Enjoy!  Y'all come back now...........

Yours truly,
Julie :)
Keep Calm and Carry On Crafting!

Sunday, November 18, 2012

Scrapbook Soup

Scrapbook Soup Show 207 is now airing online @ www.scrapbooksouptv.com.  We air each show 24/7 every day for a week starting at noon EST on Fridays.  This week's show was all about new materials.  I started the show by sharing an assortment of materials to be used with an inkjet printer.  I love photography, so I'm always looking for new ways to display my photographs.  One of my personal favorites is Transfer Artist Paper from C&T Publishing.  You can print on this material then add the images to almost any surface! 


Another favorite of mine is canvas.  You can almost achieve the look of an oil painting using this material.  It's a great surface for a multitude of mixed media projects and inkjet canvas paper is easy to find.  This was the basis for the first project I designed for Elmer's.  I just love this photo of the cardinal.  I found him sitting on the fence one wintery morning and shot him - with  my camera of course......  The project was designed to feature glue as a resist.  You'll have to watch to see what I did!  Hope you love it as much as I do. 


Stacey Caron from Spellbinders presented our second project, a shabby chic scrapbook page using die cut elements that were cut, embossed and stencilled using a single die!


The "Puppy Love" page, designed by Julie FF, featured a new line of wood embellishment, tools and inks from Prima


and for our final project, Suzy West shared some "WOW" ideas for using embossing powders on metal.


The overall theme for this series is Journaling and at the end of each show, we share personal journals from viewers who are also CHA Designer members.   The first journal is from Madeline Arendt.  You can find more details about this journal on her blog @ http://www.madelinesthoughts.blogspot.com.  The second journal was created by Brenda Pinnick.


You can see detailed instructions on how to make each of these projects when you watch the show. Project instructions are also available on our website under the "Projects" tab.  Enjoy!

Have a very wonderful and blessed Thanksgiving!  Y'all come back now.....

Yours truly,
Julie :)


Saturday, November 10, 2012

Smoothfoam

Smoothfoam™ is a fun product to work with giving crafters endless opportunities to be creative quickly and easily.  Here's why:

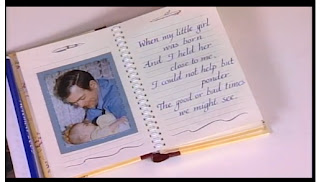
1.  You can paint directly onto its smooth surface without any prep!  For example, I painted the surface of a 12x12 sheet of Smoothfoam with pink acrylic paint, pinned ribbon around the edge, added a 12 x 12 piece of lace scrapbook paper, photos and embellishments to create a lightweight wall hanging.  Perfect in a baby's room.  

 
These pieces were painted with Neon acrylic paint for an older child.  Adding embellishments to the robots was easy.  The buttons were large red brads pushed directly into the painted surface.


2.  You can pin things into it without worrying that they'll fall out again!  Create flower balls for Spring, birthday, shower or wedding decorations, or a topiary for the holidays.  Just add small silk flowers with sequin pins.


3.  You can cut it without it crumbling.  Stack a small, medium and large ball together to create your very own Snowman.  Cut a slice from each side of the ball then glue the flat sides together.


4.  You can glue anything to it, so its perfect for découpage using the printed layer of a decorative napkin, or pieces of leftover wrapping paper.  It's also great for lightweight photo cubes.


5.  And since the holidays will shortly be upon us, how about some quick'n EZ projects to get you started.  Simply cover the surface of a Smoothfoam ball with glue, then sprinkle liberally with glitter.  Display on a colored charger, or in a large martini glass.  You can also add gold brads, or stickers and hang with a ribbon.  (Make a "u" shaped hook from a paper clip to hold the ribbon and hanger in place.)  Like I said, EZ PZ Quick'n EZ and sure to add a special sparkle to your holidays.


You can find Smoothfoam at all major craft stores, but - guess what - we're having a giveaway!  As you hop thru the designer blogs, comment on your favorite projects.  Each time you comment you'll be entered to win, so the more comments you add the more entries you'll have. (You can also comment on our Pinterest page after November 12th for additional entries.)   The winner will receive this Smoothfoam Snowman kit


and, as you know, if you've ever received a box of goodies from me, there'll be a whole lot more for you to play with.  The winner will be announced on Monday, November 19th on our Facebook pages @ http://www.facebook.com/DesignerCraftsConnection?ref=hl and @ http://www.facebook.com/Smoothfoam  We hope you'll "like" us too!  Enjoy!  Y'all come back now...

Yours truly,
Julie :)