Friday, July 26, 2013

CHA Summer Show 2013 - Create & Connect

Greetings from the Las Vegas Hilton, home of Create & Connect!


 Like the summer show in Orlando a few years ago, this year's summer show in Las Vegas was busy and intimate.  Sadly it was also the last of the summer shows.  As an industry designer and consultant, I have been attending both summer and winter shows for the past 20+ years and will surely miss my summer trips.  On a positive note,  the winter show is only a short 5 months away!

There were some really cool products on the show floor.  We've seen some of them before, but there were also some innovative new ones:

1.  3-D Printer.  I'm sure you've heard about these in the news, well here it is, up close and personal.  Not yet available at retail, but eventually you'll be able to buy this particular model for less than $1,000.


Quick question:  What would YOU use a 3D printer for?  I'd seriously love you to comment on this.

2.  Bottle Cutter.   Bottle cutting isn't new, but I really like this one.  It's easy to use and you can also purchase wine glass stems to used in the top part of the bottle.  Personalize with original etchall® re-usable etching dip, or creme and you have a winning combination each and every time!


3.  Magic Marble.   We've seen marbling paint before, but this can be used with regular tap water.   Look what they did with these Smoothfoam™ balls.  Note:  Smooth foam has a smooth surface which can easily be marbled.


Check out this short, how to video by Lisa Fulmer.  http://www.youtube.com/channel/UCEVXpCg8s1U2mfu9I5efqTA?feature=watch

4.  Milk Paint.  Anyone else remember this?  Well, it's baaaack......

 
Now here's some iCandy from the show floor:


The following pieces are framed art paper collage by DCWV:


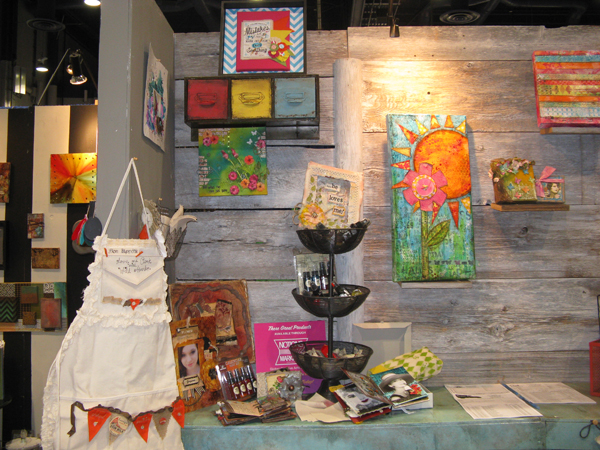
So what will you Cre8 Time for this year?  Designers were asked to create displays around the theme "8".  Here's mine.  8 projects showcasing 8 crafting categories:  Mixed Media, Digital Wall Art, Decorative Painting, Up-cycling, Preserving Memories (Scrapbooking), Accesories, Jewelry Making and Re-cycling.


Time to go.......


Enjoy!  Y'all come back now..........

Yours truly,
Julie :)

KEEP CALM AND CARRY ON CRAFTING!


Thursday, July 18, 2013

Rowlux® Illusion Film

I am SO busy, but ideas and techniques keep popping in my head for the Rowlux film, so I thought I'd share a couple more.  Sorry there are no photographed step by step instructions, but I'm all about techniques that may inspire you to play too.

        Lantern.  Do you remember making paper lanterns when you were in elementary school?  I still make them for parties for the kids, but got to thinking they'd be really cool for adult parties too.  So here's an updated "paper" lantern that you could use for summer parties.


1.  Starting 1/2" from the edge of a 5" x 12" piece of film, I used a craft knife and metal ruler to cut slits 1/2" apart along the length of the piece.  I started and ended 1/2" from the top and bottom edges.  Punch holes 1" apart along the top and bottom edges.  Punch holes in each end (make sure they're aligned), then roll the finished piece into a cylinder.  Overlap the ends then secure with brads. 

2.  Cut a second piece of film about 4.5" x 12".   Punch holes 1" apart along the top and bottom edges.  Roll into a cylinder then place inside the first piece.  Make sure the holes are aligned then secure the bottom edges of both cylinders together with brads.

3.  Push the outer cylinder down so the holes of both cylinders are aligned then secure the top edges together with brads.  Use bulldog clips to hold the edges together until you've secured them with the brads.

I placed mine over the top of a tall glass votive, but you can adjust the size to fit whatever you might have on hand.  You could also place it around an empty glass vase and use it for flowers, or you could add a handle if you wanted to hang it and even dangle shapes from the bottom. 


        Flower.  This is just a cool technique I wanted to share.  I was wondering what would happen if I used an embossing/heat gun on the film and OMG - I love it!  Just look!!


I cut a free form, 5 petal flower from pink film then applied the heat gun to one petal at a time.  What now?  Well I punched a small hole in the center then pushed the shank of a button thru it.  Secondly I attached it to a candle using the bar pin of a small brooch I had.  


Given more time  I might have been tempted to create a vase full, but one is okay for now.  I'll add a wire to the button shank then pop it into a skinny rose vase I have on my kitchen window sill that gets a lot of sun.....  So many ideas, so little time.

That's all for now.  Off to Las Vegas for the CHA Summer trade show on Monday and I still have lots to do.  Check my post below for more info and a GIVEAWAY for Rowlux® Illusion Film.  Y'all come back now!  Enjoy..........

Yours truly,
Julie :)

KEEP CALM AND CARRY ON CRAFTING!