
It's been really, really windy in Texas this Spring, so a wind sock seemed like a pretty good project to feature some red & white striped ribbon! Plus, it's always a good idea to be able to look thru the window to see which way the wind is blowing before stepping outside.... and, it's another way to show support for the red, white & blue on Memorial Day, Independence Day and Veterans' Day if you don't have a flagpole...

Here's what you'll need:
- 2 Gwen Studios 5/8" Red & White Stripe Grosgrain Ribbon spools @ 9' each
- SINGER® Blue and White Stars Cotton Fabric Bundle
- Loops & Threads™ Wooden Embroidery Hoop - 6"
- String - about 5'
- 5/8" Bead with large hole
- Needle & Thread
- Scissors
- Double-sided adhesive tape (optional)


1. Separate the embroidery hoop then cut a piece of fabric long enough to go around the inner hoop, plus 2". I measured the length along the selvedge edge of the fabric, then cut the width between the 6th & 7th rows of stars. (I adjusted later by removing the 6th row of stars.)


3. With the ends of the string facing upwards and the loops hanging down, wrap the fabric around the outside of the hoop with the pattern facing inward. You may find it easier to put double-sided tape around the outside of the hoop first to hold the fabric in place. Overlap the ends then fold the upper piece of fabric back 1". Adjust the top edge so about 1" of the fabric shows above the edge of the hoop.

3. Unscrew the outer hoop so you can slide it around the fabric covered inner hoop with the screw placed where the ends of the fabric overlap.Tighten the outer hoop to hold the fabric and the ends of the string in place. Flip the fabric over the outer hoop.

4. Snip the fabric where the ends overlap around the screw. Fold one end under then pin together. "A stitch in time saves nine, but I hot glue mine" is a popular saying in crafts, but for this project I used a simple running stitch to stitch the sides together.

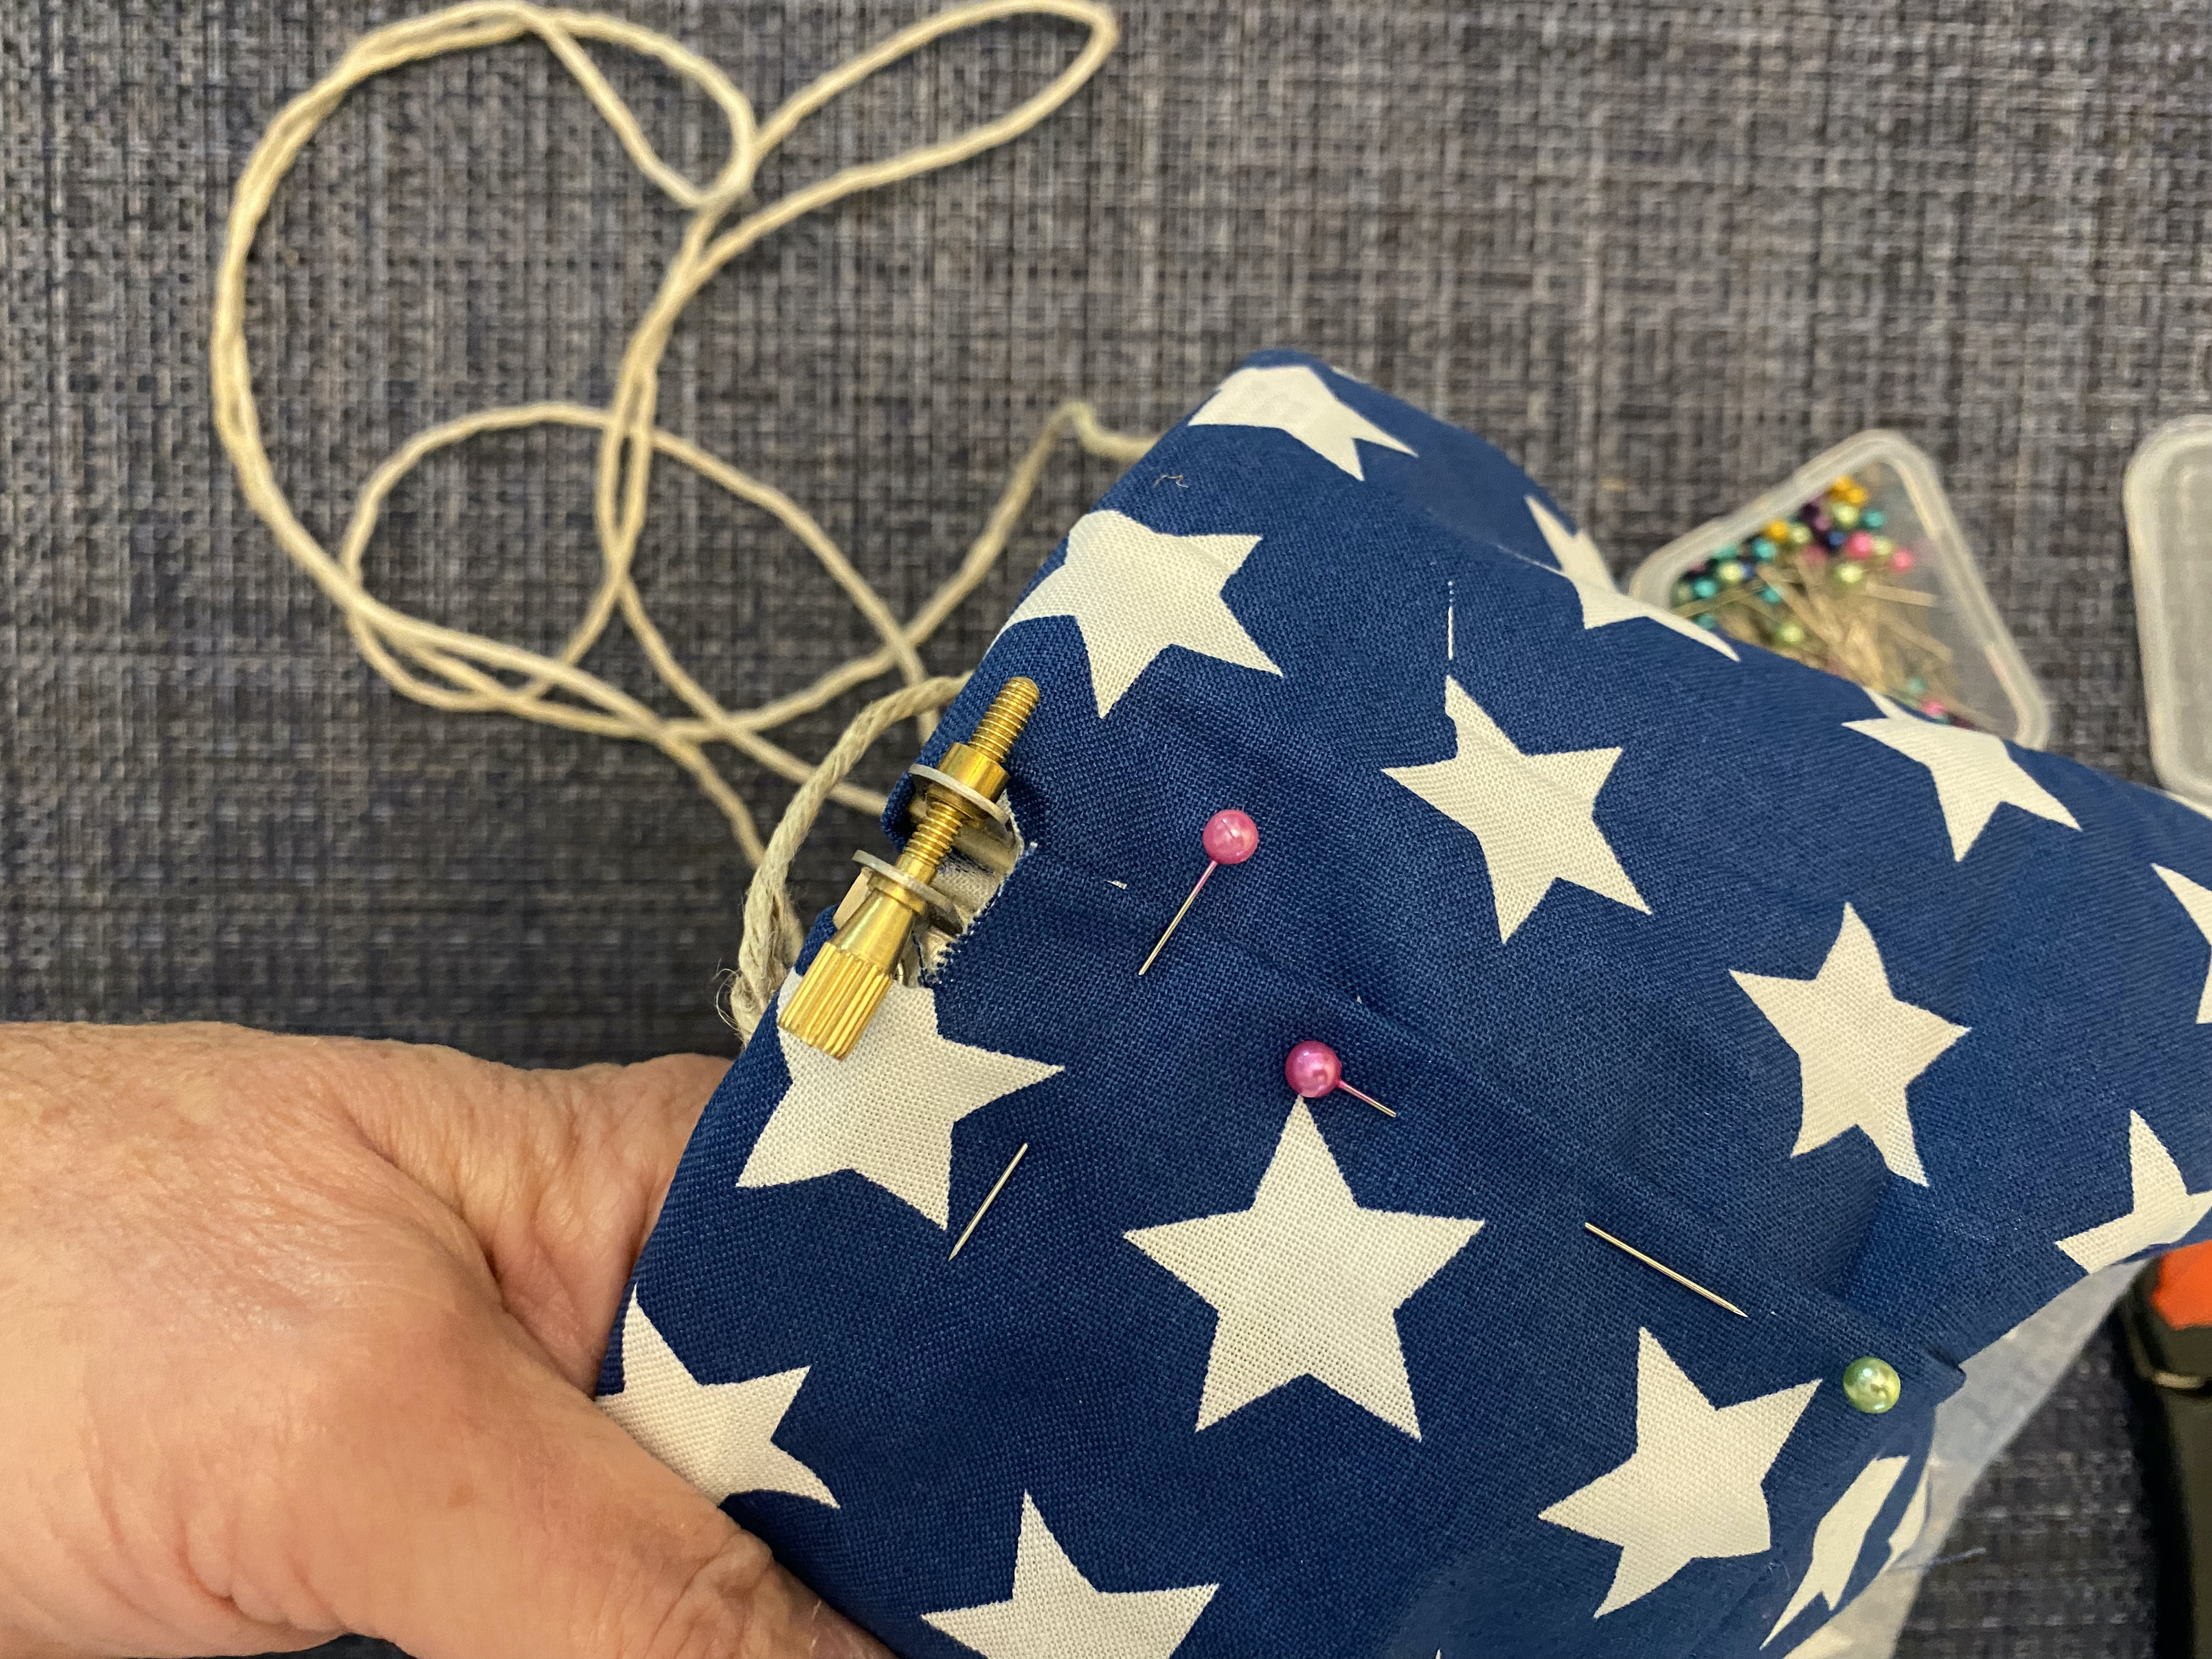
5. Cut one spool of ribbon into 8 pieces. (I folded the full length of ribbon from the spool in half, then in half two more times to create 8 equal pieces.) Using one of the pieces as a guide, cut 6 additional pieces from the second spool.
6. Attach the ribbons around the bottom of the fabric as follows:
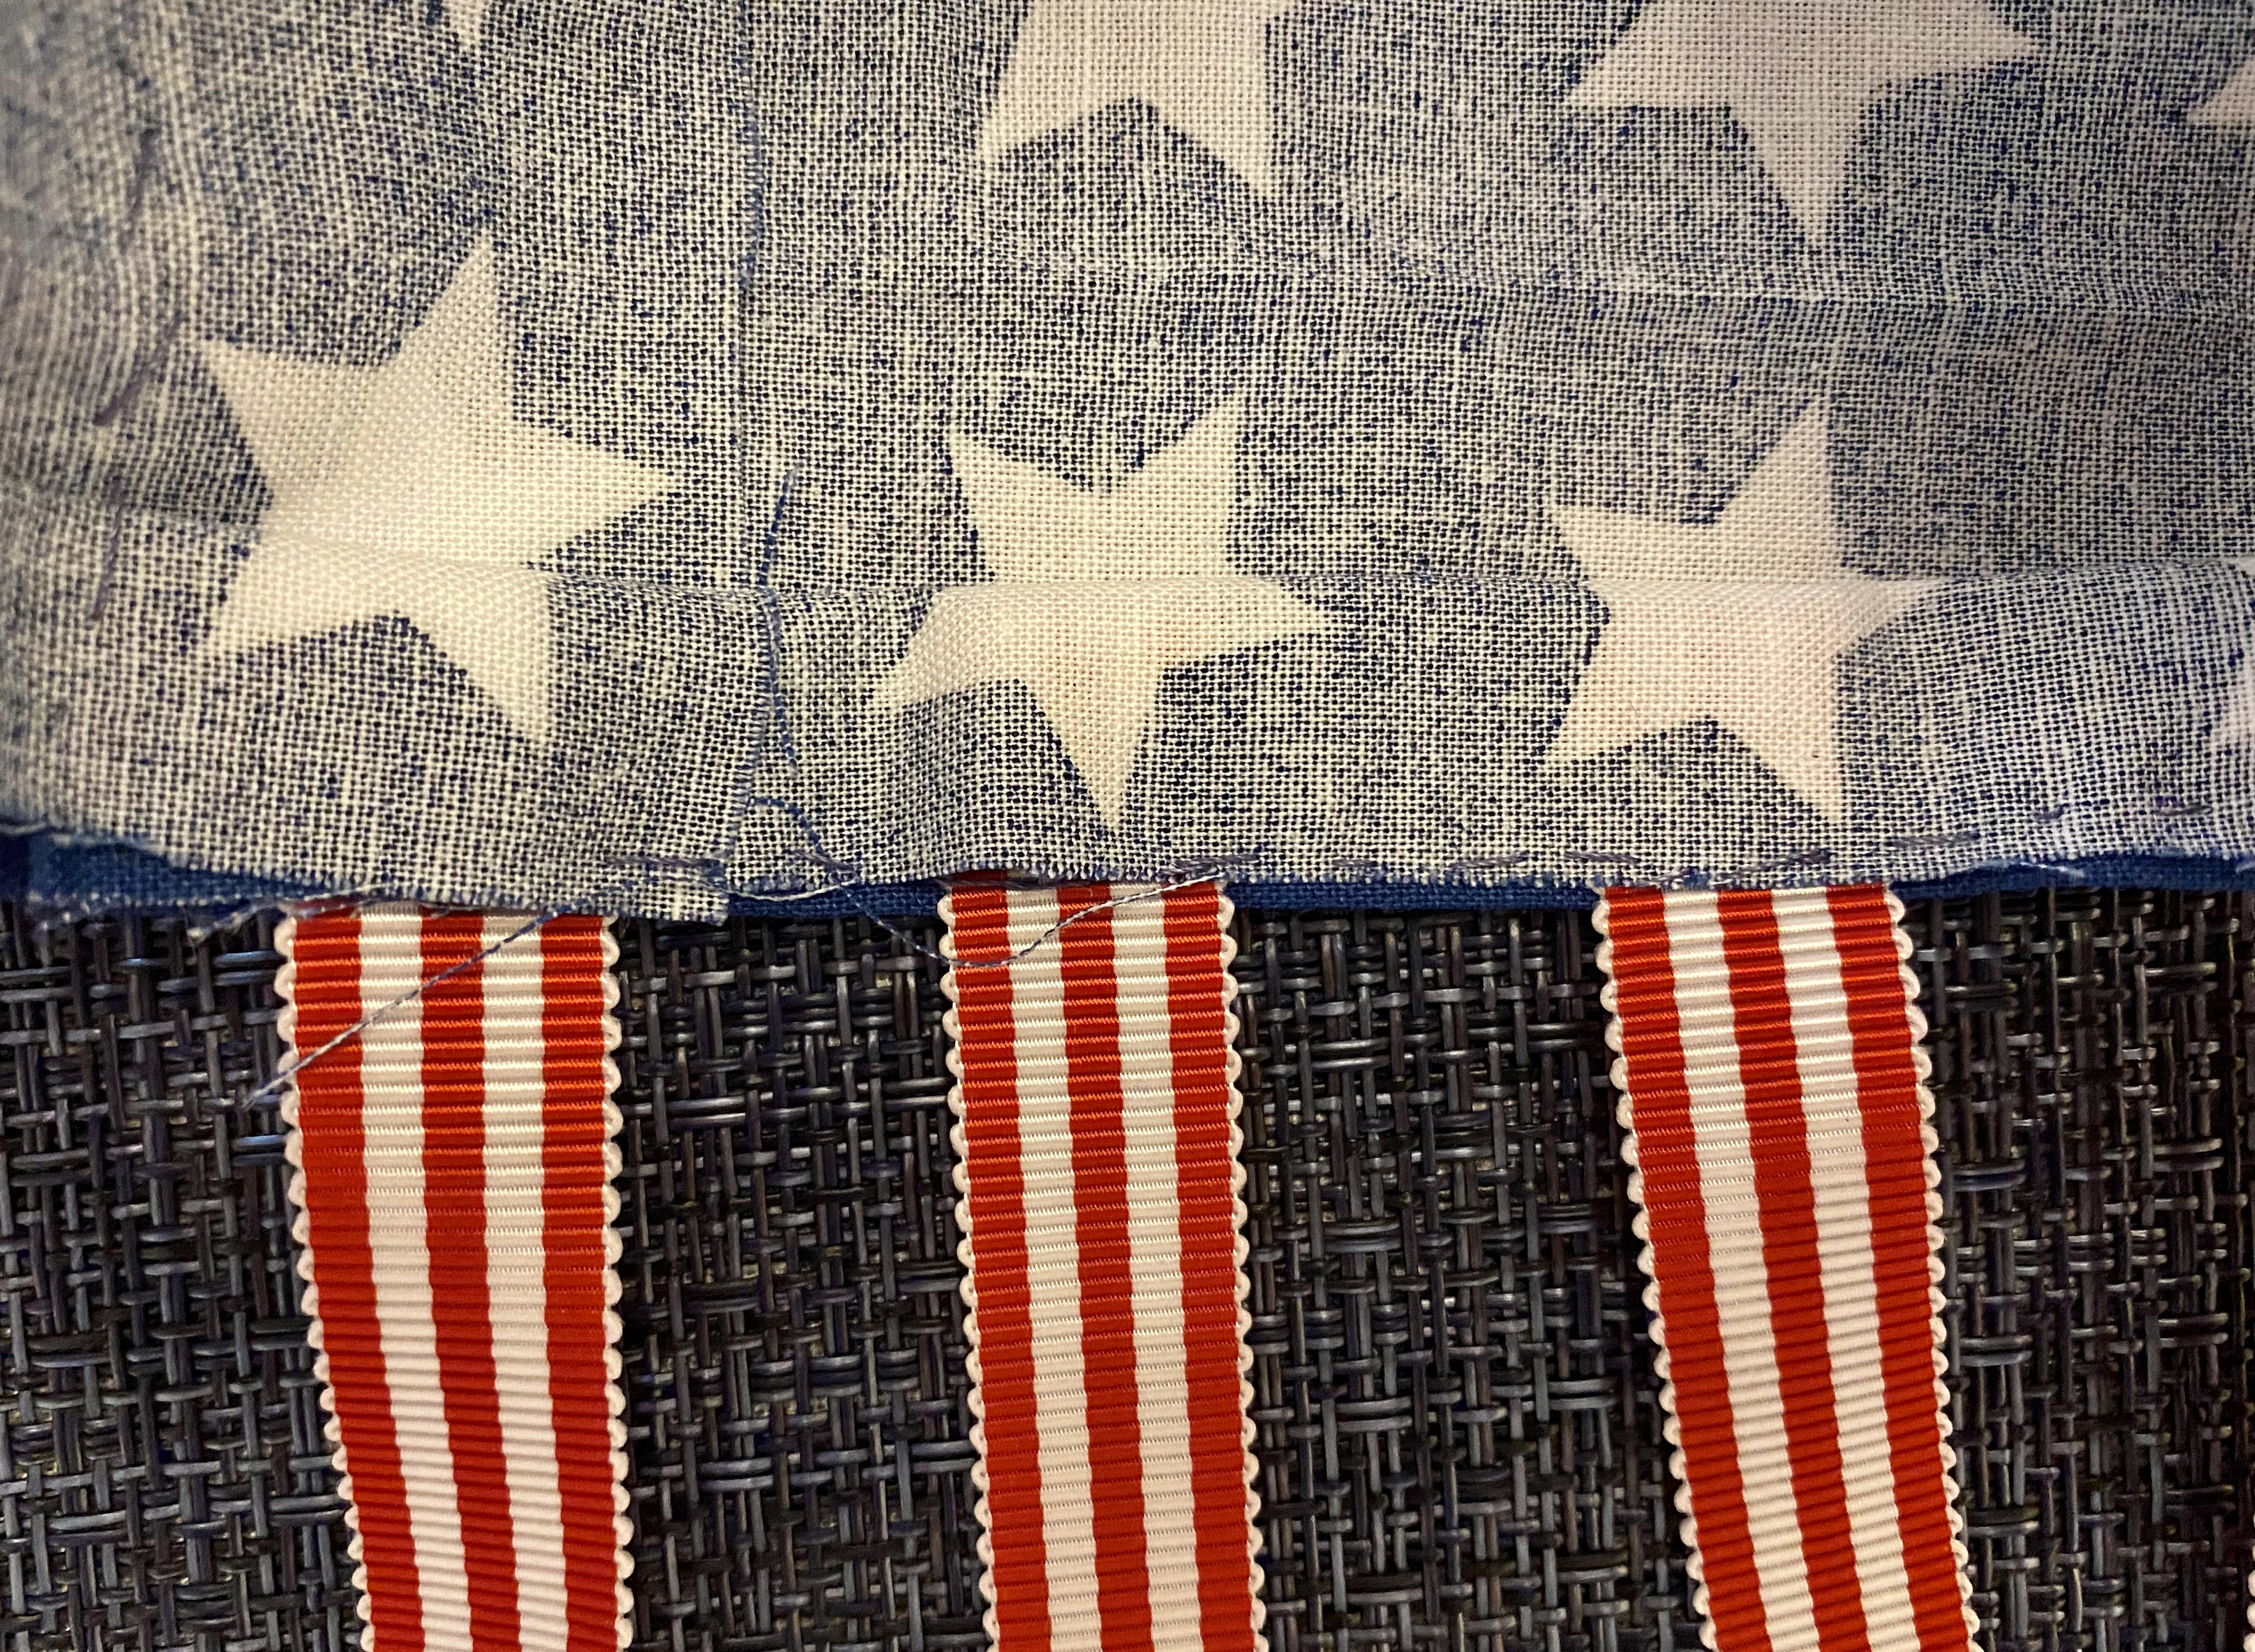
- Fold the bottom edge of the fabric upward then place the end of the ribbon at the center. (I used the stars as a guide for placement.)
- Pull the top of the fabric down over the end of the ribbon.
- Pin in place all around the edge, then stitch to secure.


7. Thread the bead over the folded ends of the strings. Make sure the ends are aven then tie an overhand knot above the bead to create the hanger.


With a wide variety of ribbons to choose from, this is a fun project for parties and celebrations! Enjoy!
Yours truly,
Julie 💝
KEEP CALM AND CARRY ON CRAFTING!
Look for more inspiration using the red & white stripe ribbon from Gwen Studios on the

The red & white striped ribbon was provided for this project by Gwen Studios.
The fabric and embroidery hoop were purchased at my local Michaels store.
what a fun project - so creative!
ReplyDeleteLov this! Great idea to have in the yard this summer.
ReplyDeleteI have not made this yet, I will post when I do. I will make it closer to holiday. Thank You's for sharing this project ❤️
ReplyDeleteGreat project! However, when I tried to purchase the fabric from Michael's, the message said they couldn't find that item. Can you tell me how much fabric was in that bundle? Thanx!
ReplyDeleteThe fabric was a quilt pack, but you could probably purchase a 1/3 or 1/4 yd of any blue with white stars fabric. You would only need enough to go around the outer embroidery hoop. The width of the fabric would be enough. .
Delete