When visions of sugar plums dance in your head….. it’s almost Christmas1

You will need:
- Kunin® Classic™ 9” x 12” Craft Cuts – 1 each Lemon Frost, Baby Pink & Minty
- Kunin® Premium 9” x 12” Craft Cuts – White
- Joy® Embroidered iron-on letter sheet – White


- Cricut® Maker™ with Rotary blade (optional. Shapes can also be cut with scissors.)
- Cricut® Easy Press Mini, or iron
- Mod Podge® Ultra – Matte
- Crystal glitter
- Glue gun & lo-temp glue sticks
- Mini pom-pom trim – 3 yd spool
- Bag of small craft pom-poms, or cut from pom-pom trim
- Tacky glue or large, extra strength glue stick
- Needle and thread
- Scissors & wax paper
Instructions:
1. Using the “shapes” feature in Cricut Design Space, create:
· 4” x 3” triangles - 5
· ½” circles - 15
· ½” x 11” rectangles - 3

2. Cut one set of shapes from each piece of felt - Lemon Frost, Baby Pink and Minty felt as follows:
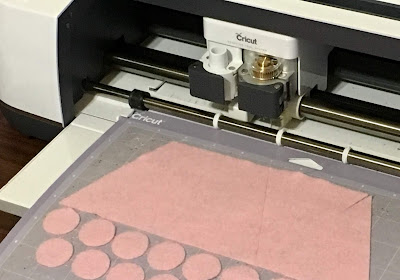
Place the felt horizontally across the top of the mat. Insert “Felt” in the “Browse all Materials” tab, then select “Felt Acrylic”. Use the rotary blade to cut. After cutting is complete, pull the felt surrounding the shape from the mat, then carefully lift the shapes.

3. Place the colored triangles onto a piece of wax paper. Spray with Mod Podge Ultra then sprinkle liberally with glitter. Allow to dry then shake off excess glitter.
4. Cover one side of each white felt triangle with glue then, with top edges aligned, center a colored triangle on top. Press firmly in place. Tip: Use a craft stick to spread an even layer of tacky glue on the felt, or use a glue stick. Premium felt is stiffer and an extra strength glue stick also works extremely well. *HAPPY (or MERRY) CHRISTMAS requires 14 pennants.

5. Cut the colored felt strips into ½” squares. For 14 pennants you will need 28 squares of each color. Alternating colors, loosely thread the squares, two of each color and one pom-pom onto a length of thread. Stitch the end of the thread to the tip of the pennant to secure then glue a felt circle over the end at the back. Use a different color felt than the felt on the pennant for contrast.

6. Remove the letters needed for the garland from the embroidered letter sheet. Alternating pennant colors, iron one letter to each pennant. Position letters right side up, cover with a pressing cloth then iron in place.

7. Place the pennants in order on a flat surface then use lo-temp glue to adhere the mini pom-pom trim across the top of all the pennants. Leave a small space between each one and make sure to add extra trim at each end to hang your garland!


ENJOY AND HAVE YOURSELVES A VERY MERRY CHRISTMAS!
Yours truly,
Julie 💝
KEEP CALM AND CARRY ON CRAFTING!

No comments:
Post a Comment