
Have bag will travel! Just add a fun felt tag for a little added pizazz!
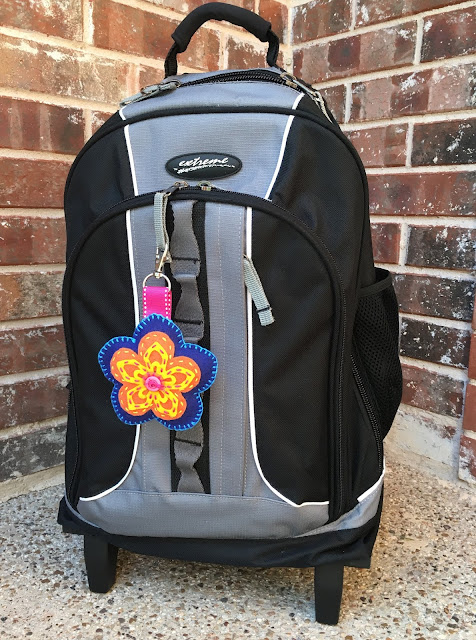
With a rainbow of felt colors to choose from, pick school colors or personal favorites!
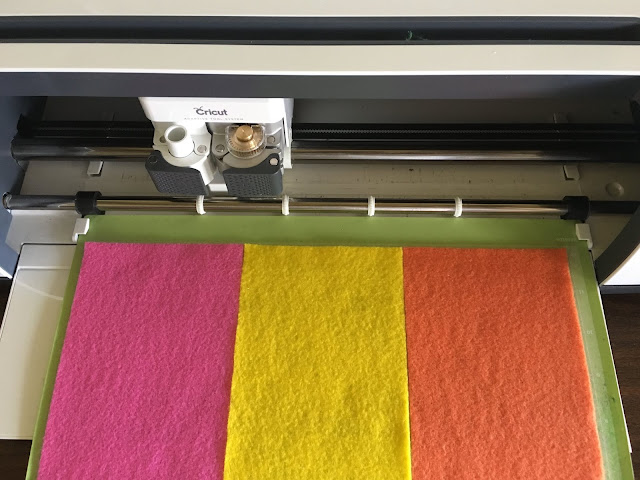
And, with a Cricut® Maker™ to cut even the most intricate shapes, it's quick'n EZ...!
You'll need:
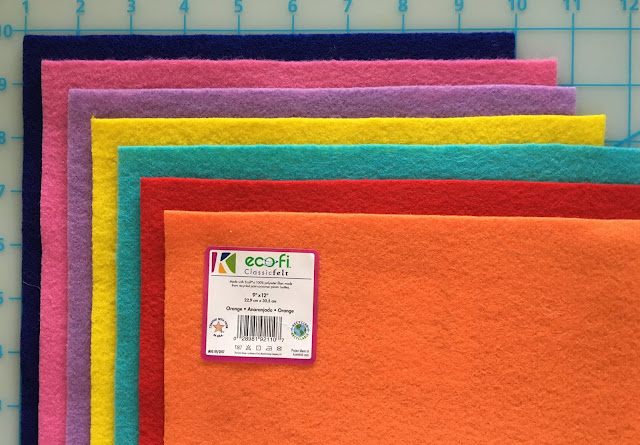
- Kunin® Classic Felt*, 9" x 12" - Royal Blue, Candy Pink, Orange & Yellow
- Cricut® Maker and rotary blade, or use patterns provided
- Embroidery floss - Pink, Orange and Lighter Blue
- Embroidery needle
- Scissors
- Button
- Cotton balls
- 5/8' Gros grain ribbon - 3"
- Swivel ring
- Felt glue
* With so many fun colors of felt to choose from, it was hard to decide!
NOTE: You will need to cut 2 large - 4", 1 medium - 3" and 1 - 2" small flower shapes. If you have a Cricut Maker, use the link below to the project in Cricut Design Space. If not, go to Step #4 in the instructions to download the flower patterns. Steps 1-3 are for readers who have a Cricut Maker.
1. If you have a Cricut Maker, use this link to connect to the project in design space. Select "customize" then "hide" the 2 large blossoms by selecting then clicking on the "eye" in the sidebar.

2. Cut* the small and medium flower shapes in 3 different colors. To cut all at one time, cut a 4" wide strip of 3 colors of felt then place them side by side on the mat. You'll decide which colors to use for your project after all the shapes are cut.
*When cutting felt, browse all materials, then select acrylic felt setting under the felt drop down menu.
3. Carefully remove the cut shapes from the mat then place the Royal Blue felt on the mat. Reveal the large flower shapes by clicking on the "eye" in the sidebar next to the large shape then "hide" the set of small shapes. Move the large shapes toward the top of the canvas then cut. Remove the cut shapes from the mat.
4. Cutting with scissors. Download the flower shape patterns. You will need to enlarge, or reduce sizes as needed. The pattern for the filigree flower is not given, since it may be hard to cut with scissors.


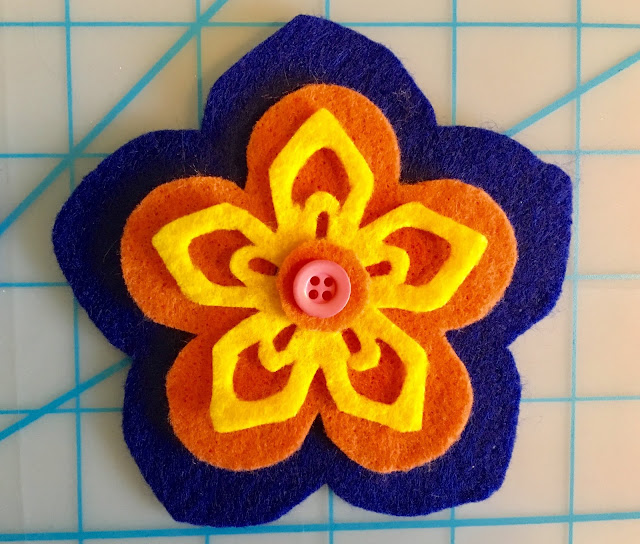
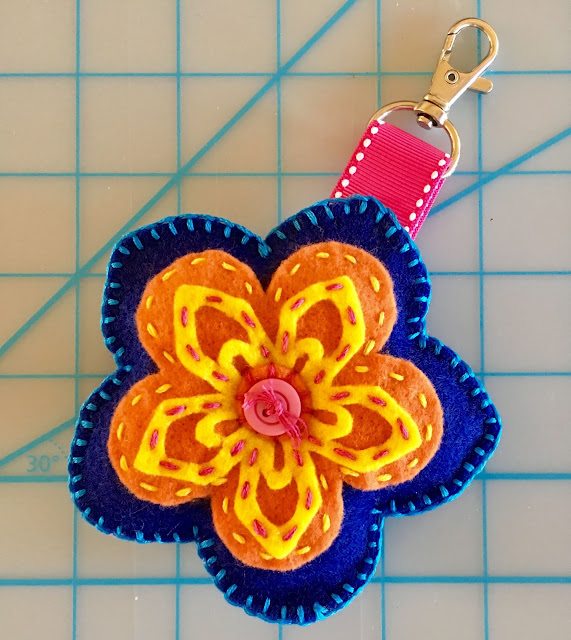
5. Once all the pieces are cut from the colors you chose, it's time to play around with layering to see which colors work best together.

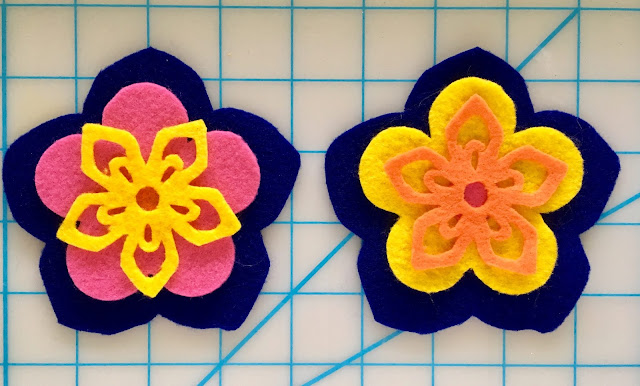
I liked these colors in this arrangement best.
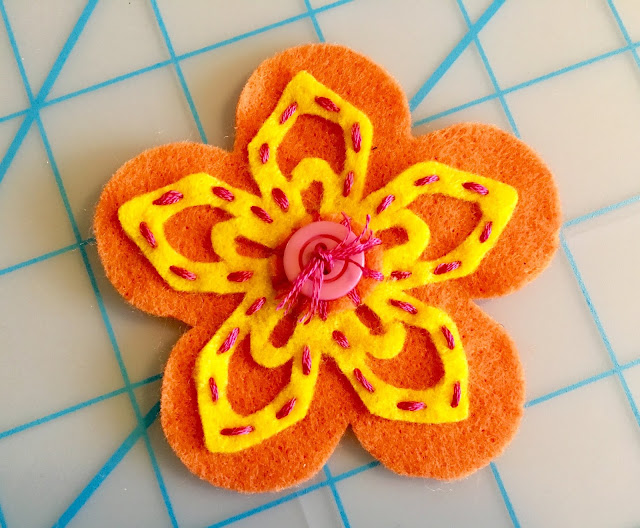
6. I love the added texture and dimension of simple embroidery on felt, but it's not necessary. You can always glue the layers of felt together! I recommend however, that if you plan to stuff your tag, it's better to stitch the two large layers together using the blanket stitch or a simple running stitch.
7. When stitching layers together, start with the top layer. Using pink thread, sew the yellow flower to the orange flower with simple running stitches around each petal as shown. Attach the button to the center. My button was small, so I placed a felt circle between the button and the flower center.
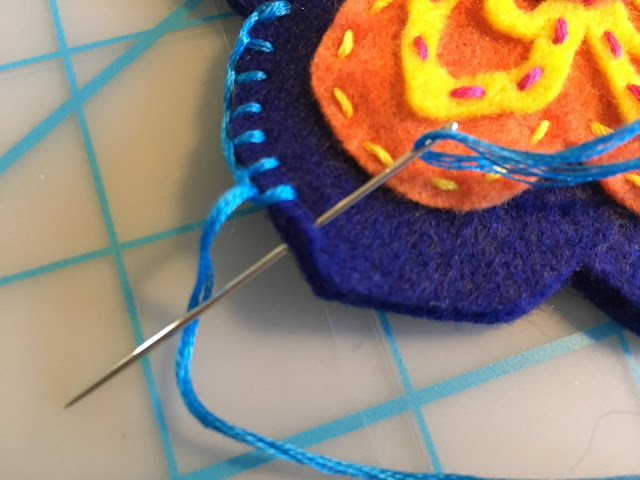
8. Stitch the orange flower to the blue with yellow thread then sew the two large flower shapes together using a lighter blue thread and blanket stitch. Simple running stitch is fine too, if you find that easier. Leave a space between the layers then stuff with about 6 cotton balls.
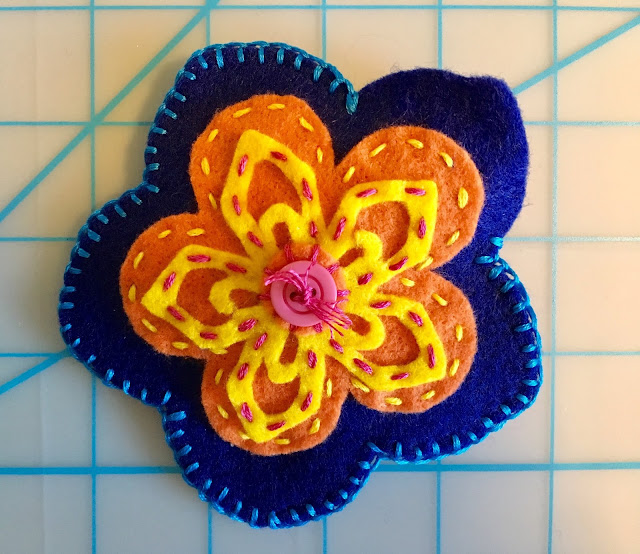
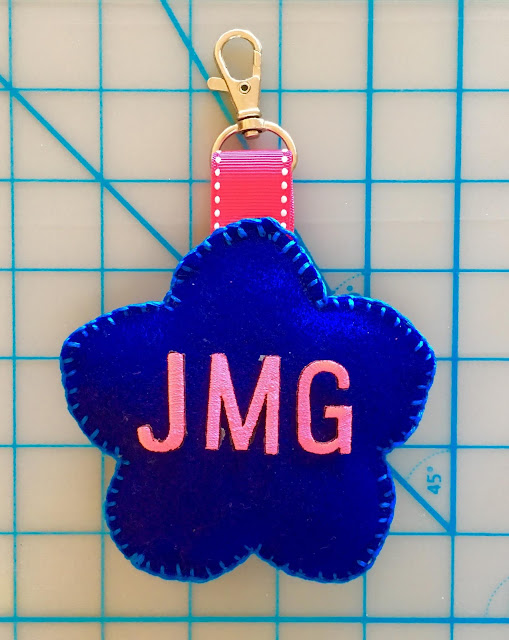
10. I glued my initials to the back with Joy® embroidered letters to finish, but you can layer flower shapes to the back too! Remember to sew (or glue) the layers together before stuffing......
Tag your bag and enjoy!
Yours truly,
Julie
KEEP CALM AND CARRY ON CRAFTING!
No comments:
Post a Comment