
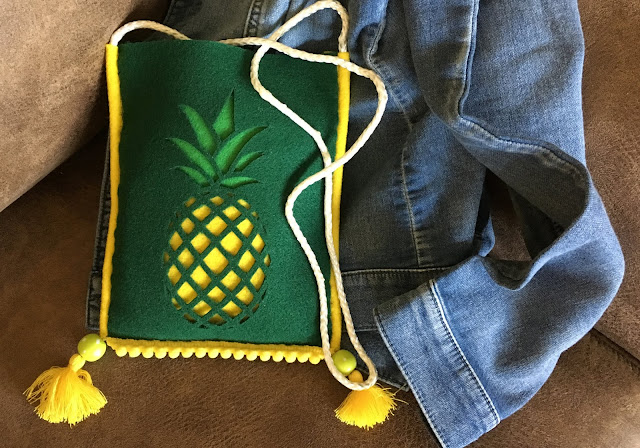
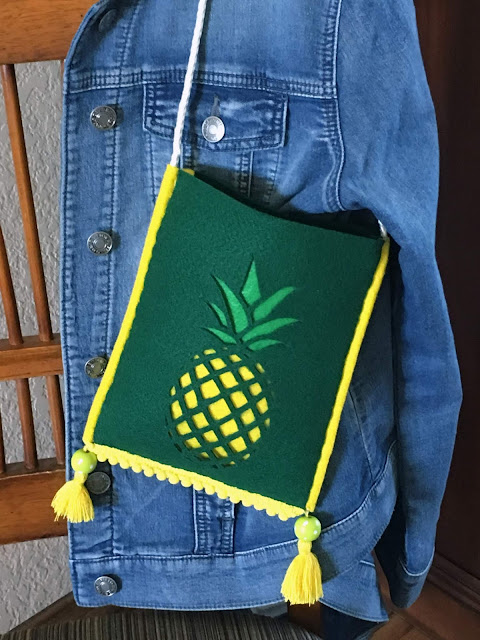
Everyone needs a trendy purse for the summer!
This one was made using felt I received from Kunin®, my Cricut® Maker die cutting machine and the following supplies:
- Kunin® Premium 12" x 18" Felt - Kelly Green
- Kunin® Classic 9" x 12" Felt - Yellow and Apple Green
- Cricut® Maker & Rotary blade
- Weeding tool
- Cord (for strap) - 1 yd
- 2 Tassels - Yellow
- 2 Beads - 5/8" Green
- Mini pom-pom trim (Expo Intl) - 7"
- Felt glue or Lo-temp glue gun
- Embroidery needle
- Thread or embroidery floss - yellow and dark green
- Pins
- Scissors
1. Download the pineapple design then upload to Cricut Design Space.

2. Unlock the design by selecting the lock icon at the bottom left corner, then set the size to 3" x 7".
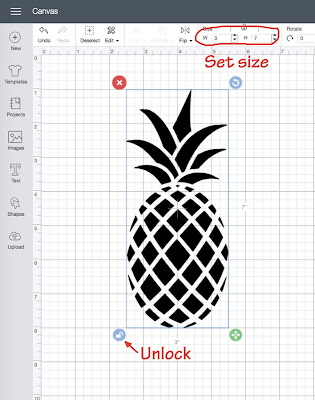
3. Continue to the next screen then move design so it is 3" from the left and 1" from the top of the canvas.

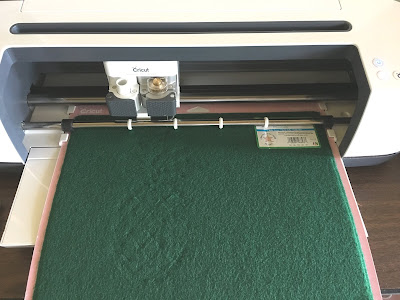
4. Select material on the next screen. Browse "all materials", search felt then select "Felt Acrylic Fabric" in the menu. On the next screen select "more" under the pressure menu.
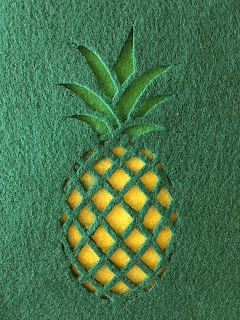
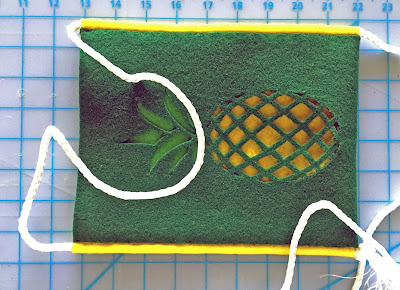
5. Place the 12" x 18" piece of Kelly Green premium felt on the pink mat, then cut.
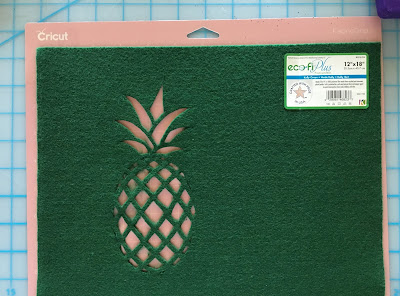
6. Weed the felt while still on the mat then carefully lift the felt from the mat. With the design at the center trim the width of the felt to 7".
7. Trim the width of yellow and green classic felt pieces to 6" then with edges touching, glue them behind the pineapple design - green at the top and yellow at the bottom. Trim as needed.

8. With the design at the front, fold the bottom part of the felt upward to create the purse.
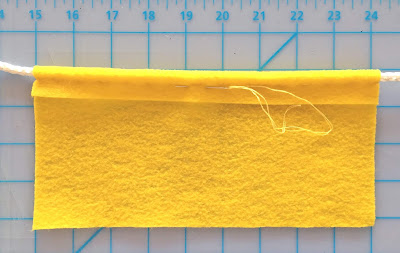
9. To make the casing for the cord on either side of the purse, place the cord across the 9" width of the yellow felt about 1" from the edge. Fold the edge over, then secure with a simple up and down (running) stitch. Take care not to stitch thru the cord. The cord needs to move freely thru the casing.
10. Cut away the excess felt from the casing then use this piece to create a second casing around the cord. Sandwich the casing between the front and back at one side.
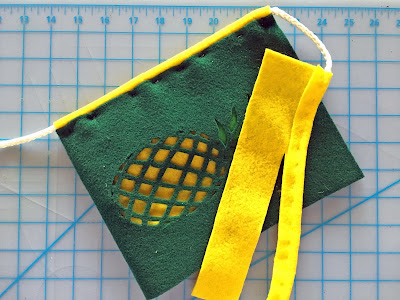
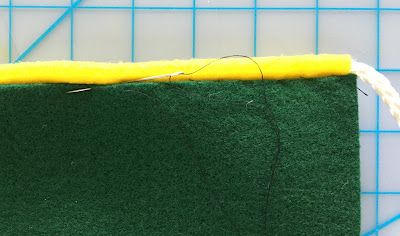
11. Pin in place then repeat on the other side with the second casing. Stitch the sides together with the casing in between the front and back at each side of the purse. Note: You can also glue together.
12. Tie a knot at one end of the cord then pull the cord up thru the casing until the knot rests at the bottom (fold). Adjust the length of the cord as desired, then cut the opposite end flush with the bottom of the purse. Stitch the end of the cord to the casing to secure. Cut the knot off the end of the cord on the other side then stitch.
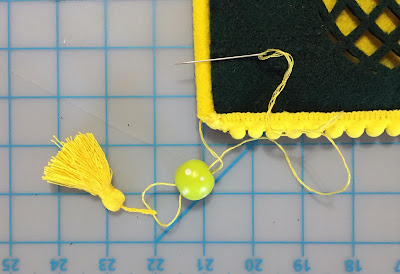
13. Stitch, or glue the mini pom-pom trim across the bottom of the purse then attach a bead and tassel to each corner as follows: Secure a length of yellow thread to the corner, thread thru the bead, thru the top of the tassel, then back up thru the bead. Pull up against the corner, then stitch securely in place.
Add a cell phone, billfold, etc and you're good to go.....
Enjoy! Y'all come back now...........
Yours truly,
Julie 😊
KEEP CALM AND CARRY ON CRAFTING!
No comments:
Post a Comment