Just add ribbon to large, shatterproof ornaments and they'll go from boring to beautiful in minutes!


You'll need:
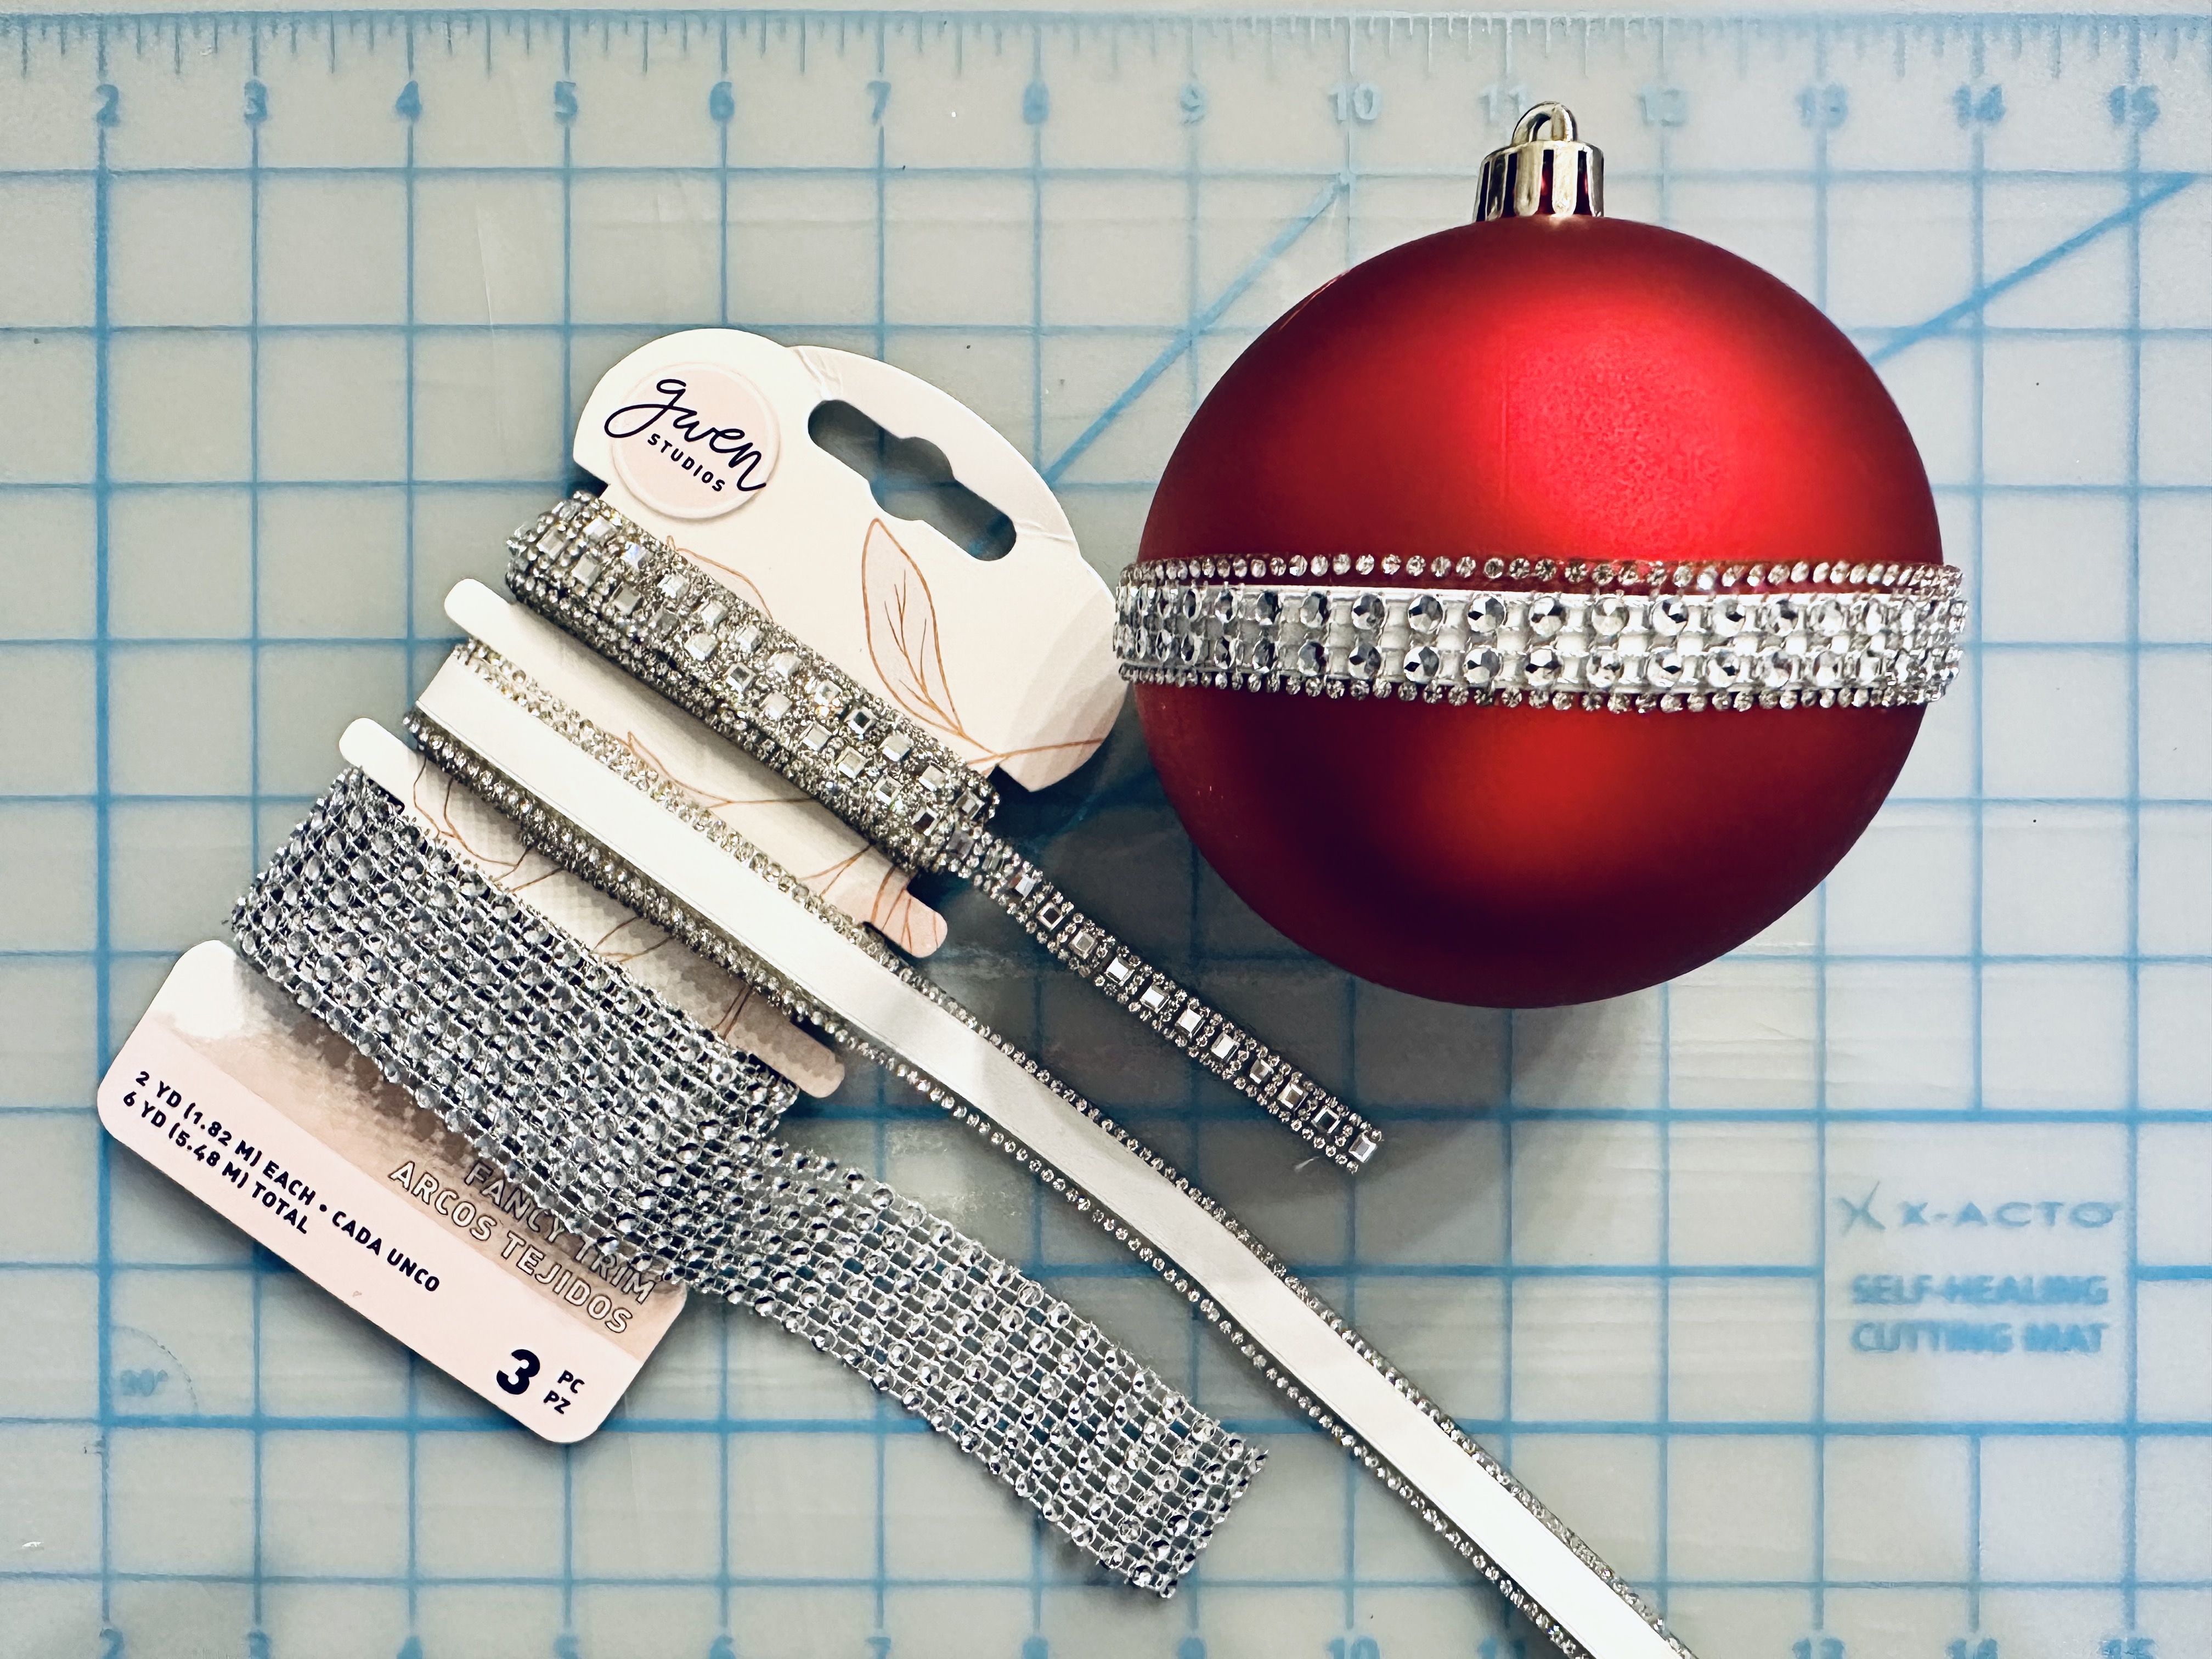
White Satin and Rhinestone Trim Set*
Satin Ribbon*
Narrow grosgrain ribbon*
4 Pack of large, shatterproof ornaments
Small pieces of Christmas greenery to embellish
Double sided adhesive tape
Lo-temp glue gun
Scissors
Zip ties - colored
*Ribbon was provided by Gwen Studios
A wide selection of styles and colors of Gwen Studios ribbon can be found online at Walmart.com and Michaels.com so there will be ribbon to match your own personal decorating style. I chose ribbon colors that I had on hand to match red ornaments: Red, green and white satin ribbon and several, narrow grosgrain ribbons.

I like sparkle when I'm decorating for Christmas, so I started by decorating each ornament with rhinestone trim which I added around the center using double sided adhesive tape. You can leave the trim as is, but the narrow, grosgrain ribbon is the perfect width to add over the center, making it easy to customize to match your color scheme.

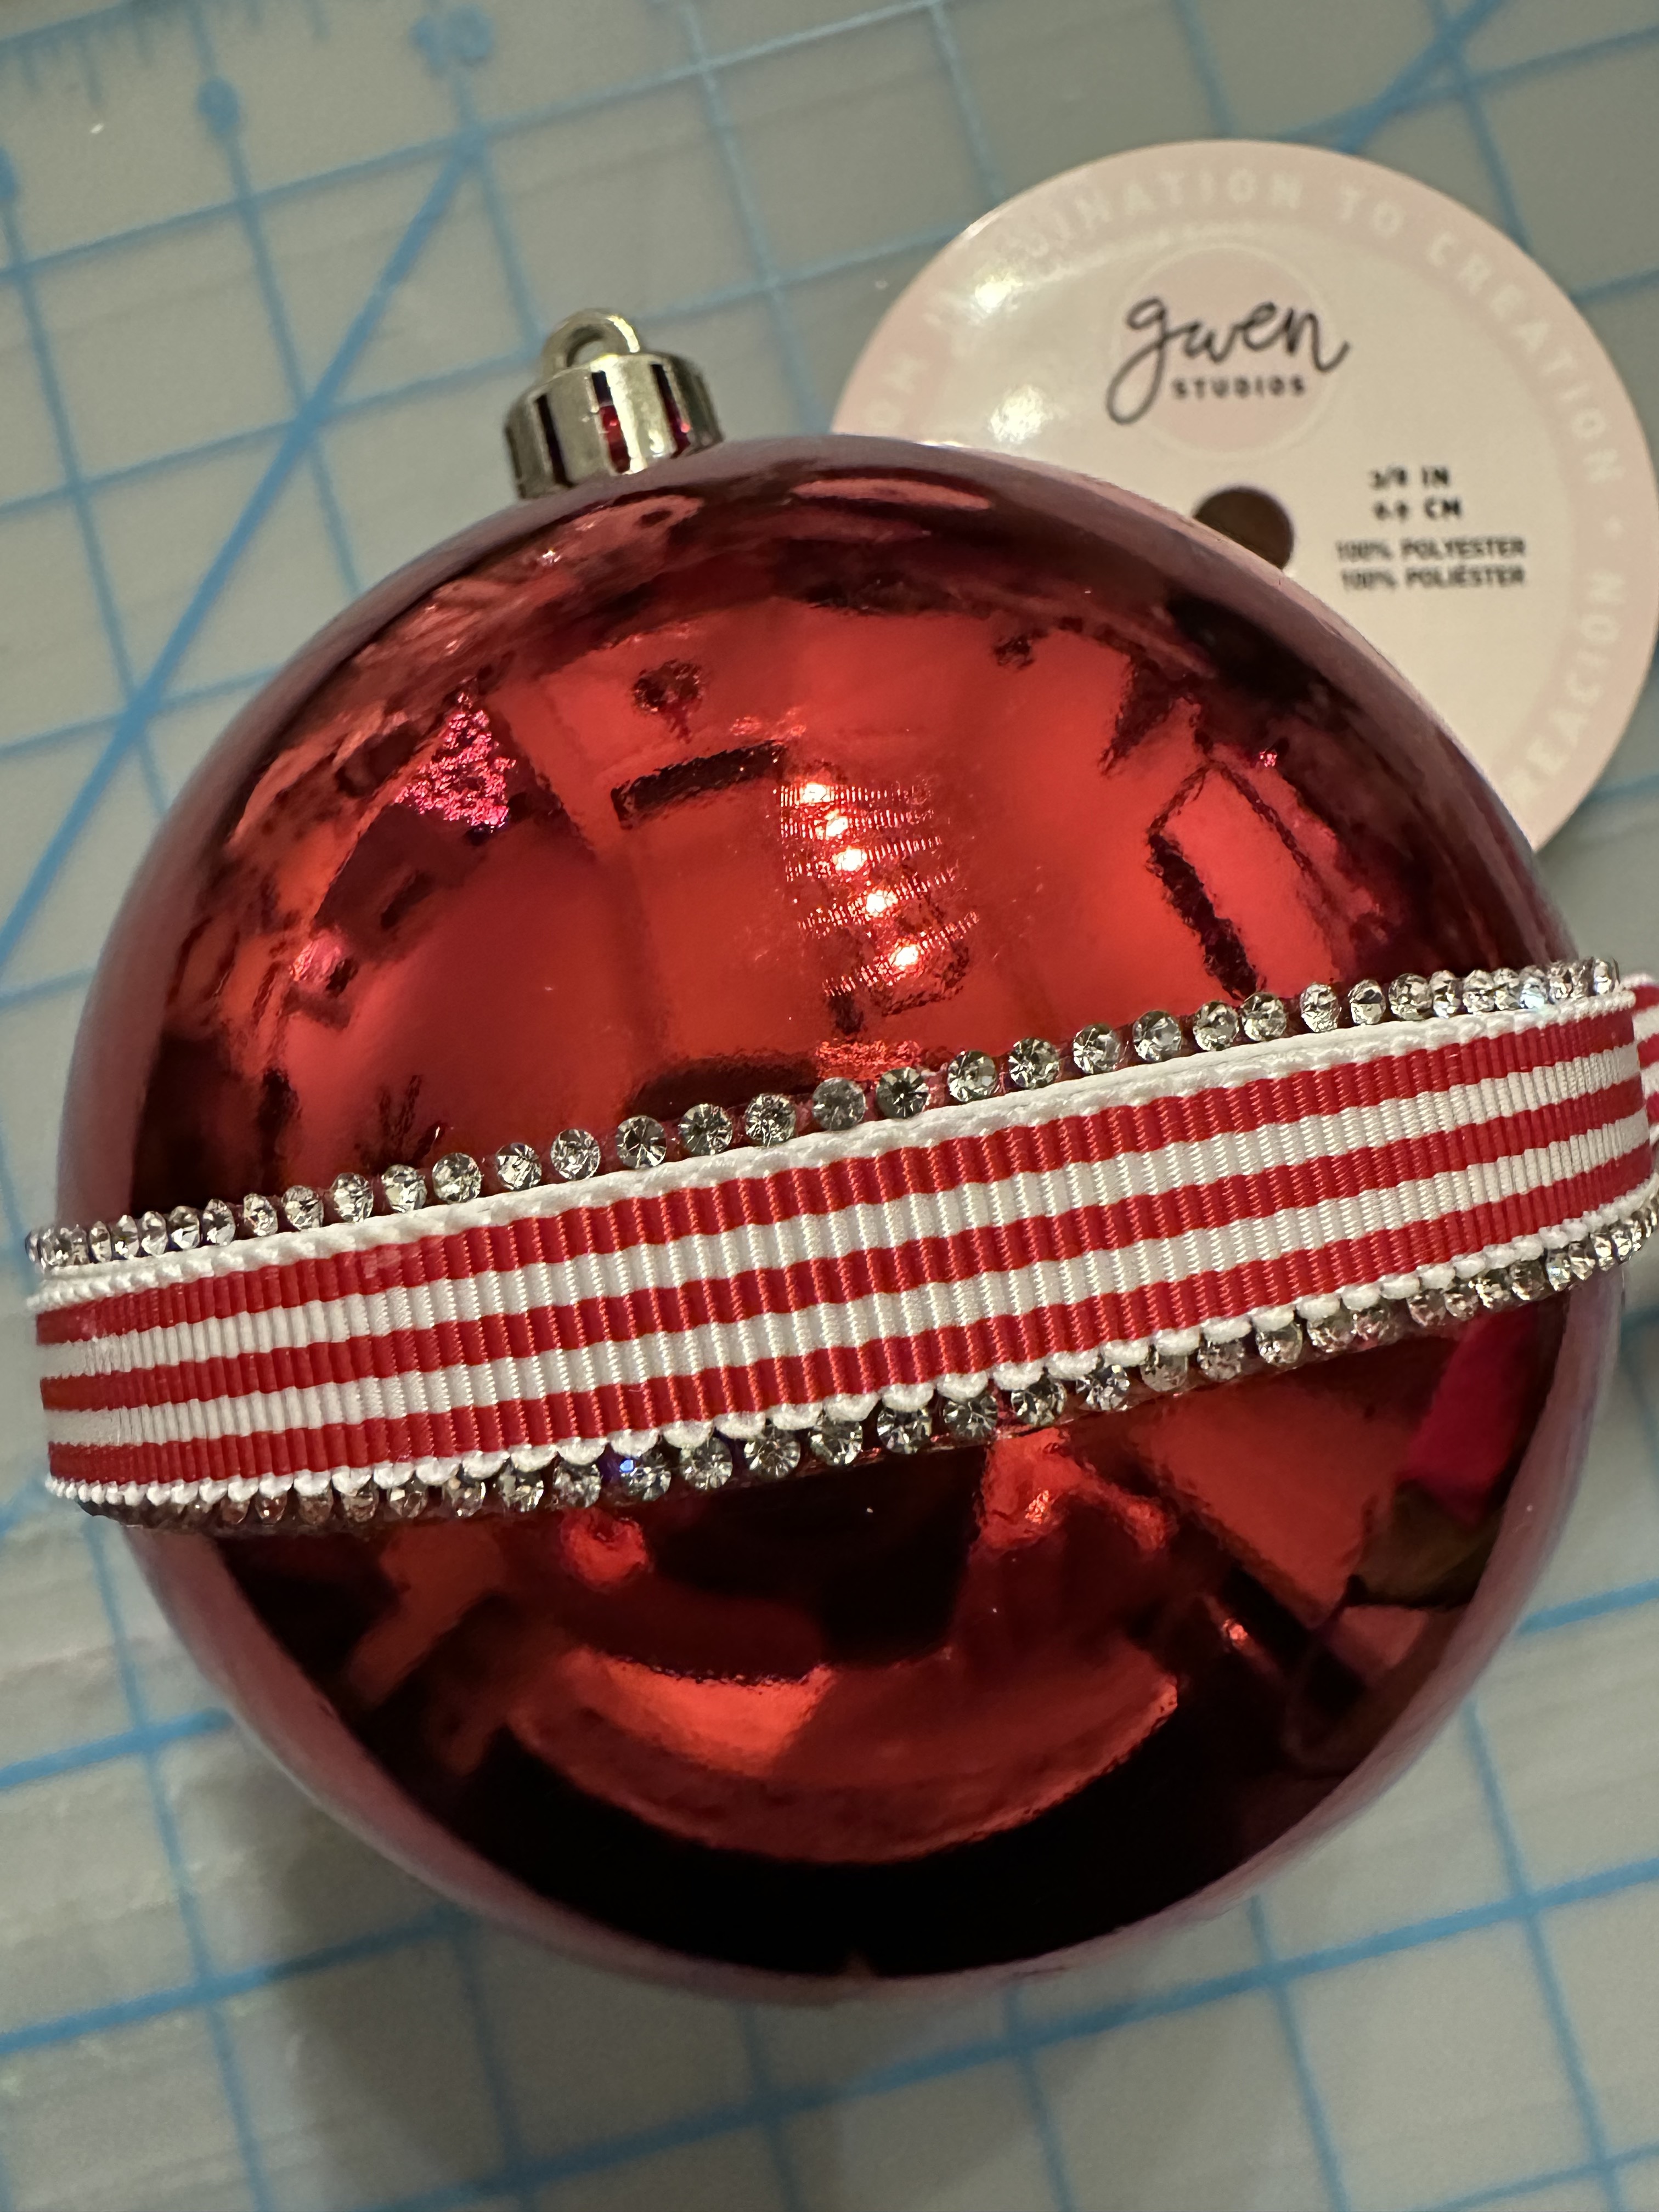
I like bling however, so I added the narrow rhinestone trim over the center for added sparkle.

I also added a large, green satin bow to the top, made as follows:
Cut a length* of ribbon. Lay on a flat surface then cross the ends over as shown below. Using your fingers, squish the ribbon together where it crosses then pull the center of the loop down and squish all together. Secure the "center" with a zip tie. (I used green to match the color of the ribbon.)
*Length will be determined by how large/wide you'd like your ribbon to be.


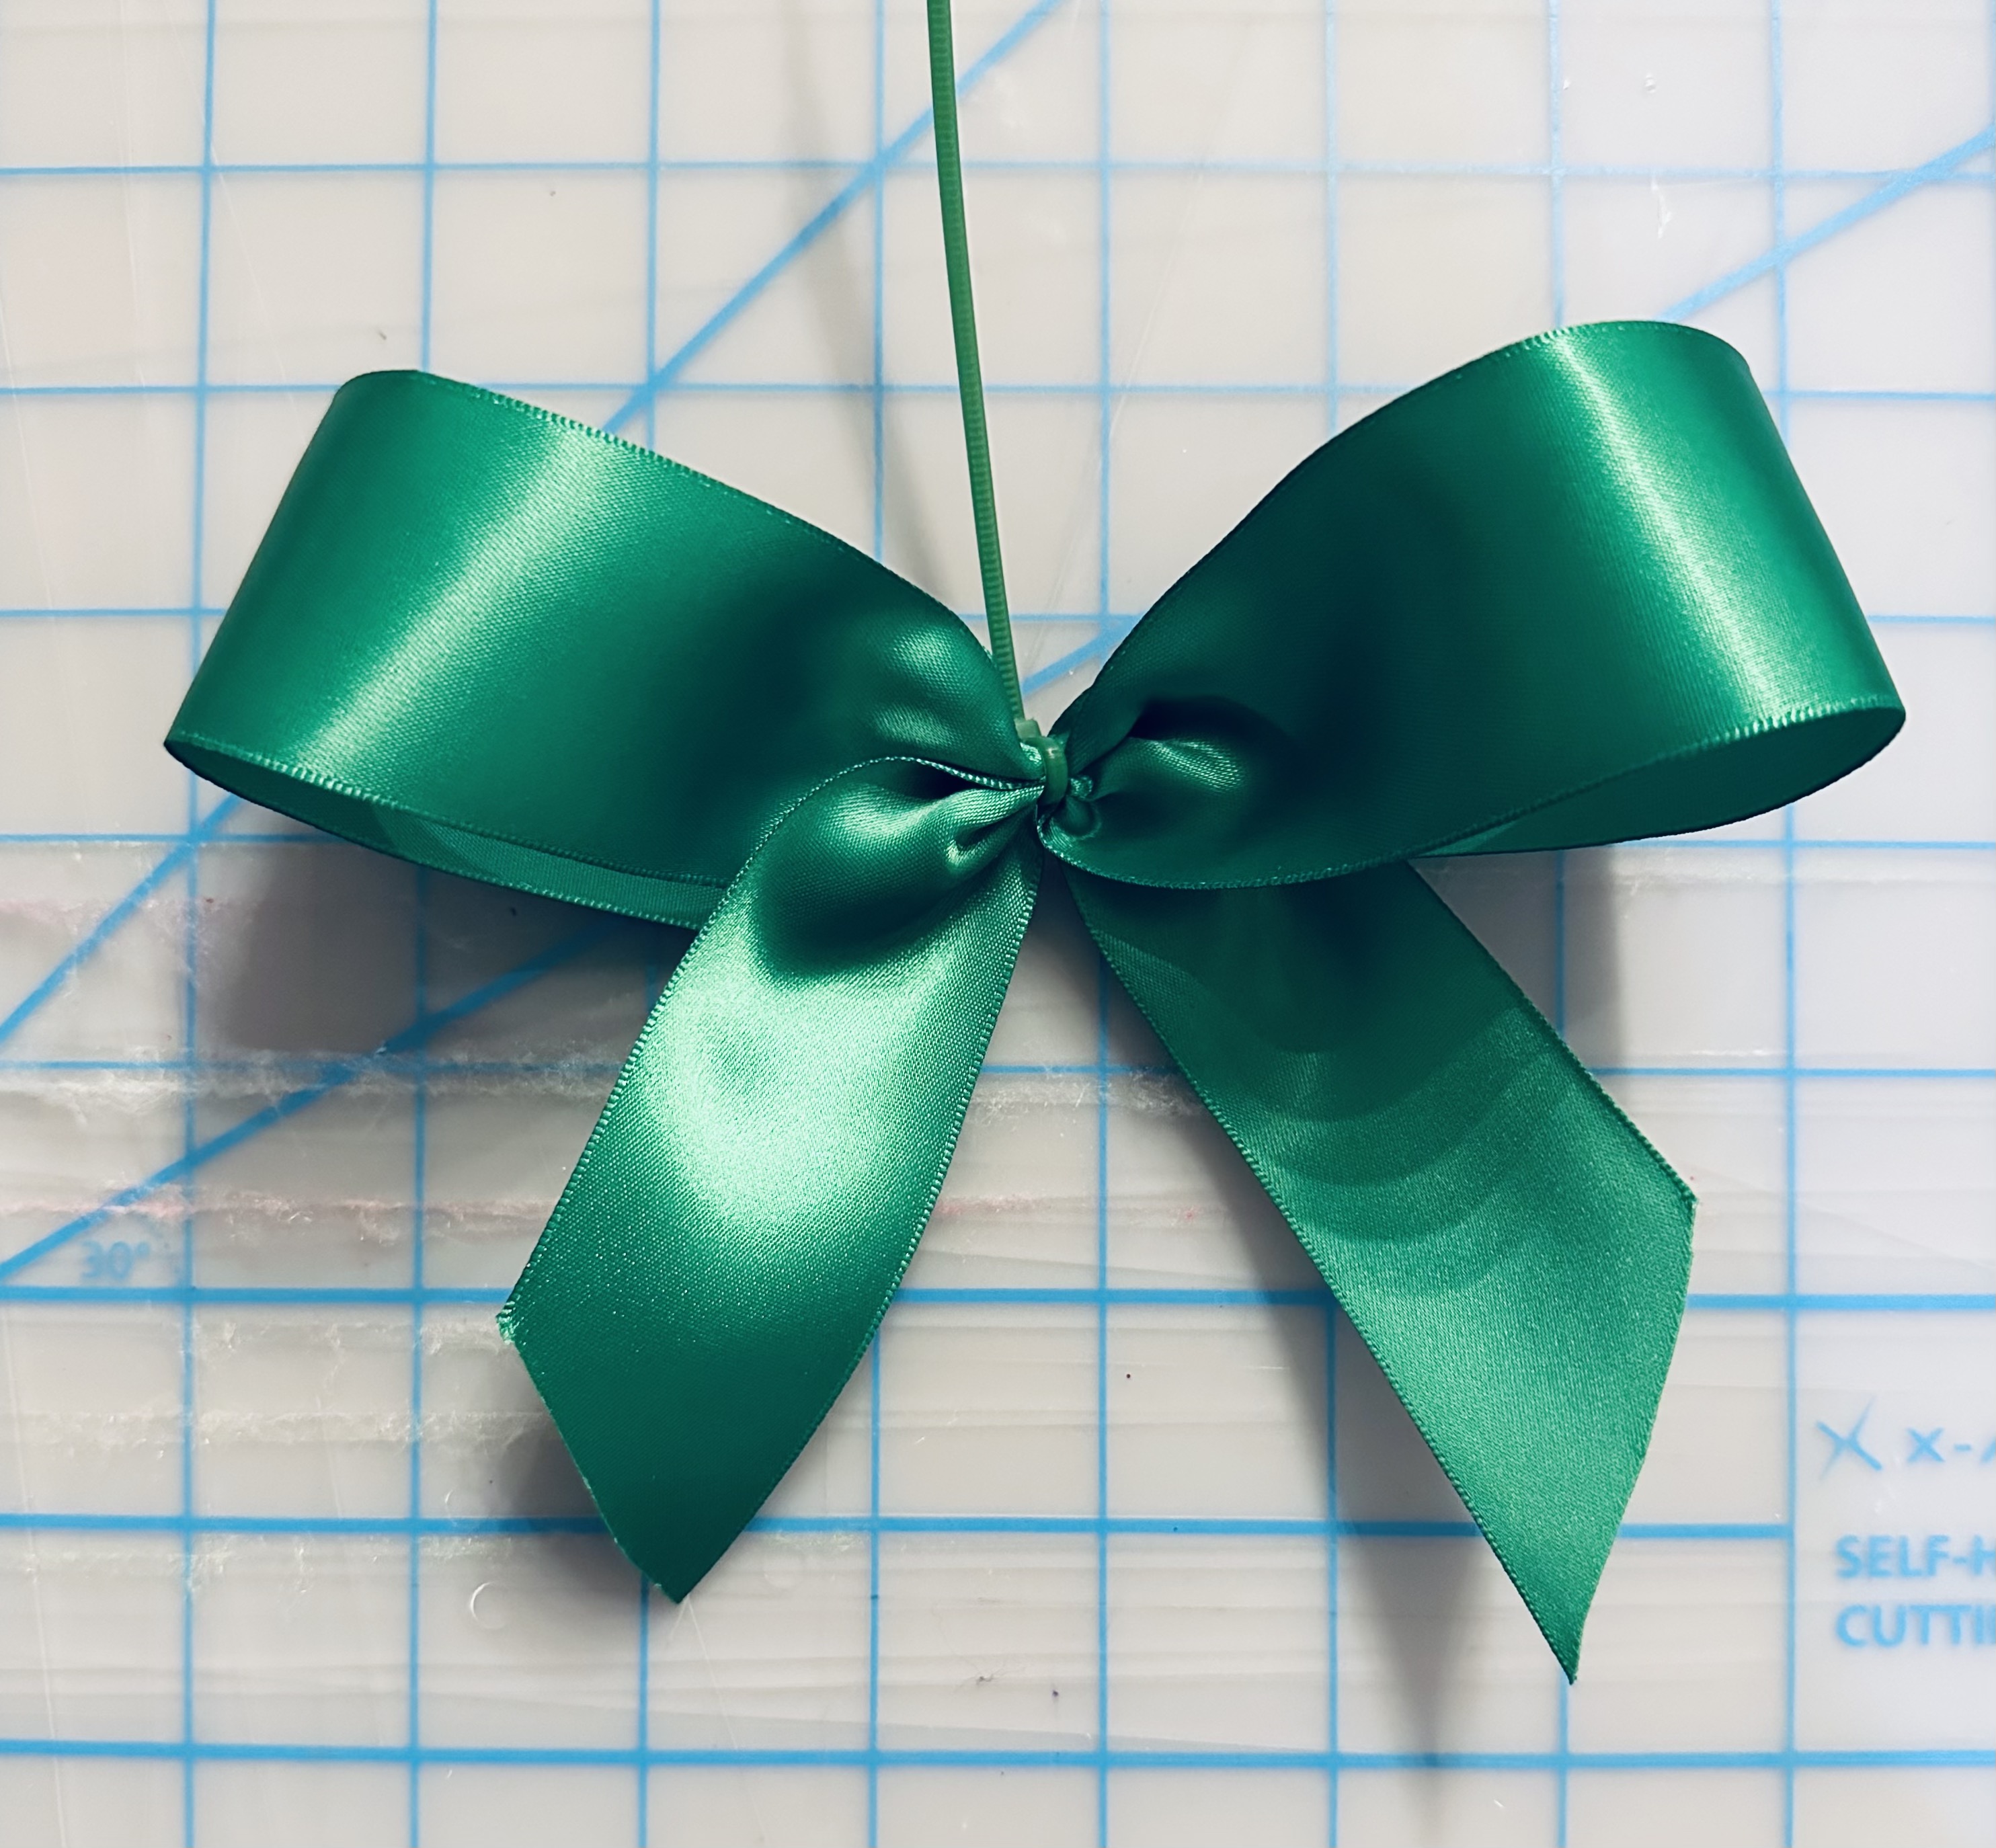
Thread a length of narrow ribbon thru the ornament cap to create a hanger. Attach the bow to the front with lo-temp glue, or simply place the end of the zip tie into the ornament cap. You can also add the bow by attaching it to the ornament cap with the zip tie, then thread a length of narrow ribbon thru the cap for a hanger.


I embellished the center of this ornament with 2 rows of the wide, rhinestone trim.

The glitter ornament already had a lot of sparkle, so I added narrow grosgrain ribbon around the enter of this one and used a length of curly ribbon for a hanger.

Use a glue gun to add additional embellishments if desired then sit back and enjoy!
I hope this gave you some ideas for quick'n EZ projects for your holiday decorating. Designer Crafts Connection members have also shared their holiday ribbon projects using Gwen Studios ribbon here:

Hope you all have a very happy and blessed Christmas season!
Yours truly,
Julie 💝
KEEP CALM AND CARRY ON CRAFTING!