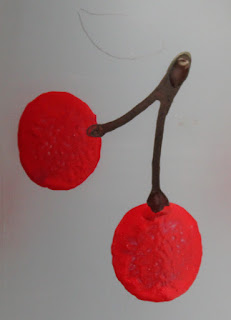
It's that most wonderful time of the year when
we're making lists and checking them twice...
remembering friends who have been really nice....
and racking our brains over the choice of a perfect gift.
As I said in an earlier post this month, there is nothing more special than a gift you make yourself and it's the perfect way to share your talents with family and friends. I love decorative painting so this is the time of year when I pull out my brushes and paint and get to work. Before you start to feel inhibited by the thought of having to use a paint brush, this project is something you can do - I promise.
My sister-in-law loves cherries, so this vintage style milk bottle is for her.
I started with an inexpensive bottle
and supplies from the following sponsors:
Paint, paint markers, paint brushes and daubers from
DecoArt,
I also used a few general supplies from around the house - paper towels, toothpick, disposable foam plate, (or wax paper) for a palette, etc.
NOTE: I love working with glass and DecoArt has a line of glass paint that you can use directly on a glass surface. For this project however, I wanted a "milk" glass look, so I etched the bottle by immersing in etchall® dip'n etch, a reusable glass etching liquid. For readers who don't know how easy and quickly this is to do, instructions are at the end of this post. Because my bottle is now etched, I can use any of the DecoArt paint lines and chose
Americana Multi Surface Satin colors.
STEP 1: Pour a small puddle of
Red Hot paint onto a disposable plate, or piece of wax paper. Holding the dauber upright, dip the sponge end into the paint then press onto your palette and twirl to spread the paint evenly in the sponge. Press gently onto the glass to create a circle. Make 3 sets of 2 circles, evenly spaced around the center of the bottle, then an additional 3 sets around the bottom.
STEP 2: Pour a puddle of
Dark Scarlet onto your palette then dip about half of the surface of the sponge into the darker color. Pat gently to blend then press on top of the original circle. The darker color will create a subtle shadow on your "cherry", so always make the shadow on the same side of each one. Use a pencil to draw lines for the stems and make a simple outline for a leaf.
STEP 2: I used a liner brush to paint the stems Coffee Bean, but you can also use a glass paint marker, no problem.
STEP 3: Outline the shape of the leaf
Apple Green with either a liner brush or marker, then fill in the center. Use
white paint to make the highlights on the cherries. It's easy. Dip the end of a small paint brush handle into a puddle of white paint. Press on top of the cherry then drag to create the "swoosh". Practice on your palette first. Let dry overnight then use a dampened cotton swab to remove any visible pencil marks.
FINISH: I wrapped black & white Bakers' twine around the neck of the bottle then used a lo-temp glue gun from
AdTech to attach a cherry button to one side. I think my sister-in-law will love it!
Thanks to
DecoArt, The
Twinery,
Buttons Galore & More and
AdTech for sharing their wonderful products with me. I wish I could have created projects with supplies from all our amazing sponsors.
You can find even more Handmade Holiday projects by visiting the following blogs. Be sure
to visit all of them so you can enter our amazing giveaway of over
$600 in craft supplies donated by our blog hop sponsors.
Here are instructions for etching the glass bottle.
You will need:
etchall® dip'n etch,
re-usable glass etching liquid
Empty soda bottle. Cut the top off as shown, so you will also have a funnel.
Step 1. Fill the bottle with water (so it doesn't float), then place it in the soda bottle, or other plastic container. Fill the container with water up to the rim of the bottle. Remove the bottle. The water level in the soda bottle will drop. Mark the water level then empty the soda bottle. Dry the inside of the soda bottle and outside of the glass bottle thoroughly.
Step 2. Fill the soda bottle with dip'n etch up to the mark. Fill the glass bottle with glass pebbles, or something to weight it down then carefully place it in the etching liquid. The liquid will rise, stopping at the rim of the bottle. Leave for 15 minutes, then remove the bottle and rinse thoroughly. Pour the dip'n etch back into its container using the funnel you created when you cut the soda bottle.
Etched glass has "tooth" which makes it a perfect surface for acrylic paint and rubber stamping. If you haven't etched glass before, please read the directions carefully. This product produces a REAL and permanent etch so don't use near porcelain sinks, granite or other glazed surfaces. It will etch them permanently too. If you're interested in glass etching, you can purchase dip'n etch and more at www.etchall.com Use the code JULIEMC to receive a 10% discount on your purchase.
Happy holidays!
Yours truly,
Julie :)
KEEP CALM AND CARRY ON HOPPING!


