Showing posts with label Julie McGuffee; Scrapbook Soup; Scrapbook Memories. Show all posts

Saturday, November 10, 2012

Smoothfoam

Smoothfoam™ is a fun product to work with giving crafters endless opportunities to be creative quickly and easily.  Here's why:

1.  You can paint directly onto its smooth surface without any prep!  For example, I painted the surface of a 12x12 sheet of Smoothfoam with pink acrylic paint, pinned ribbon around the edge, added a 12 x 12 piece of lace scrapbook paper, photos and embellishments to create a lightweight wall hanging.  Perfect in a baby's room.  

 
These pieces were painted with Neon acrylic paint for an older child.  Adding embellishments to the robots was easy.  The buttons were large red brads pushed directly into the painted surface.


2.  You can pin things into it without worrying that they'll fall out again!  Create flower balls for Spring, birthday, shower or wedding decorations, or a topiary for the holidays.  Just add small silk flowers with sequin pins.


3.  You can cut it without it crumbling.  Stack a small, medium and large ball together to create your very own Snowman.  Cut a slice from each side of the ball then glue the flat sides together.


4.  You can glue anything to it, so its perfect for découpage using the printed layer of a decorative napkin, or pieces of leftover wrapping paper.  It's also great for lightweight photo cubes.


5.  And since the holidays will shortly be upon us, how about some quick'n EZ projects to get you started.  Simply cover the surface of a Smoothfoam ball with glue, then sprinkle liberally with glitter.  Display on a colored charger, or in a large martini glass.  You can also add gold brads, or stickers and hang with a ribbon.  (Make a "u" shaped hook from a paper clip to hold the ribbon and hanger in place.)  Like I said, EZ PZ Quick'n EZ and sure to add a special sparkle to your holidays.


You can find Smoothfoam at all major craft stores, but - guess what - we're having a giveaway!  As you hop thru the designer blogs, comment on your favorite projects.  Each time you comment you'll be entered to win, so the more comments you add the more entries you'll have. (You can also comment on our Pinterest page after November 12th for additional entries.)   The winner will receive this Smoothfoam Snowman kit


and, as you know, if you've ever received a box of goodies from me, there'll be a whole lot more for you to play with.  The winner will be announced on Monday, November 19th on our Facebook pages @ http://www.facebook.com/DesignerCraftsConnection?ref=hl and @ http://www.facebook.com/Smoothfoam  We hope you'll "like" us too!  Enjoy!  Y'all come back now...

Yours truly,
Julie :)

Monday, October 22, 2012

Halloween Crafts

The weather is very "fallish" this week and windy, so the grandkids and I thought it would be fun to have some ghosts flying from the trees for Halloween.


Not a reason to make a long trek to the store though, so we gathered up some supplies from around the house:  Coat hanger, 4" Smoothfoam™ Ball, Tall Kitchen Bag, black permanent marker (I use Painter™ markers), string to hang, plus scissors and pliers. (I used my hubby's, but you can borrow from anyone if you need to.)


 Step 1 :  Straighten out the coat hanger hook.

 Step 2 :  Lay the trash bag flat.  Then cut slits about 2" wide from the bottom upwards.  Stop 15" from the top!  Place the coat hanger inside the top opening.


 Step 3 :  Gather the trash bag ties around the neck of the coat hanger.  You can leave them like this, or carefully stuff the ends to the inside.


 Step 4 :  Cut ONE LAYER of each strip about 4"-6" from the top.  Alternate cutting from the front and the back of the loop.  Think about this before cutting!  You don't want to cut them off, but by cutting one layer you'll make them longer.


 Step 5 :  Push the straightened out hook from the coat hanger into the base of the ball.  You'll know where this is because there's a little hole to guide you.


 Step 6 :  Push the ball all the way down then use the pliers to fold over the end of the wire.  Squeeze tightly together so when you loop string thru the hook, it won't come off.


 Step 7  :  Now you have to add some eyes and a mouth with the black marker, or paint.  Nice thing about Smoothfoam™ is, that it is - SMOOTH - so you don't have to prep the surface, or anything.  The kids liked doing this the best.  We have some pretty scary looking ghosts!

Now wasn't that easy!  In no time at all you'll have ghosts dancing in the wind all around the house.  Woo Hoo!


Happy Haunting!  Hope y'all make it back now!

Yours truly,
Julie :)

Sunday, September 2, 2012

Vintage Crafts - Designer Crafts Connection - First Monday

You may remember that I love collecting shells.  I have boxes of them that I've dragged around with me for almost 50 years.  I'm not sure where this fascination came from, I just know that it is what it is.  I've talked about collecting shells quite a few times over the past year or so and each time I think I've mentioned Sailors' Valentines.  Here's a photo of one I created for my Aunt about 15 years ago.


This is a photo of my Uncle Derek taken in the late 1940's.  He has since passed away.  My Aunt is now in her 90's and this "Sailors' Valentine" stands on the shelf over her fireplace.  It's a very basic rendition, of course, but special because all the shells I used were found on the beach where my Aunt and Uncle used to go on holiday every year.  I used the base of an empty heart shaped box of candy then glued the shells in place around the photo.  Much the same as making a mosaic.  If you're wondering how this ties in with our "Vintage" theme, I've had the shells for a long, long time and crafting with shells is inherently vintage.

Samples of antique Sailors' Valentines can be found in maritime museums in coastal areas in the US and other parts of the world.  Easy to find, crafting with shells was a popular pastime for early 19th century sailors - can you believe they were "eco crafting" and upcycling 200 years ago!   To learn more, you only have to "google" Sailors Valentines.  Click on images for some great samples!  You can also read a little history here: http://www.sailorsvalentinestudio.com/history.asp   Enjoy!  Y'all come back now..... there's a special blog hop for our group, 8-18 Sep with a GIVEAWAY.  You can read more about it on Carol Heppner's blog when you hop forward....

Yours truly,
Julie :)

Sunday, August 5, 2012

Back to School Crafts!

"And mom and dad can hardly wait for school to start again".   Do you remember this line from an old, old song........ ?  After a 3 month vacation, the start of a new school year was always something both moms and kids looked forward to.  (Yes, I know it's from a Christmas song.....)

Even as a grandmother with the oldest going into 1st grade and his sister entering pre-K, I still look forward to the "Back to School" excitement.  I mean, OMG have you seen all those fabulous school supplies on sale!!!!  Composition books for less than a dollar - they make great journals - all you have to do is decorate the covers with leftover scraps.  Then there's pens and papers and all kinds of boxes and storage stuff.  The mind positively boggles with so many creative opportunities!

I re-cycle all kinds of empty containers and hate to admit it, but I have a "thing" for the bottoms of Velveeta cheese packages.  They're made of thick corrugated cardboard and are nice and sturdy for lots of stuff.  They fit in drawers for dividers for all kinds of sewing notions, pens and pencils and are sturdy enough to sit on a shelf to hold cards, or photos like this one.


It's on the shelf right above my computer and I use it for photos and cards "that I'm going to do something with one day".  I also have another box I use for project sheets and booklets that I pick up each time I visit the craft store.  I had thought of covering them both with scrapbook paper, duck tape, or something (in my copious free time), but.....  you know how that goes.  Well, last week I found these colorful crayons for .25 cents for a box of 24 with all the fabulous school supplies.  Not one to resist a bargain I picked up a few boxes and thought they'd look pretty cool glued onto the Velveeta boxes, empty cans, or shortened soda bottles. (Great little plant holder for a teacher gift BTW).  Anyway here's one I just finished.  You know how I LOVE Quick'n EZ - it took me all of 5 mins!


You could glue them on with a glue gun,  tacky glue,  double sided tape,  or whatever you might have on hand.  Either way, I think it looks kinda cool.

Crafting with School Supplies is the theme for Designer Craft Connection bloggers this month, so don't forget to hop forward and see what everyone else came up with.  Enjoy!  Y'all come back now....

Yours truly,
Julie :)   

Sunday, July 29, 2012

Scrapbook Memories Show 1604 Now Online

Series 1600 was the last series of Scrapbook Memories before the show was re-formatted and updated to become Scrapbook Soup.  The second series of Scrapbook Soup is now airing on PBS and will then air online later this year.  Until that time we thought our online viewers might enjoy watching Scrapbook Memories once more.

This is show #4 of the series and I know you'll enjoy seeing Beth again. 


The show theme was Home Dec, so during the open we showed you products that I had found at the recent trade shows.  I really liked the magnetic boards, but even though I saw different variations in the stores for a while, I'm sorry to say I haven't seen any recently.  Hopefully they'll make a comeback at some point.

Julie Fei Fan Balzer joined us for some hosting duties for the first time on this series.  We taped some of the segments on location at the 2010 CHA Summer trade show in Orlando, Florida.  Beth wasn't able to come to the trade shows, so we asked Julie to interview some of the designer demonstrators for the Artist to Artist segments which you'll see on some of the shows in this series.

Julianna Hudgins was our first guest who showed us how make candle wraps using textured papers created from leftover pieces of card stock.  Quick'n EZ to make, they are a perfect home accent as well as being a great hostess gift.


Next we were on location at the CHA Summer trade show in Orlando with Cynthea Sandoval in the Doodlebug booth.  As you'll hear me say on air, I love this booth.  It's such a bright, cheerful and happy place and no matter what the trends and seasonal fads are, this company has maintained its brand while still bringing new and updated product lines to their customers.  At this trade show, we saw how to use their scrapbooking products to brighten our living spaces around the house and were introduced to a wide variety of home accent pieces.


Lisa Singer from Elmers' was our final guest.  You've probably noticed that I design the Elmers' projects, something I really enjoy.  For this project I created a piece of dimensional wall art using 2 of Lisa's vacation photographs.  Both of them were printed onto ink jet canvas purchased from the office supply store, then glued to foam board for stability.  I added sand, a starfish, a shell and a small charm for even more texture and dimension.  I love being creative with photographs.


At the end of the show, we showed you some wood veneer "paper".   I found this line in the Creative Imaginations booth at an earlier trade show and fell in love with the possibilities.  Unfortunately it was one of the products that never made it to any of the stores that I visit, but if you're interested, try "googling" Ink jet compatible wood veneer paper and see what you come up with.


A lot has changed since we taped this series and we are changing with it.  You can now watch show segments on YouTube, connect with show fans on Facebook, get some behind-the-scenes information here on my blog and see project photos on Pinterest.  Social media has changed our lives dramatically.  We're Tweeting up a storm, using Smart Phones to take photographs and videos and using apps like Instagram and this is just scratching surface.  I often wonder what we did without all these options.  There are days when it can be quite overwhelming. 

I hope you enjoy watching the show!  Y'all come back now..........

Yours truly,
Julie :)

Sunday, July 15, 2012

On My Way to CHA!

Sorry I haven't posted this week......  it's been crazy busy.  On my way to Chicago tomorrow for the Craft & Hobby Association summer trade show.  Julie Fei Fan Balzer and I will be teaching a seminar on Monday, so it's full speed ahead.......  Hope to see some of you there and I'll be posting photos for those of you who couldn't make it, and especially for non members to give them a sneak peek into the new products that will be coming their way soon. 

In the meantime, I hope you're all enjoying the Scrapbook Memories shows that are now airing 24/7 online.  Don't forget to start looking for the NEW series of Scrapbook Soup.  It will be available for stations to air this month.........  Enjoy!  Y'all come back now!

Yours truly,
Julie :)

Wednesday, July 4, 2012

Scrapbook Soup - Show 13 Now Online!

Each series consists of 13, half hour shows.  Show 13, the final show of this series, is now online at www.scrapbooksouptv.com until noon EST, July 6th.  After that we'll be showing all 13 shows from the final series of Scrapbook Memories

We taped the first series of Scrapbook Soup in April 2011.  Mixed media was the latest trend, which uses a wide range of craft supplies including the many scrapbook, rubber stamping and paper crafting supplies that you, our viewers already have.  For this reason we really mixed it up on this new series.  Not only did we update our set and format, we wanted to share some new projects and techniques that the younger generation of crafters are embracing and inspire our scrapbooking viewers to take their supplies to a new level.  We also introduced you to a new co-host, Julie Fei-Fan Balzer, who you first met as a guest on Scrapbook Memories. We realize that for many of you, it's all about scrapbooking and documenting the memories of your life, but we also know that some of you have discovered a creativity through scrapbooking and paper crafting that you'd like to explore.  We tried not to stray too far from our original format and hope we inspired our viewers to try something new.

For the first segment Julie FF shows us how to create this beautiful star using digital software from Kaleidescope Collections and a photograph.  You can also photograph, or scan a favorite piece of paper or fabric for your own custom design using your Flip-Pal hand held scanner.  


Julianna Hudgins (Jewels) joins me next with a Spellbinders project designed by Terre Fry using an album and embellishments from Want 2 Scrap.  This specialty line of products is designed to coordinate perfectly with Spellbinders die cut shapes.


Lynell Harlow from Dreamweaver Stencils shares some beautiful cards with us using metal stencils, a dimensional paste and flocking.  You have to check this out!


Our final guest is Kathy Kromer who shared some very personal thoughts and ideas on art journaling.


Julie and I wrap this final show with some embellishment ideas using Paper Clay and scrapbook pages sent in by viewers which feature fabric.


We taped the second series of Scrapbook Soup this past April and it will start to air this month on your local PBS channel and online this fall.    In this new era of reality shows, it's not always easy to find shows which actually "show" you how to do something, step by step.  If it weren't for our sponsors, these shows would not be possible.  For manufacturers to continue to support this, and other "how to" series, they need to know that you, the viewer, still enjoy this kind of craft show. 

A quick note about Craft Wars. This is a fabulous new show airing on TLC hosted by celebrity crafter, Tori Spelling.  There's been a lot of chatter on Facebook since the first show aired last week.  Please bear in mind, that whether we like the format or not, it has put crafts back in the forefront, so let's take advantage of the momentum being created and let TV stations know how much you like to watch all kinds of craft shows. 

See you next time on Scrapbook Soup!  Enjoy..........  ya'll come back now!

Yours truly,
Julie :)

Sunday, July 1, 2012

Seaside Treasures

Of all my posts this year, I was looking forward to this one most of all.....  until, that is,  I realized I couldn't find the projects I wanted to share.  So, being the creative person that I am - I decided to punt...  no doubt I'll find my shell encrusted frame and heart shaped Sailors' Valentine when I'm not looking for them - probably in December while I'm looking for the Christmas presents I've hidden.  Age is a great teacher and probably one of the most important things I've learned is - to make notes, otherwise those secret hiding places will remain just that - a secret!

Vacations and crafts go hand in hand at our house.  Partly because, for me, it isn't a vacation unless I'm walking along a beach somewhere looking for shells.  I've collected shells ever since I can remember.  We always went to the beach two or three times a year when I was growing up and I always came back with buckets full of shells.  I still have them.  They've been lovingly and carefully wrapped and stored in old biscuit (cookie) tins and shoe boxes and have always moved with me.

I remember building sand castles, sand cottages and motor boats on the beach with my parents, then decorating them with shells.  The shells I brought home were used to decorate boxes or turned into flowers, animals and anything and everything I could imagine.  I've written a lot of craft books in my time and one of my favourties is still "Seaside Treasures".  It was first published in 1995 and still available a couple of years ago.  It was updated in 2010 (I think), but the projects are still the same.  I have to admit though, that some of them definitely need updating.....


Crafting with shells is one of those timeless crafts many of us enjoy and since the "beach" theme always seems to be trendy in some form or another, shell crafts never go out of style.  Take a look at the photos I took in one of the showrooms at Dallas Gift Market just last week.


And, talking of photos, shells have been the focus (no pun intended) of a lot of mine.  In 2005 I created a line of transparencies,  "Quips, Quotes and Anecdotes" featuring photos, sayings and one liners to use on cards, scrapbook pages, etc.  Because they're on transparencies, they could also be used on glass for cool 3-D photo effects....... but, that's another post.  Here's an example. 


I found these shells in 1985 while on holiday in the Cayman Islands.  My son (7 yrs old at the time) dived down to get them for me from the ocean floor just off the beach - yes, I still have them......  and here's a banner I compiled from a bunch of different shells I photographed, then printed out to make a border for a beach, scrapbook page............


Hopefully I'll find the Sailor's Valentine I made and I'll post about it later this year.  I just love them, and the history is absolutely fascinating. 

Wish I could say I was off to the beach this summer, but.....  maybe next year....  Enjoy!  Y'all come back now........

Yours truly,
Julie :)

Wednesday, June 27, 2012

Scrapbook Soup Show 112 Now Online!

Show 112 is now airing online at www.scrapbooksouptv.com thru noon EST, Friday, June 29th.


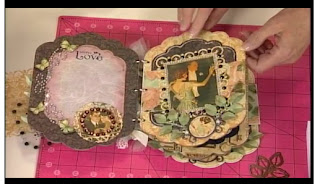
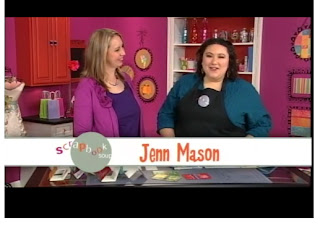
Jenn Mason joins Julie for the first segment and shows us how construct and decorate a small, accordion fold album using watercolor paper.  There's a good reason for this, as you'll see when you watch the show. 


Jenn is the editor of Cloth, Paper, Scissors magazine.  It's a great magazine, so don't forget to check out their website, which is full of FREE information. 

Kathy Kromer, from the Michaels design team joins me on the next segment.


I love Kathy's project.  It features a technique Julie used on the previous show, except Kathy uses paint instead of oil pastels.   She also shows us how to make a photo transfer with packing tape.  I wonder if anyone else remembers a product called "Decalit".  It looked very similar to ModPodge.  You would brush about 6 layers of this medium onto printed paper; wrapping paper for example.  Each coat had to dry so it was a little time consuming.  When you finished applying the Decalit the piece of paper was then soaked in water to soften.  The layers of Decalit dried clear like tape, so once the paper had softened you'd rub the paper away leaving the print on the "plastic".  At that time, plaster molds were trendy, so we'd create the molds then place the "decal" on the mold.  A little bit of crafty history there.  You'll have to check out the segment to see which of Julie's techniques I was referring to........  This is another sample she brought to show us. 


The next two are "Julie Julie" segments.  We always enjoy these.  Manufacturers send us their projects and we get to share them with you! 


On the first segment we were showing how to personalize items we use every day:  Coffee mugs, smart phone covers, pens, key rings and more!  I think I even suggested we make name tags for ourselves....  lol

For the next segment, I showed how to use the i-Top, bradmaker from Imaginisce.  We love this tool.  You can custom make brads for paper craft projects, quilting and all kinds of fabric based projects.  One of the things I like to do with it is to make brads with baby photos.  Use a circle punch to punch a photo a little smaller than the diameter of the brad you're using.  Then use the specialty i-Top punch to punch the flowery looking shape from acetate.  Attach the photo to the top of the brad with a glue dot then seal it with the piece of acetate by following i-Top directions.


I had a fabulous "find" to share at the end of the show.  No, it's not a purse, it's a  - well, you'll just have to watch the show and see. 
 

You'll also find out what is so special about this pad of paper.


If you've watch the shows a lot over the years, you've probably heard me talk about "Quarter" cards.  I mentioned them again during the Imaginisce segment.  Thought I'd clarify.  If you cut an 8 1/2" x 11" piece of paper in half, lengthways you'll end up with 2, pieces of paper that are 5 1/2" x 8 1/2".  Score then fold in half to create 2 cards.  These are the perfect size for all kinds of cards!  I'm using a Westcott trimmer here.  It's wonderful for card making because both a cutting and scoring blade are always on the trimmer....


You can find instructions for most of the projects on our website and don't forget to check projects from past Scrapbook Memories shows.   Manufacturers are responsible for sending us the instructions, so if you don't find the instructions you're looking for, shoot them an e-mail and ask them to send them to you.  They'll like the fact that you liked their project and it lets them know you're watching the show!


Don't forget to "like" us on Facebook.  We have a group page and a page "page".   The group page is a great place to ask questions.   You'll get lots of answers from other group members.

One of the things scrapbookers are always looking for is ideas.  So, if you're looking for even more ideas, check out my website www.juliemcguffee.com/craft_lane_ designs  I was spring cleaning - again - last week and I filled some USPS "if it fits it ships" boxes with scrapbooking magazines from 2003, 2004 & 2005.  Colors and paper prints may have changed since then, but the ideas never go out of style.  You'll be surprised at how many of the ideas we refer to as "new" have been around a long, long time.  They've just been re-discovered and updated.  Enjoy!  Y'all come back now..........

Yours truly,
Julie :)